WEEK 4
Another week another load of screenshots to get through, this episode 102 SCREENSHOTS.
 The task for this week was to 3D print a flower pot and design a watering can. So the frist thing I did was the pot, and the first thing I did was create a sketch and make a circle 50 cm.
 Off of that I created a construction line off a little bit to the side and set it verticle so it was constraint
 Then I used the dimensions tool to set the hight to be 26mm.
 Then I made a circle with the dimensions of 6 mm.
 Then I used the trim tool to trim the outside of the new circle I made so I'm left with a half cirlce in the middle of the bigger circle.
 Then I used the circle pattern tool to create the pattern all the way around. In the picture it says 27 in the screenshot but I changed it to 28 times around the cirlce.
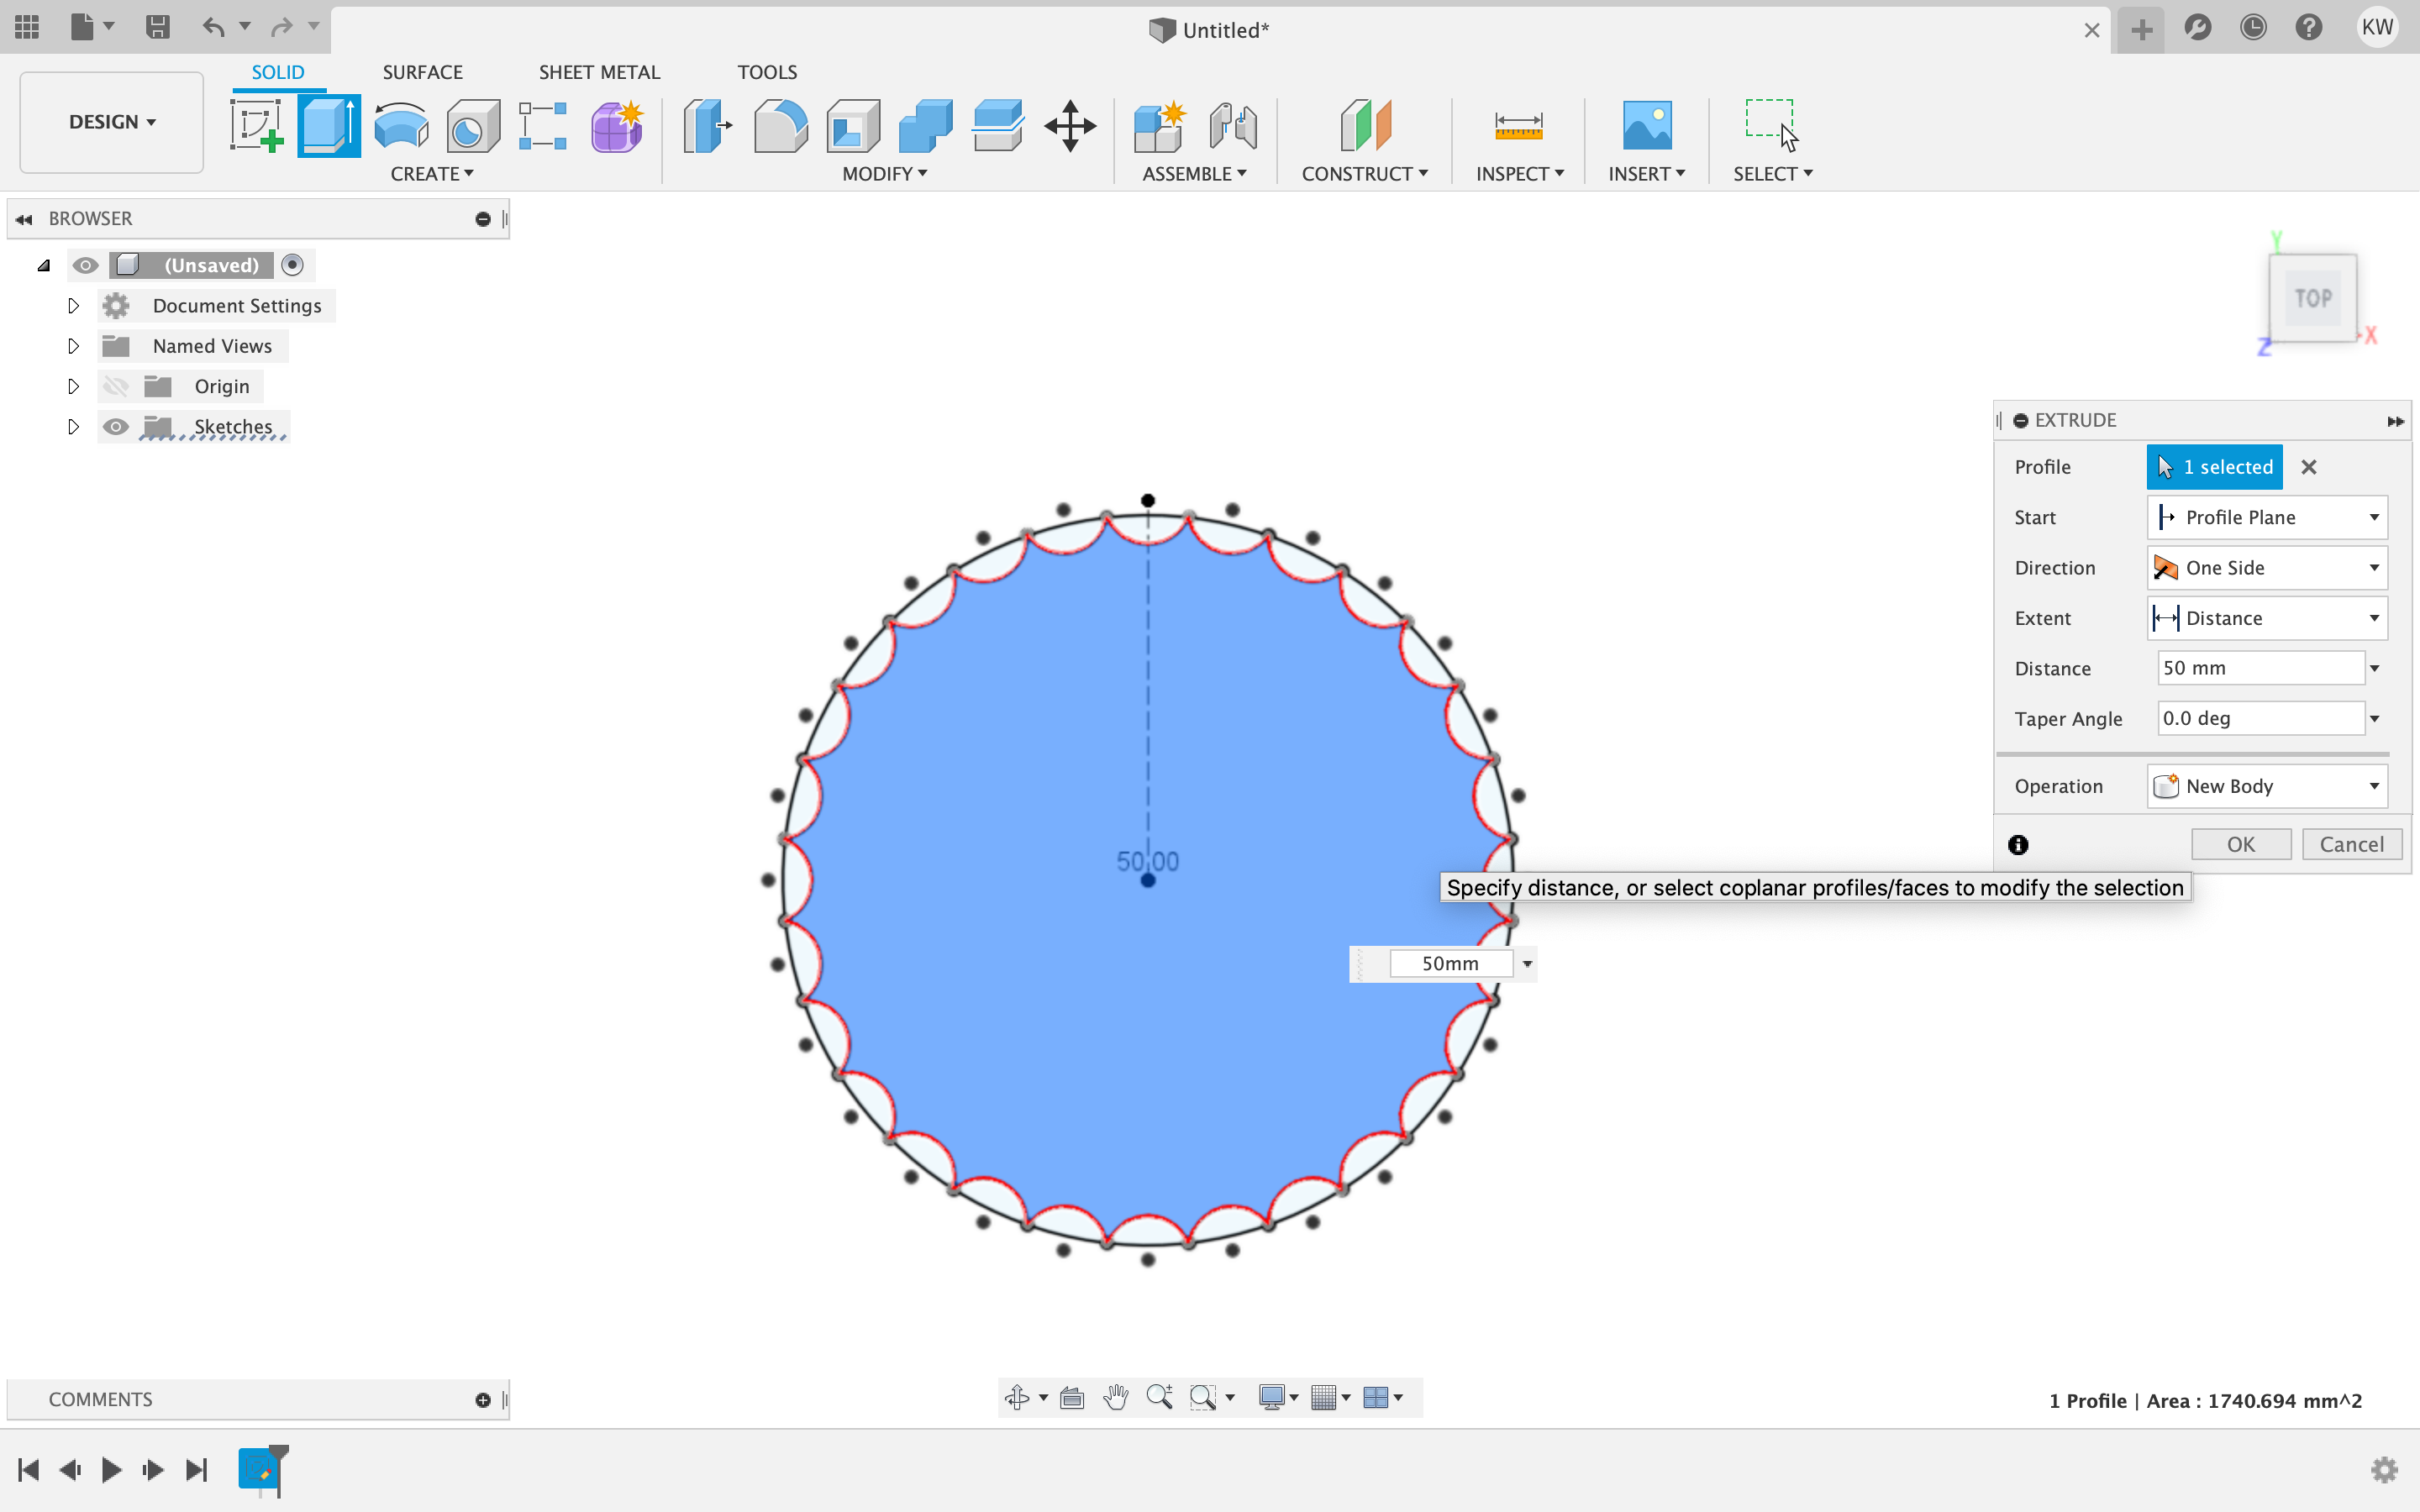
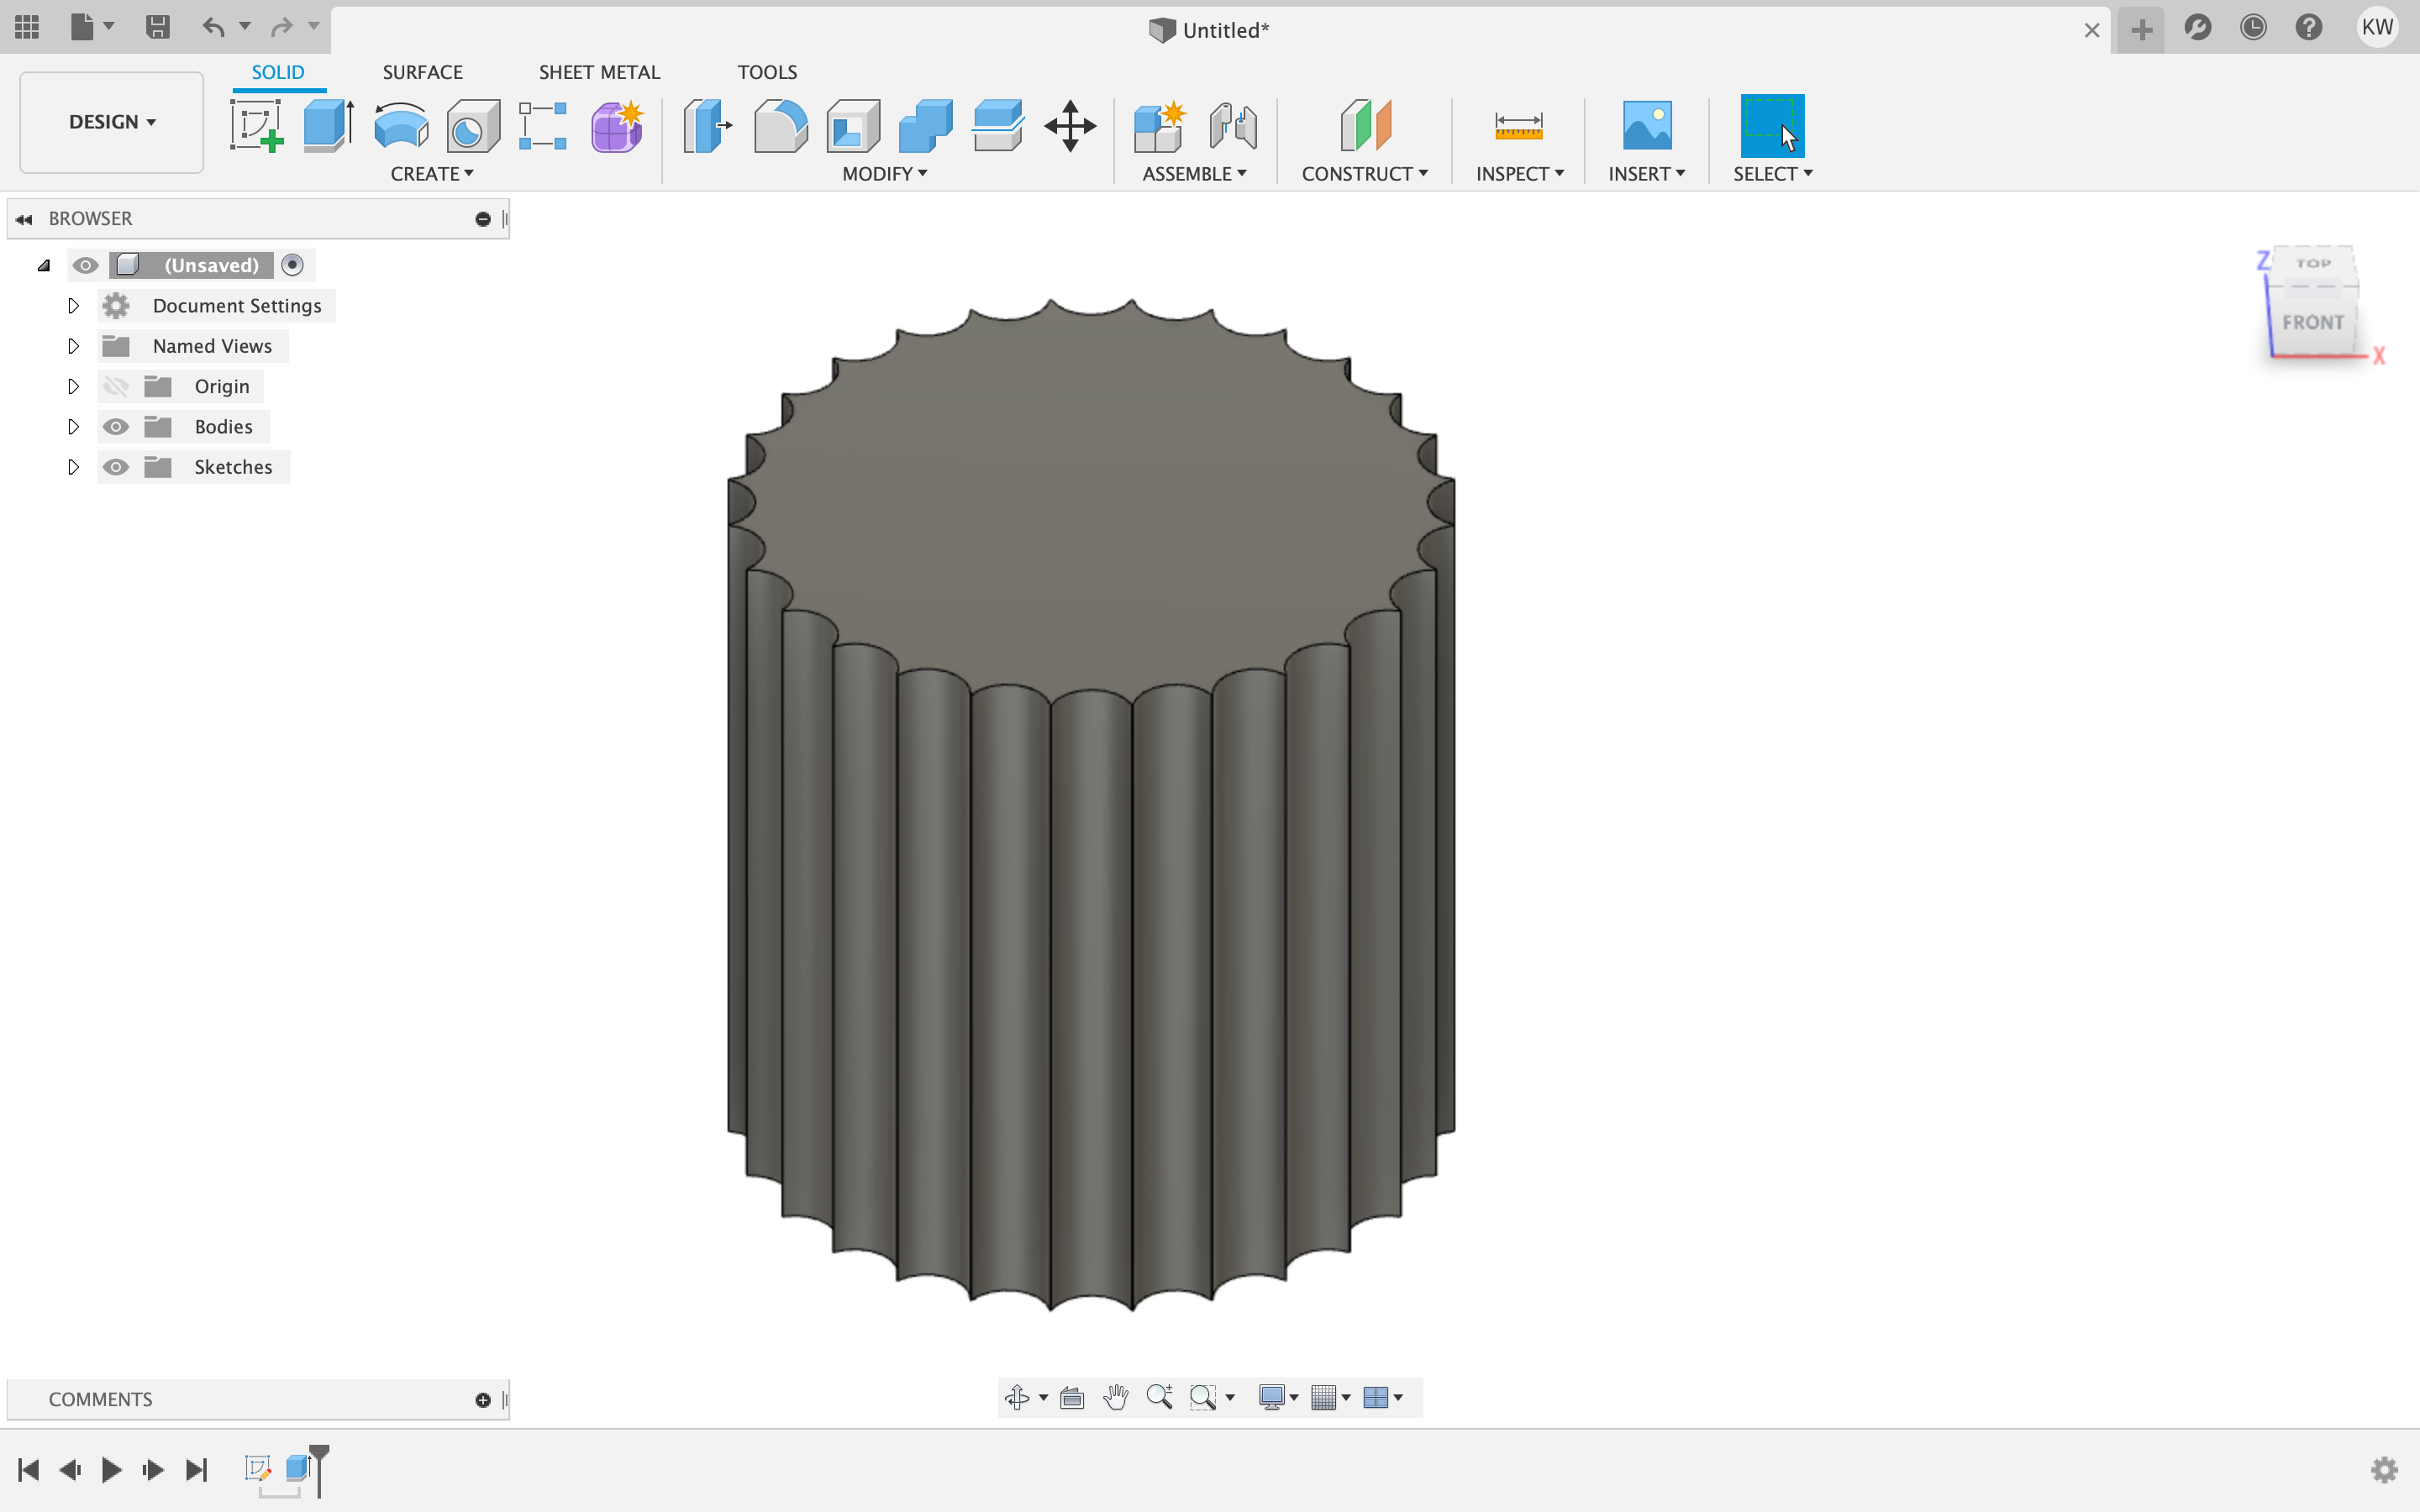
 I then extruted the pot 50mm up.
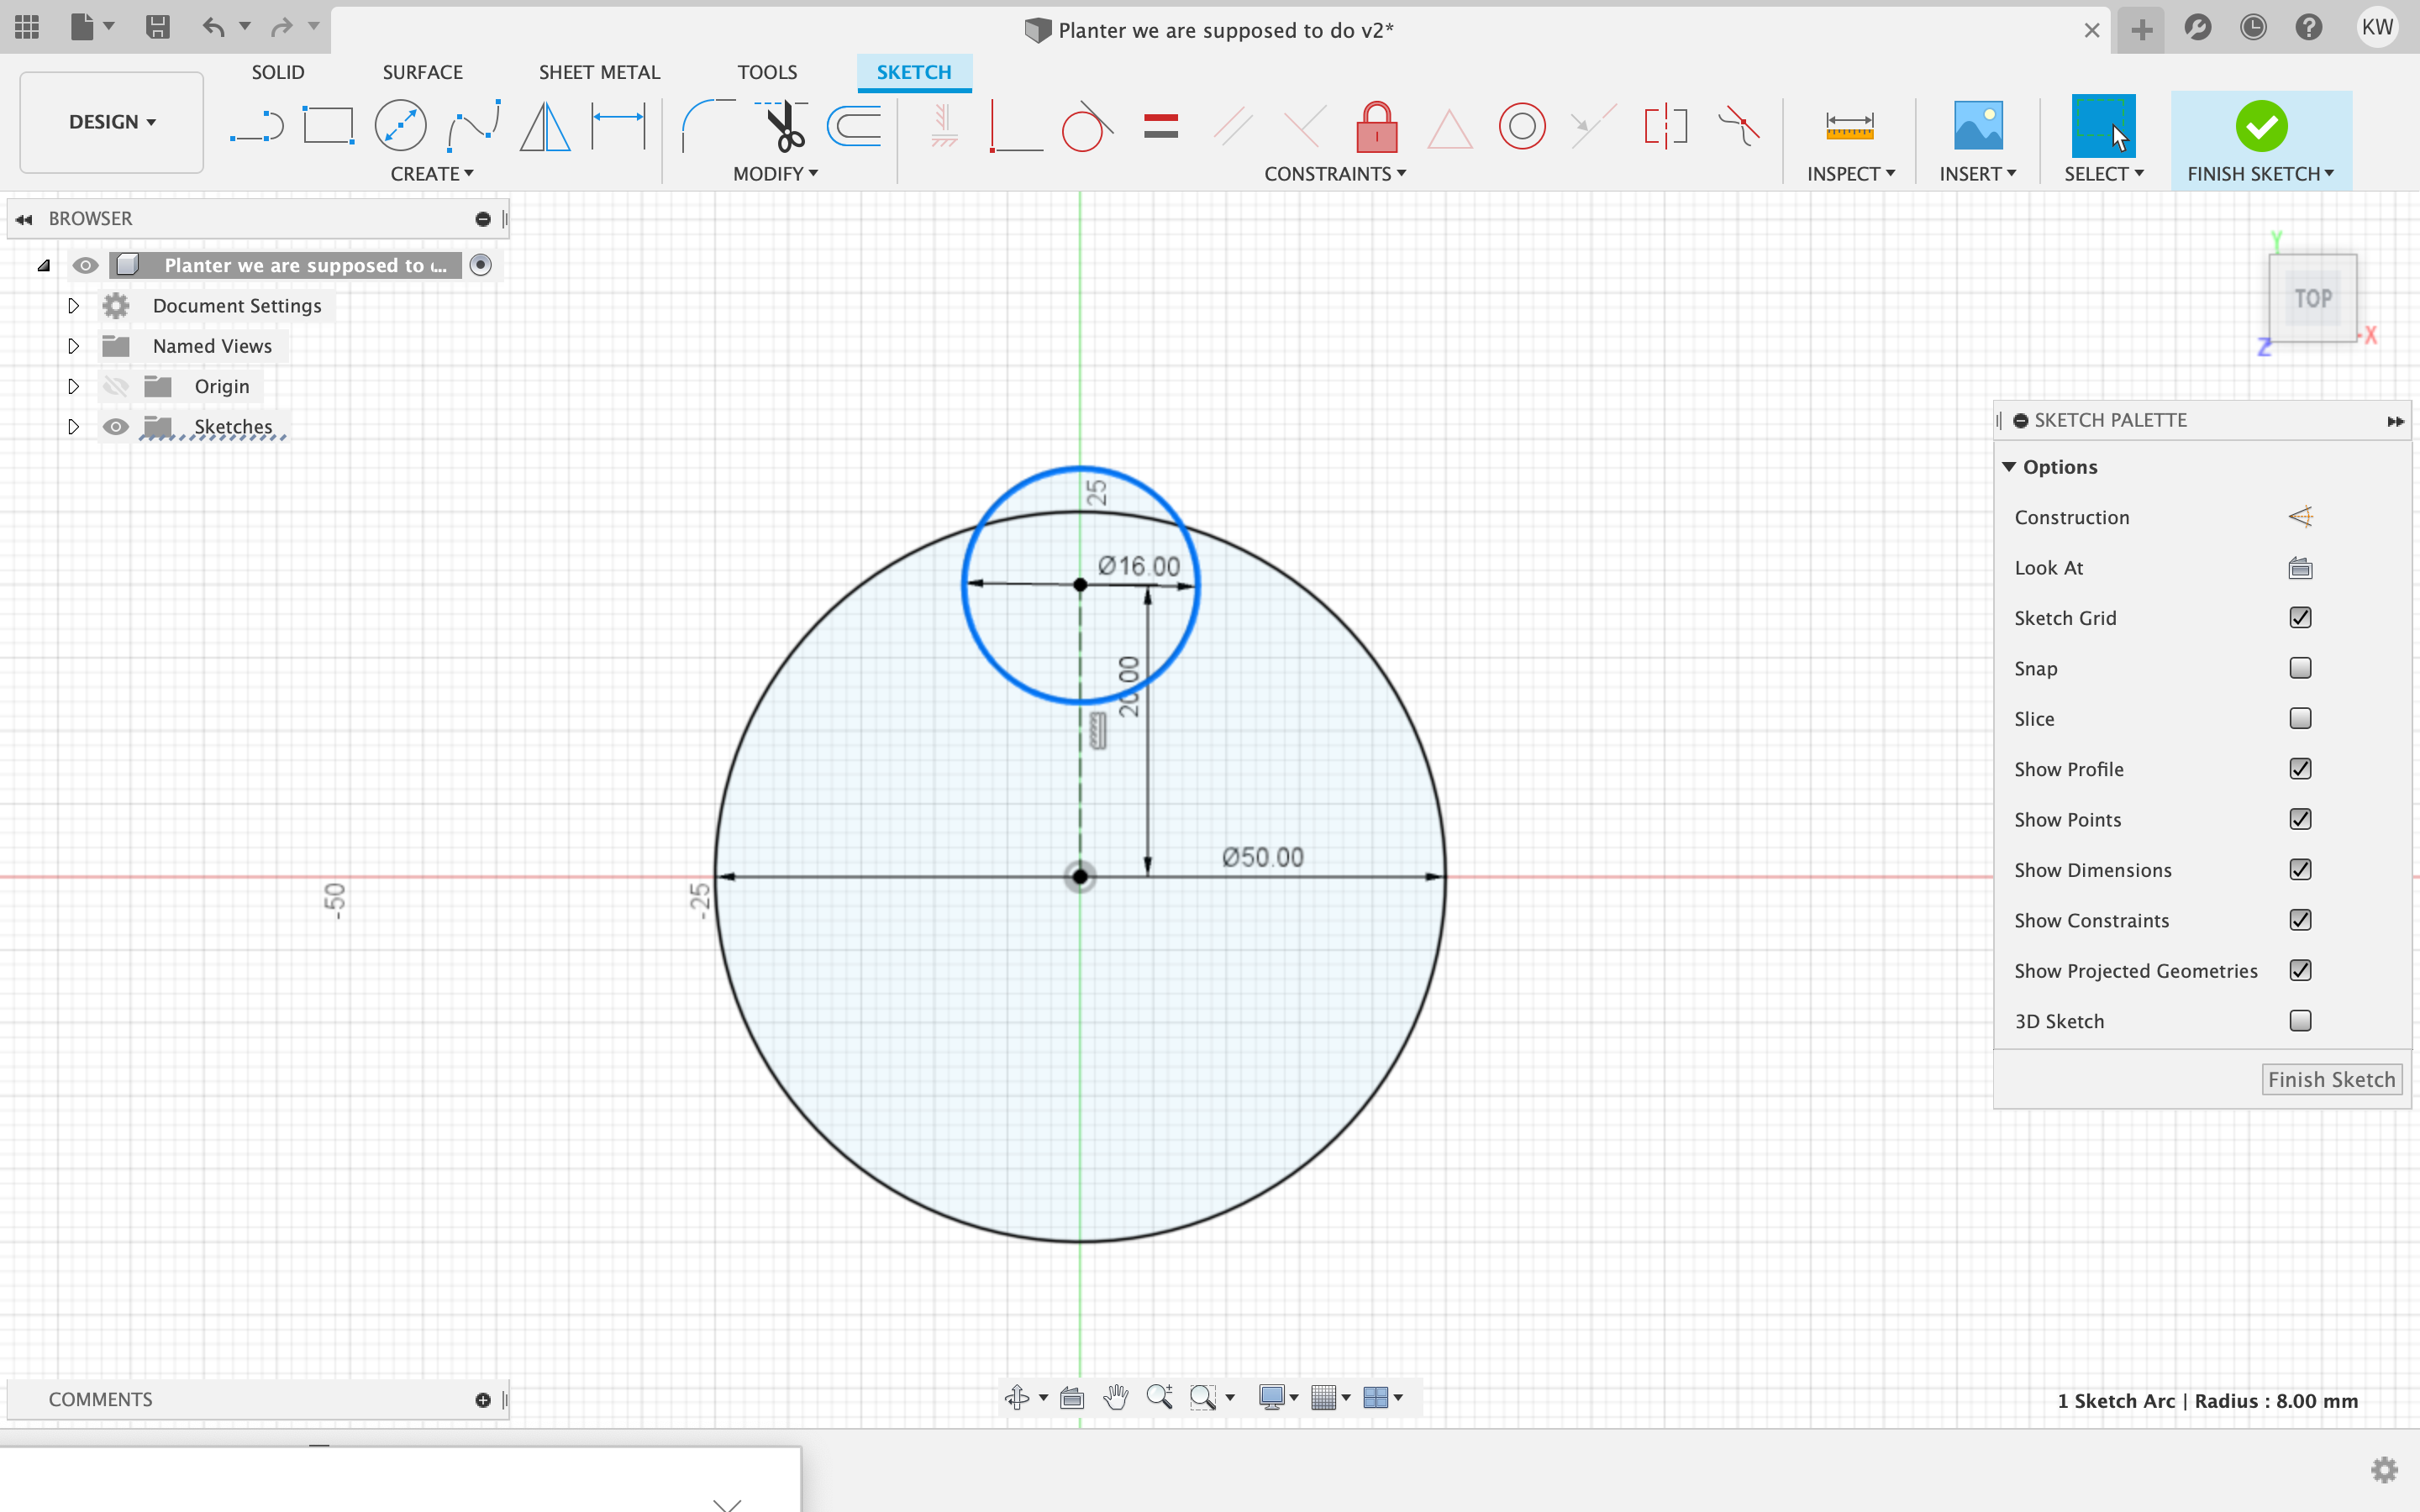
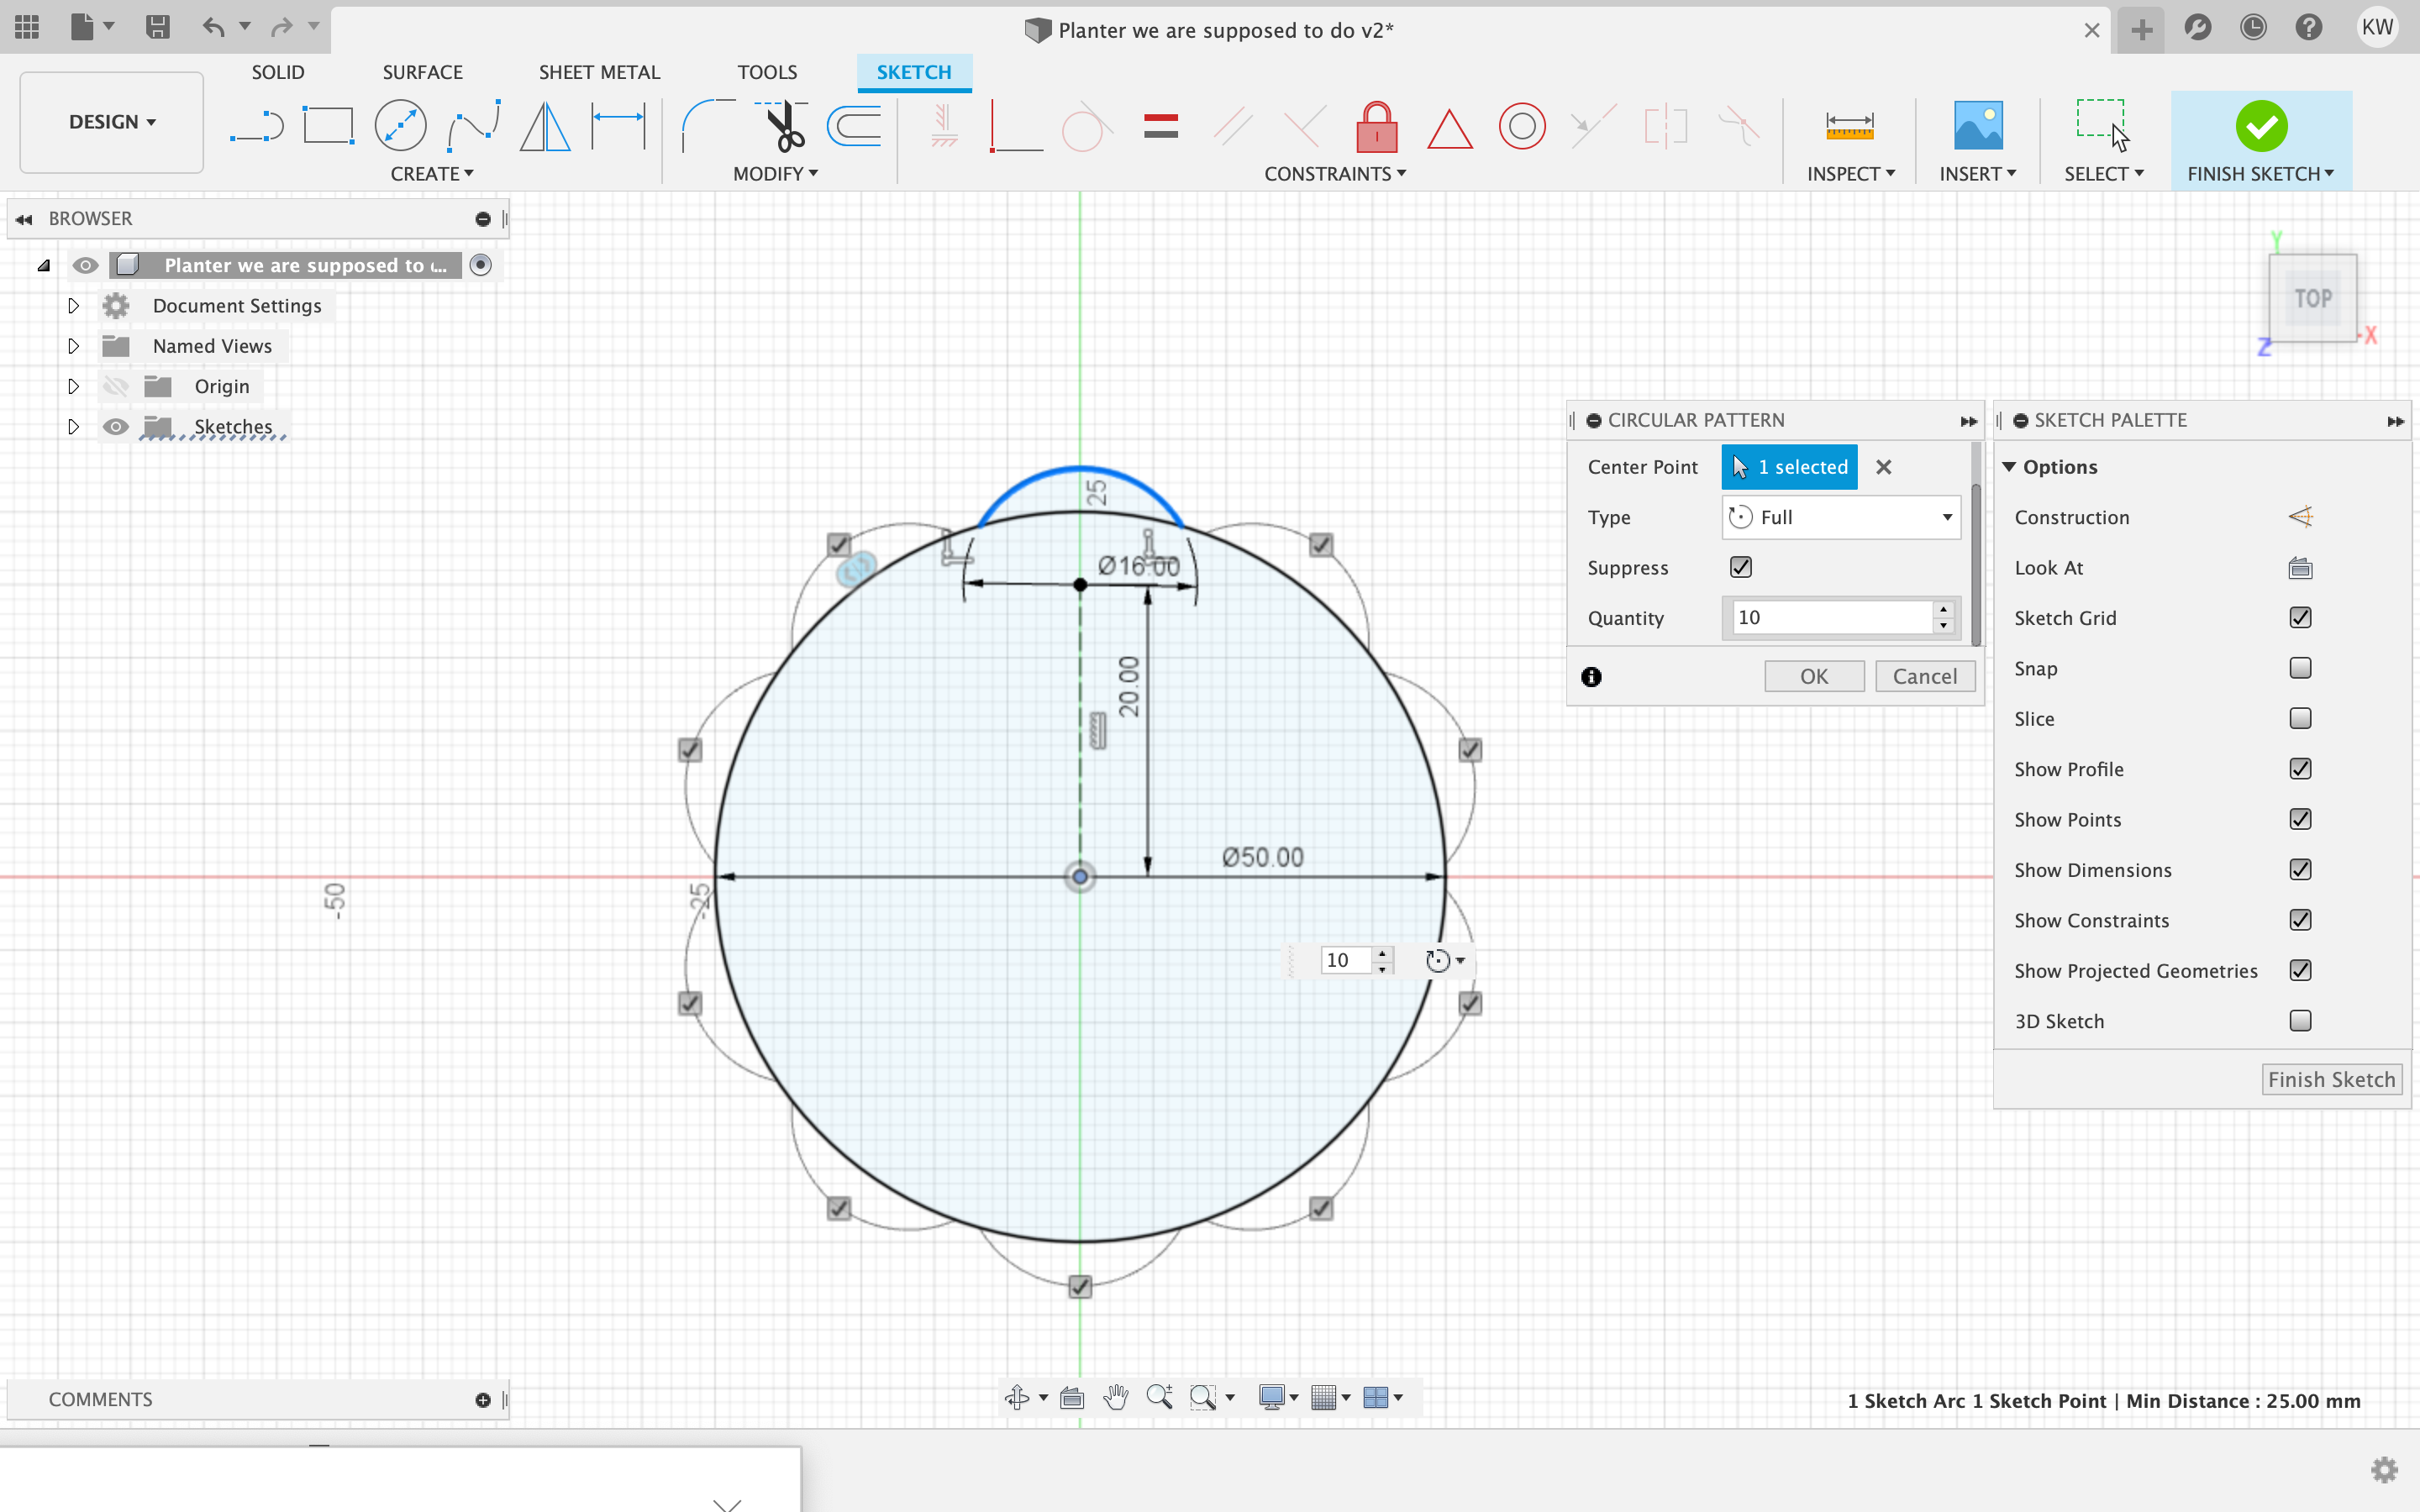
 So that was the one we were supposed to do, but I wanted to make a pumpkin for spooky season. So damnit I'm making a pumking. I did the exact same thing up until the cirlce. I made the circle 16mm long instead of 6mm.
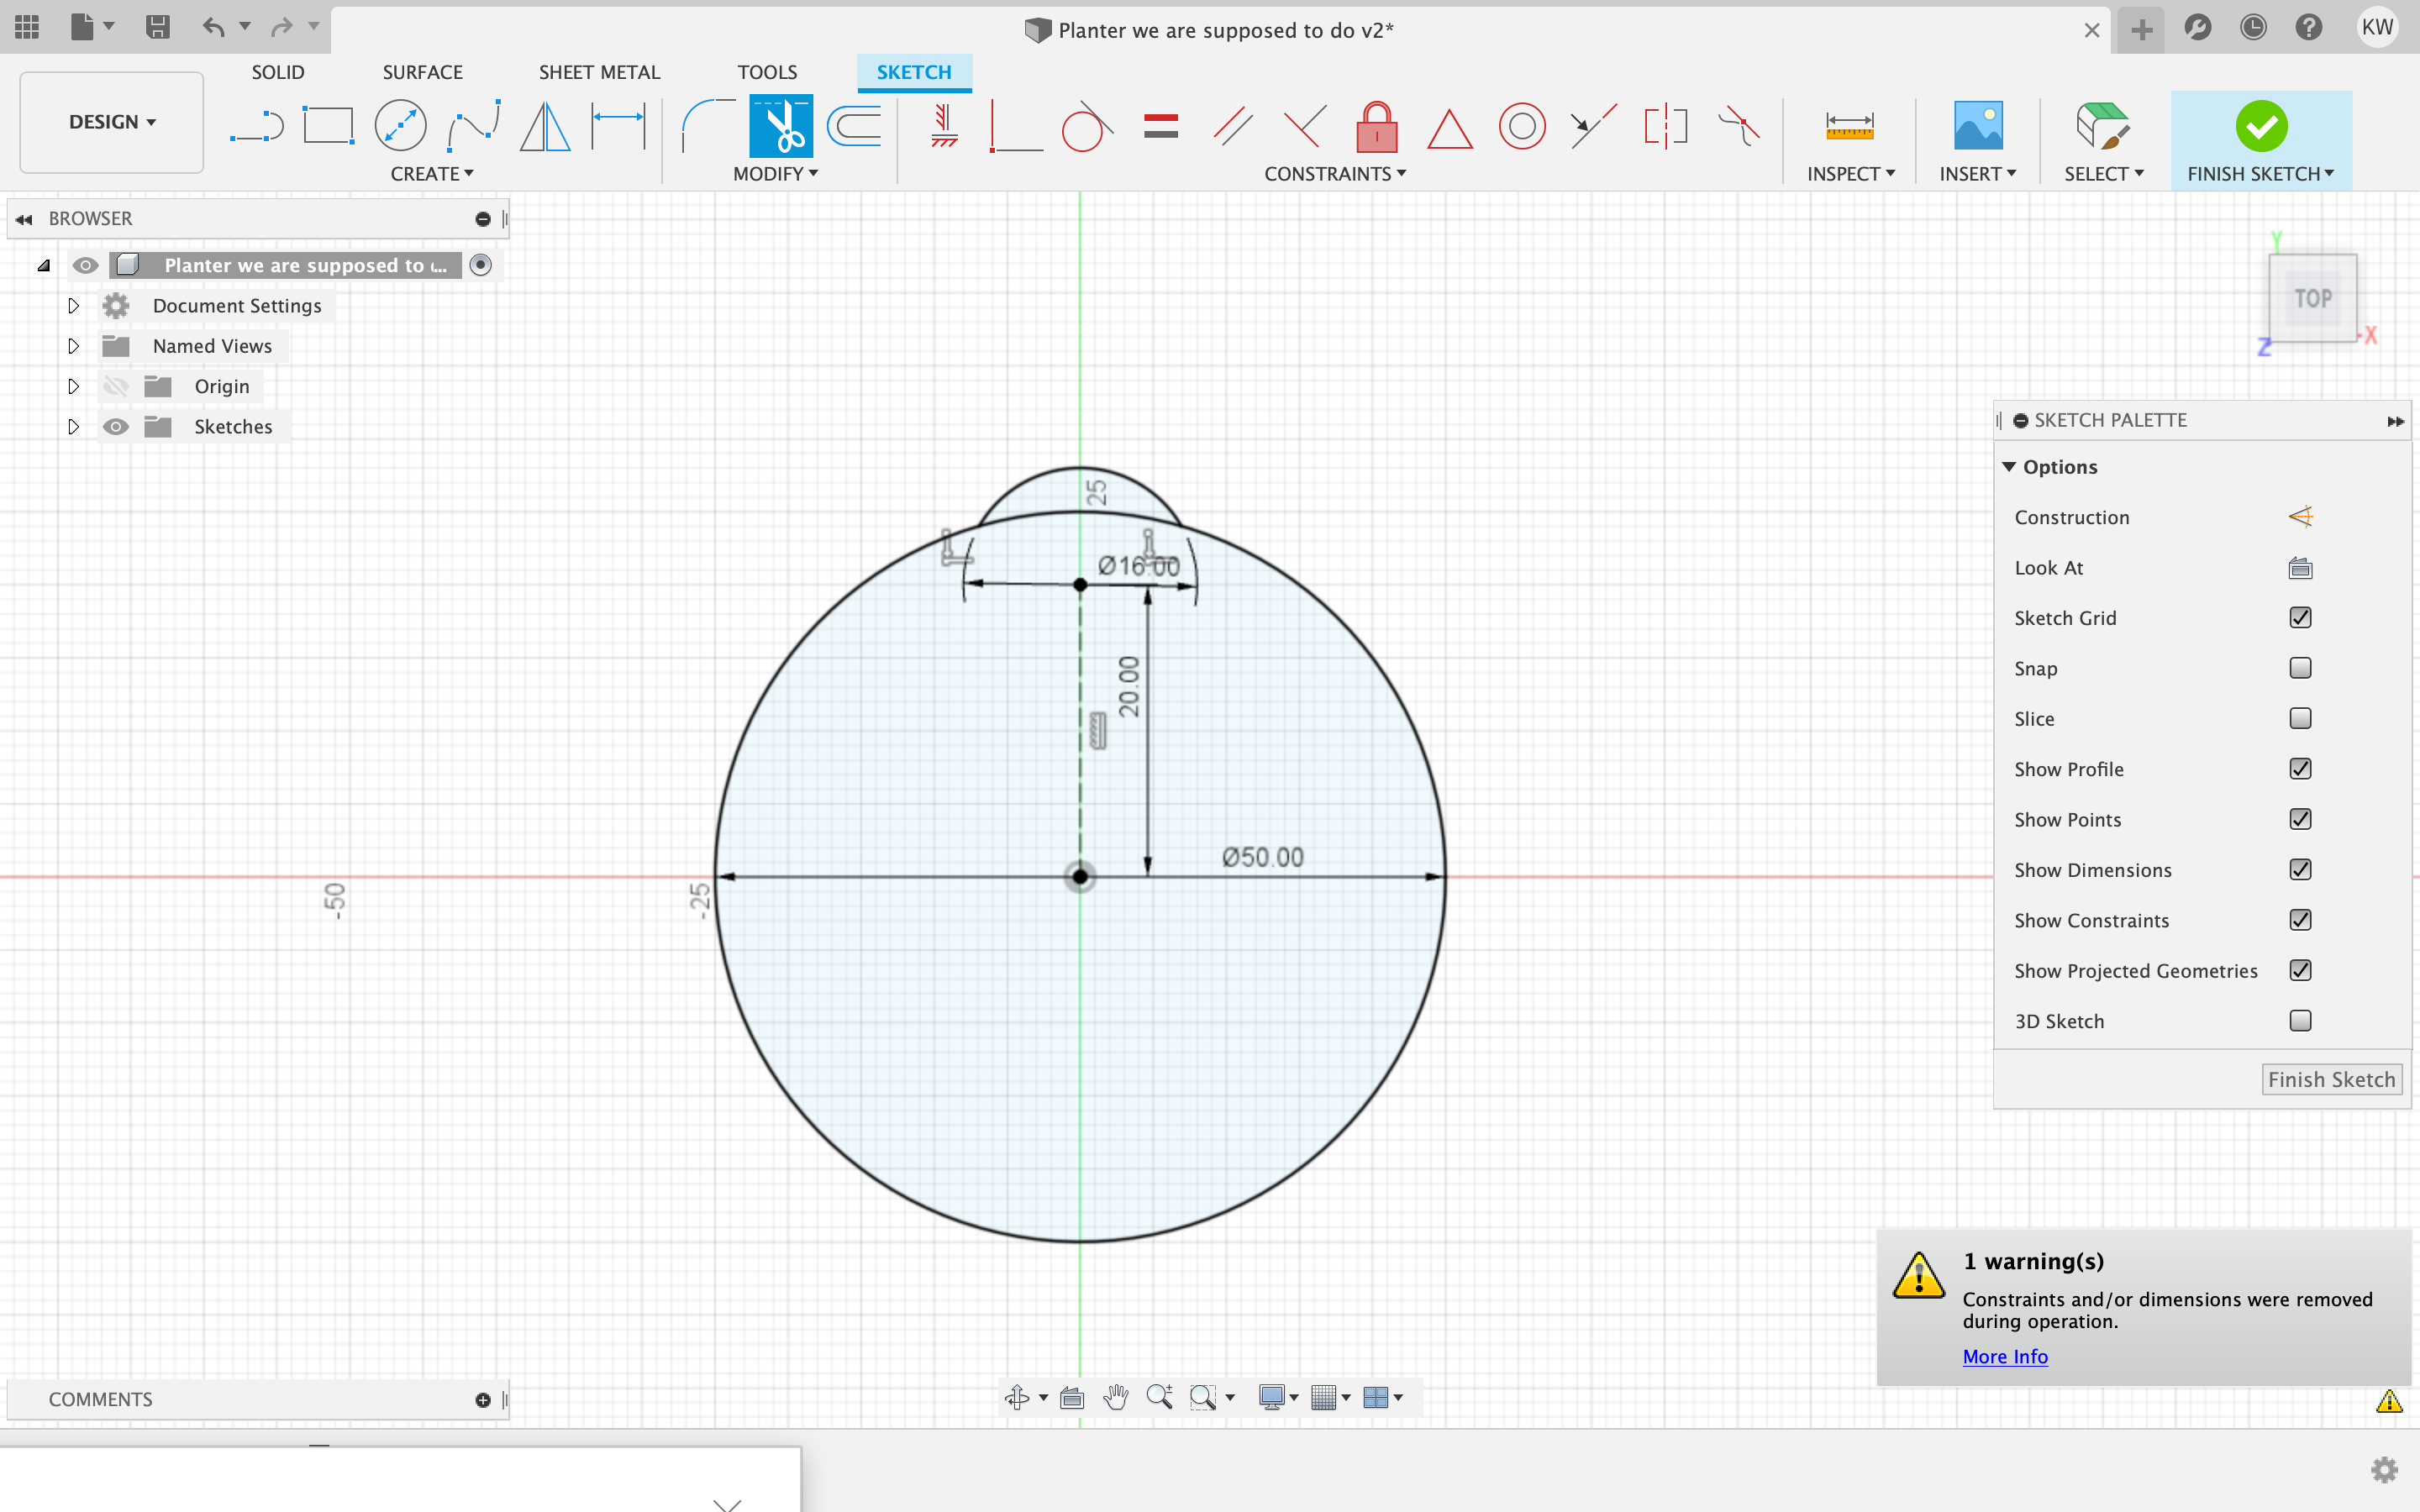
 Then I used the cut tool to cut the part of the circle on the inside rather than the outside.
 Then I used the cirlce pattern tool one more time and made it go around 10 times.
 Then I extruted it 25 mm. The rest of the pictures from the project are not allowing me to post them for some reason so I'll get those up tomorrow. The process was brining it in Prusaslicer, I changed the deminsions a bit to make it wider so it looked more like a pumkin, then I went into print settings -> verticle shells -> spiral base and clicked the box. Then I brought it to the printer and printed it out. It took 2 tries because the orange PLA wasn't working :(
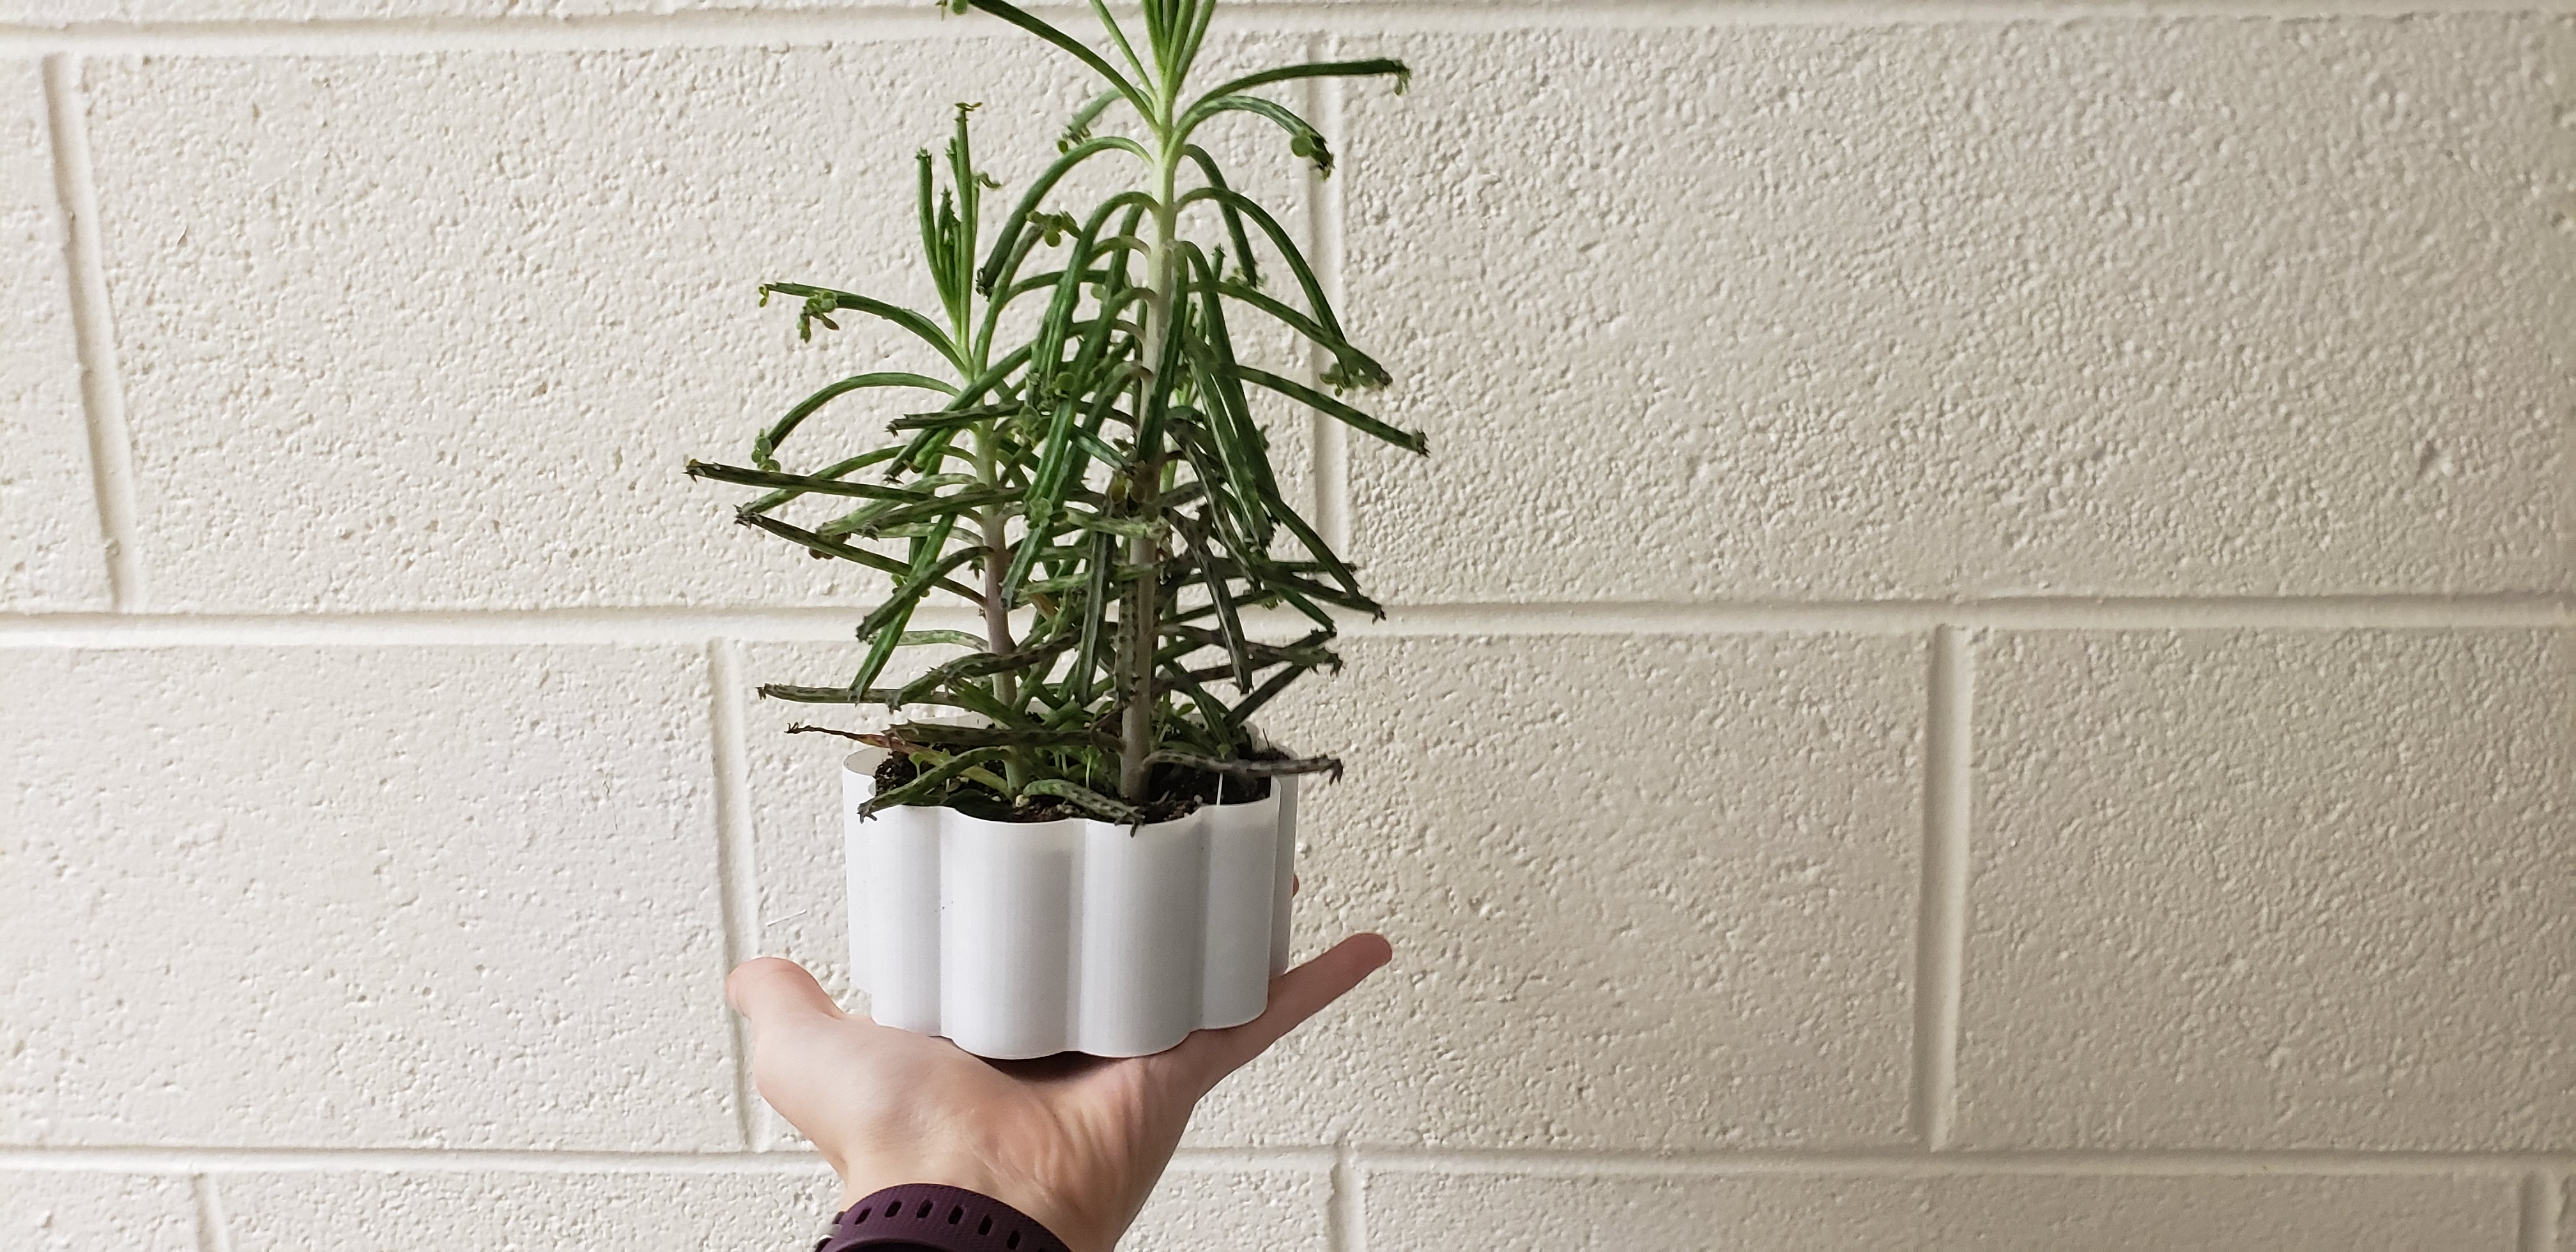
 Here is the final product with the plant inside, I named her Perfuma, everyone say hi.
 So the next part was to create the watering can. I started out by making an oval, 50 mm long and 25mm high.
 Then I extruted it 50 mm.
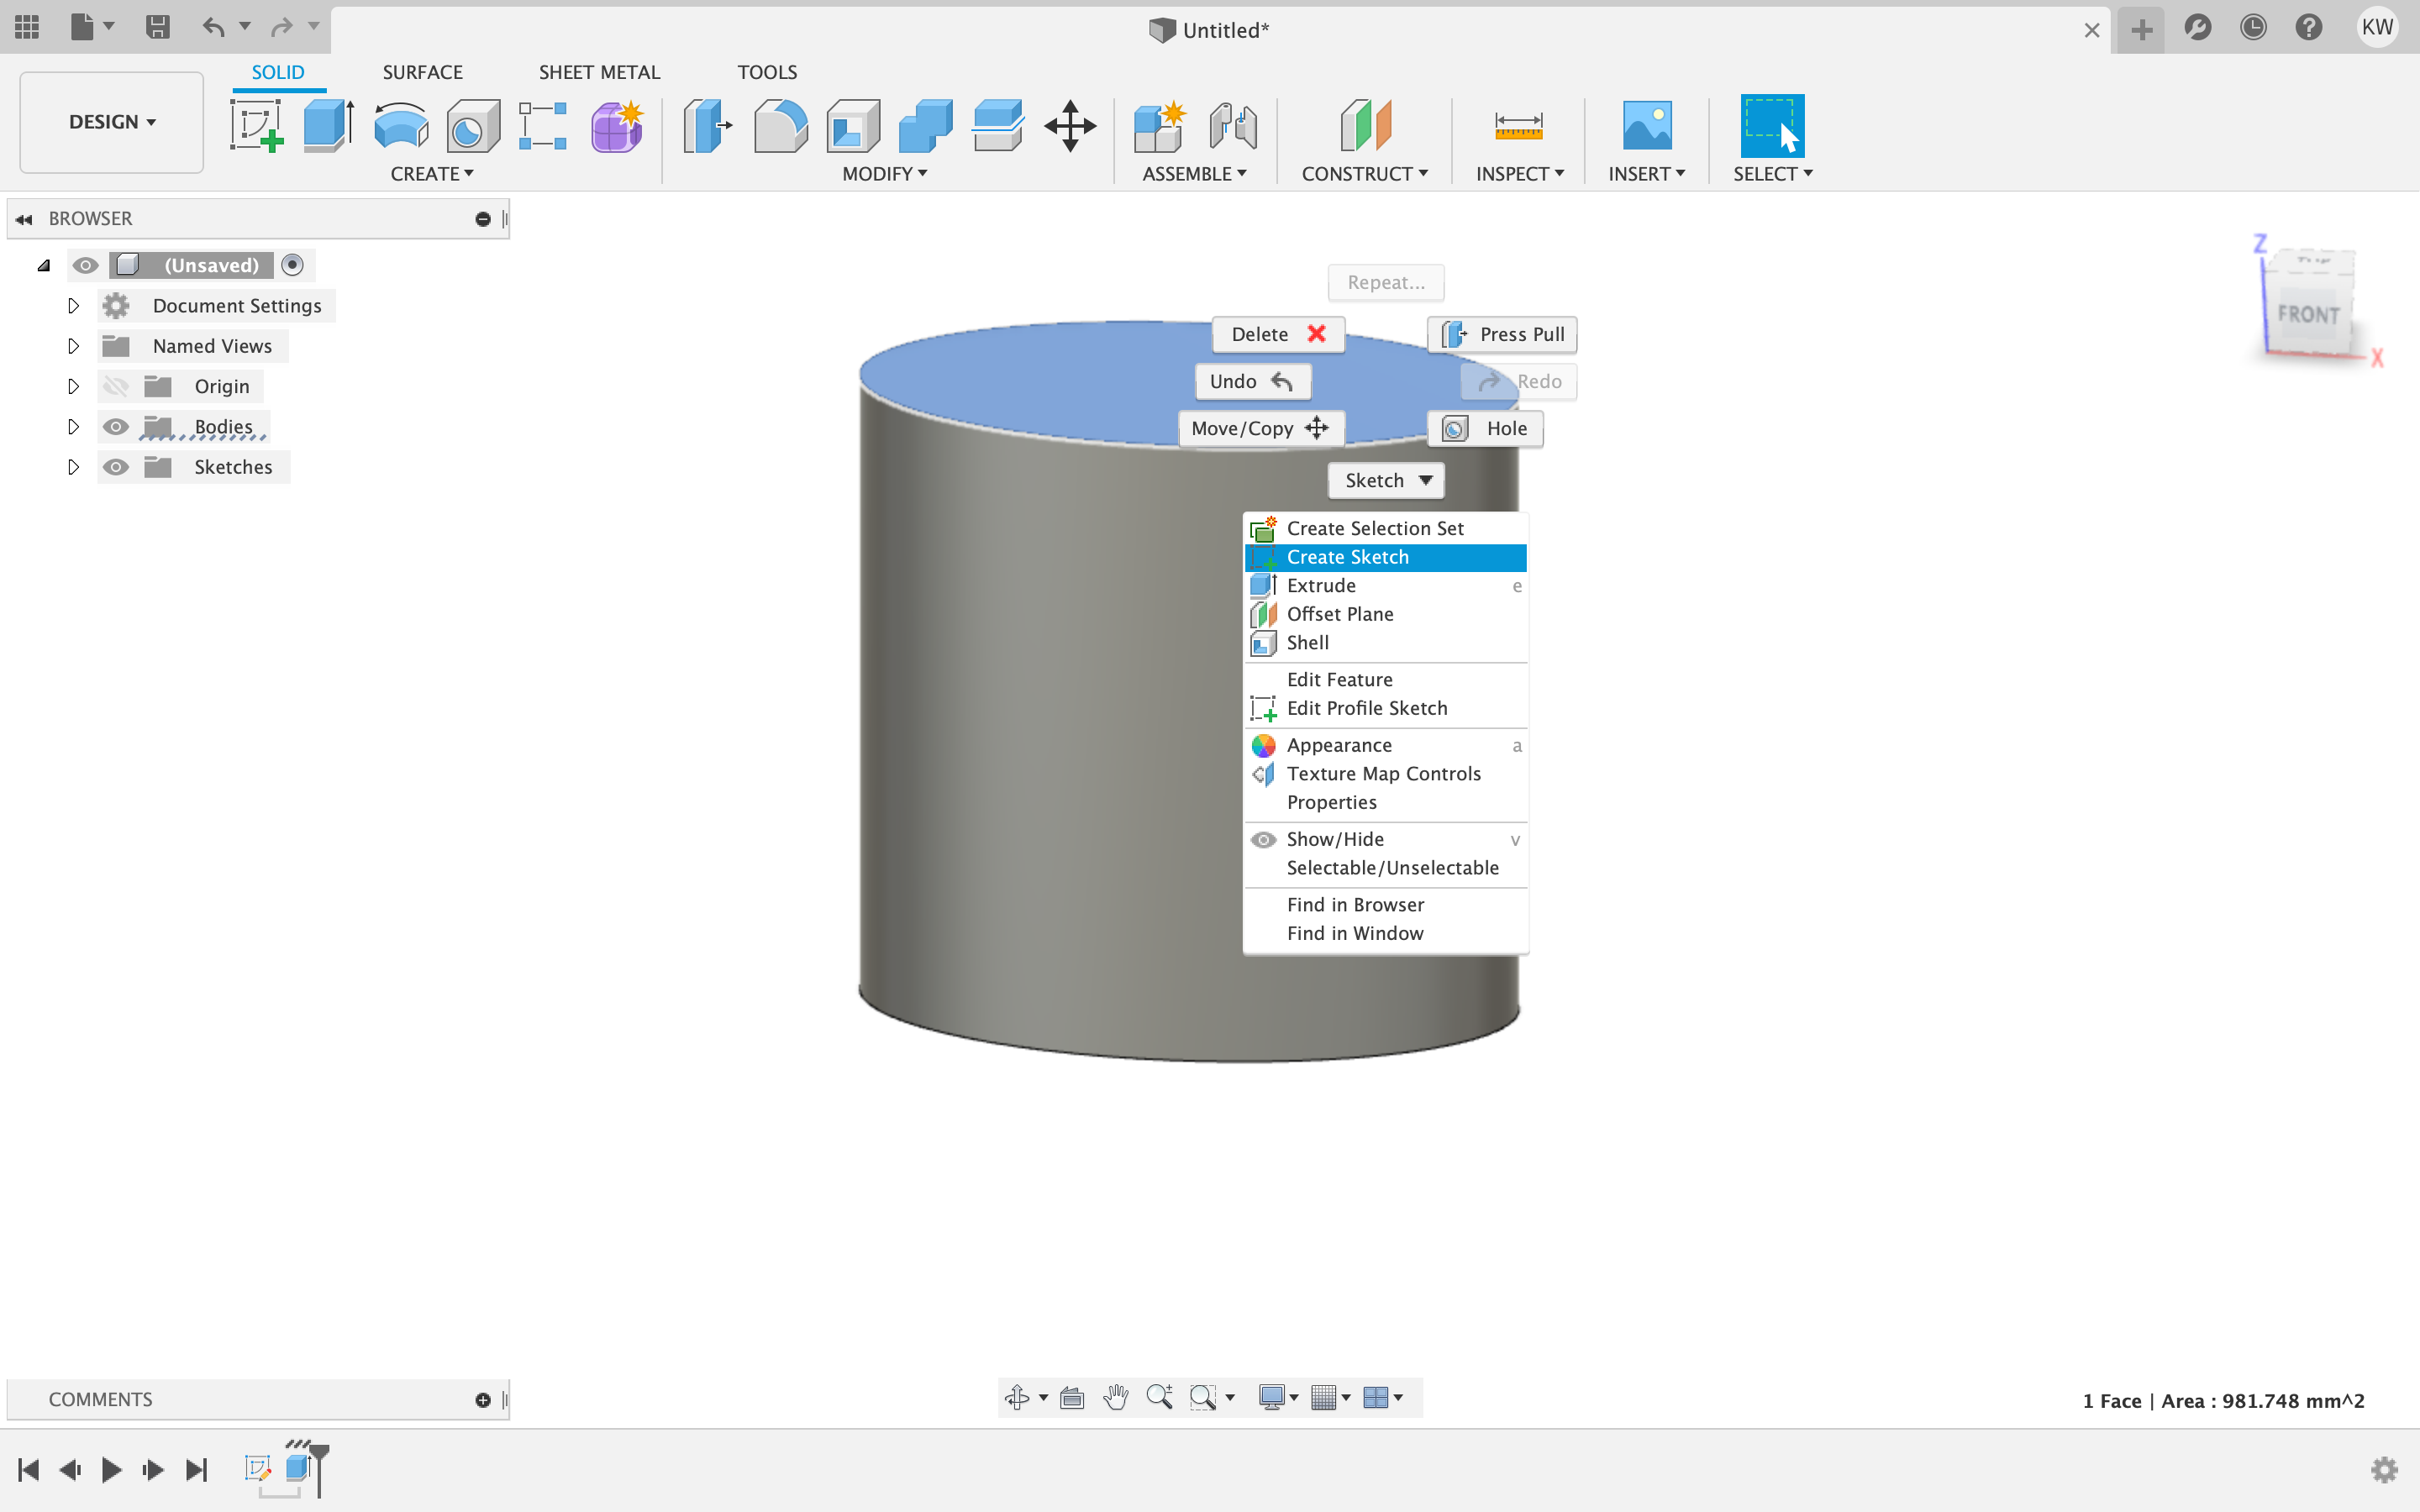
 The next thing I did was creat a sketch on the top of the oval and created a construction line and set it to be horizontal.
 Next I created a plane tangent to a face at point to make a plan coming right off of the oval front.

 I created a sketch and a construction line box around the plane and a line going down 20mm. Then I made a construction line going across and set that to be 18mm and projected the bottom of my oval so everything was connected.


 Then I did create a plane at a angle and set it to 60.
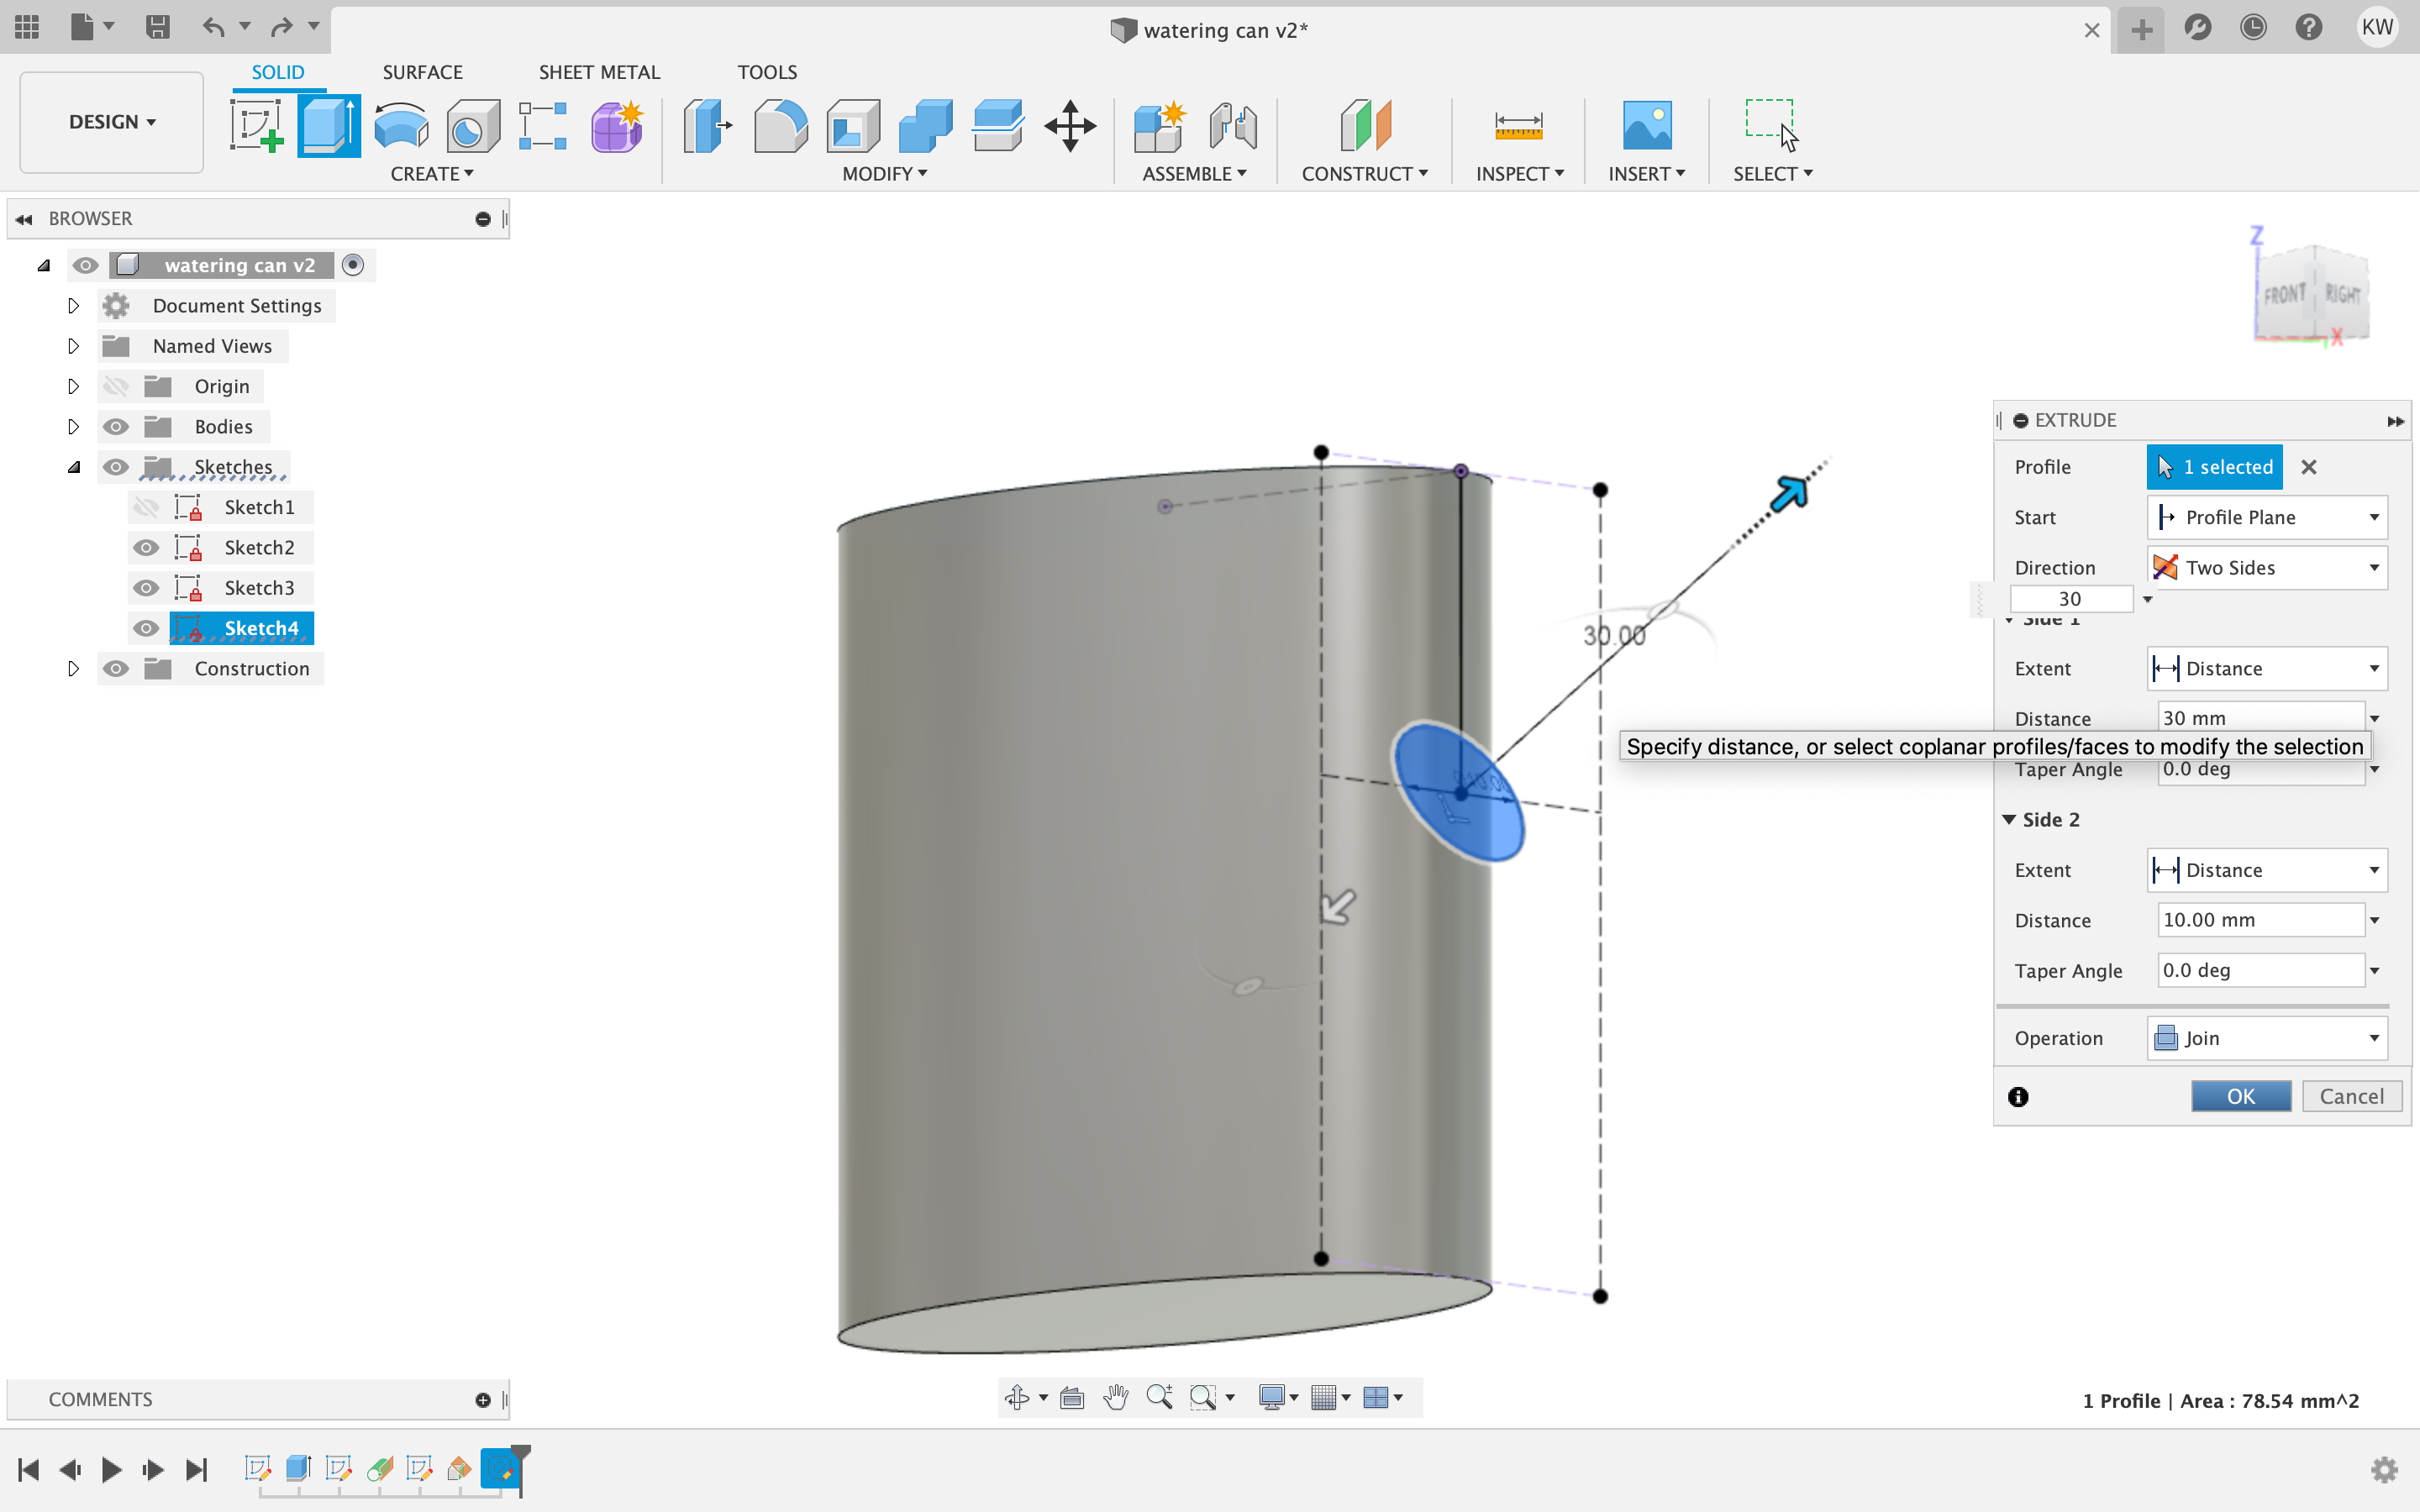
 Then I created a cirlce and extruded it 30 up and like 10 in.
 Then I created an offset plane and set it 7 mm up.

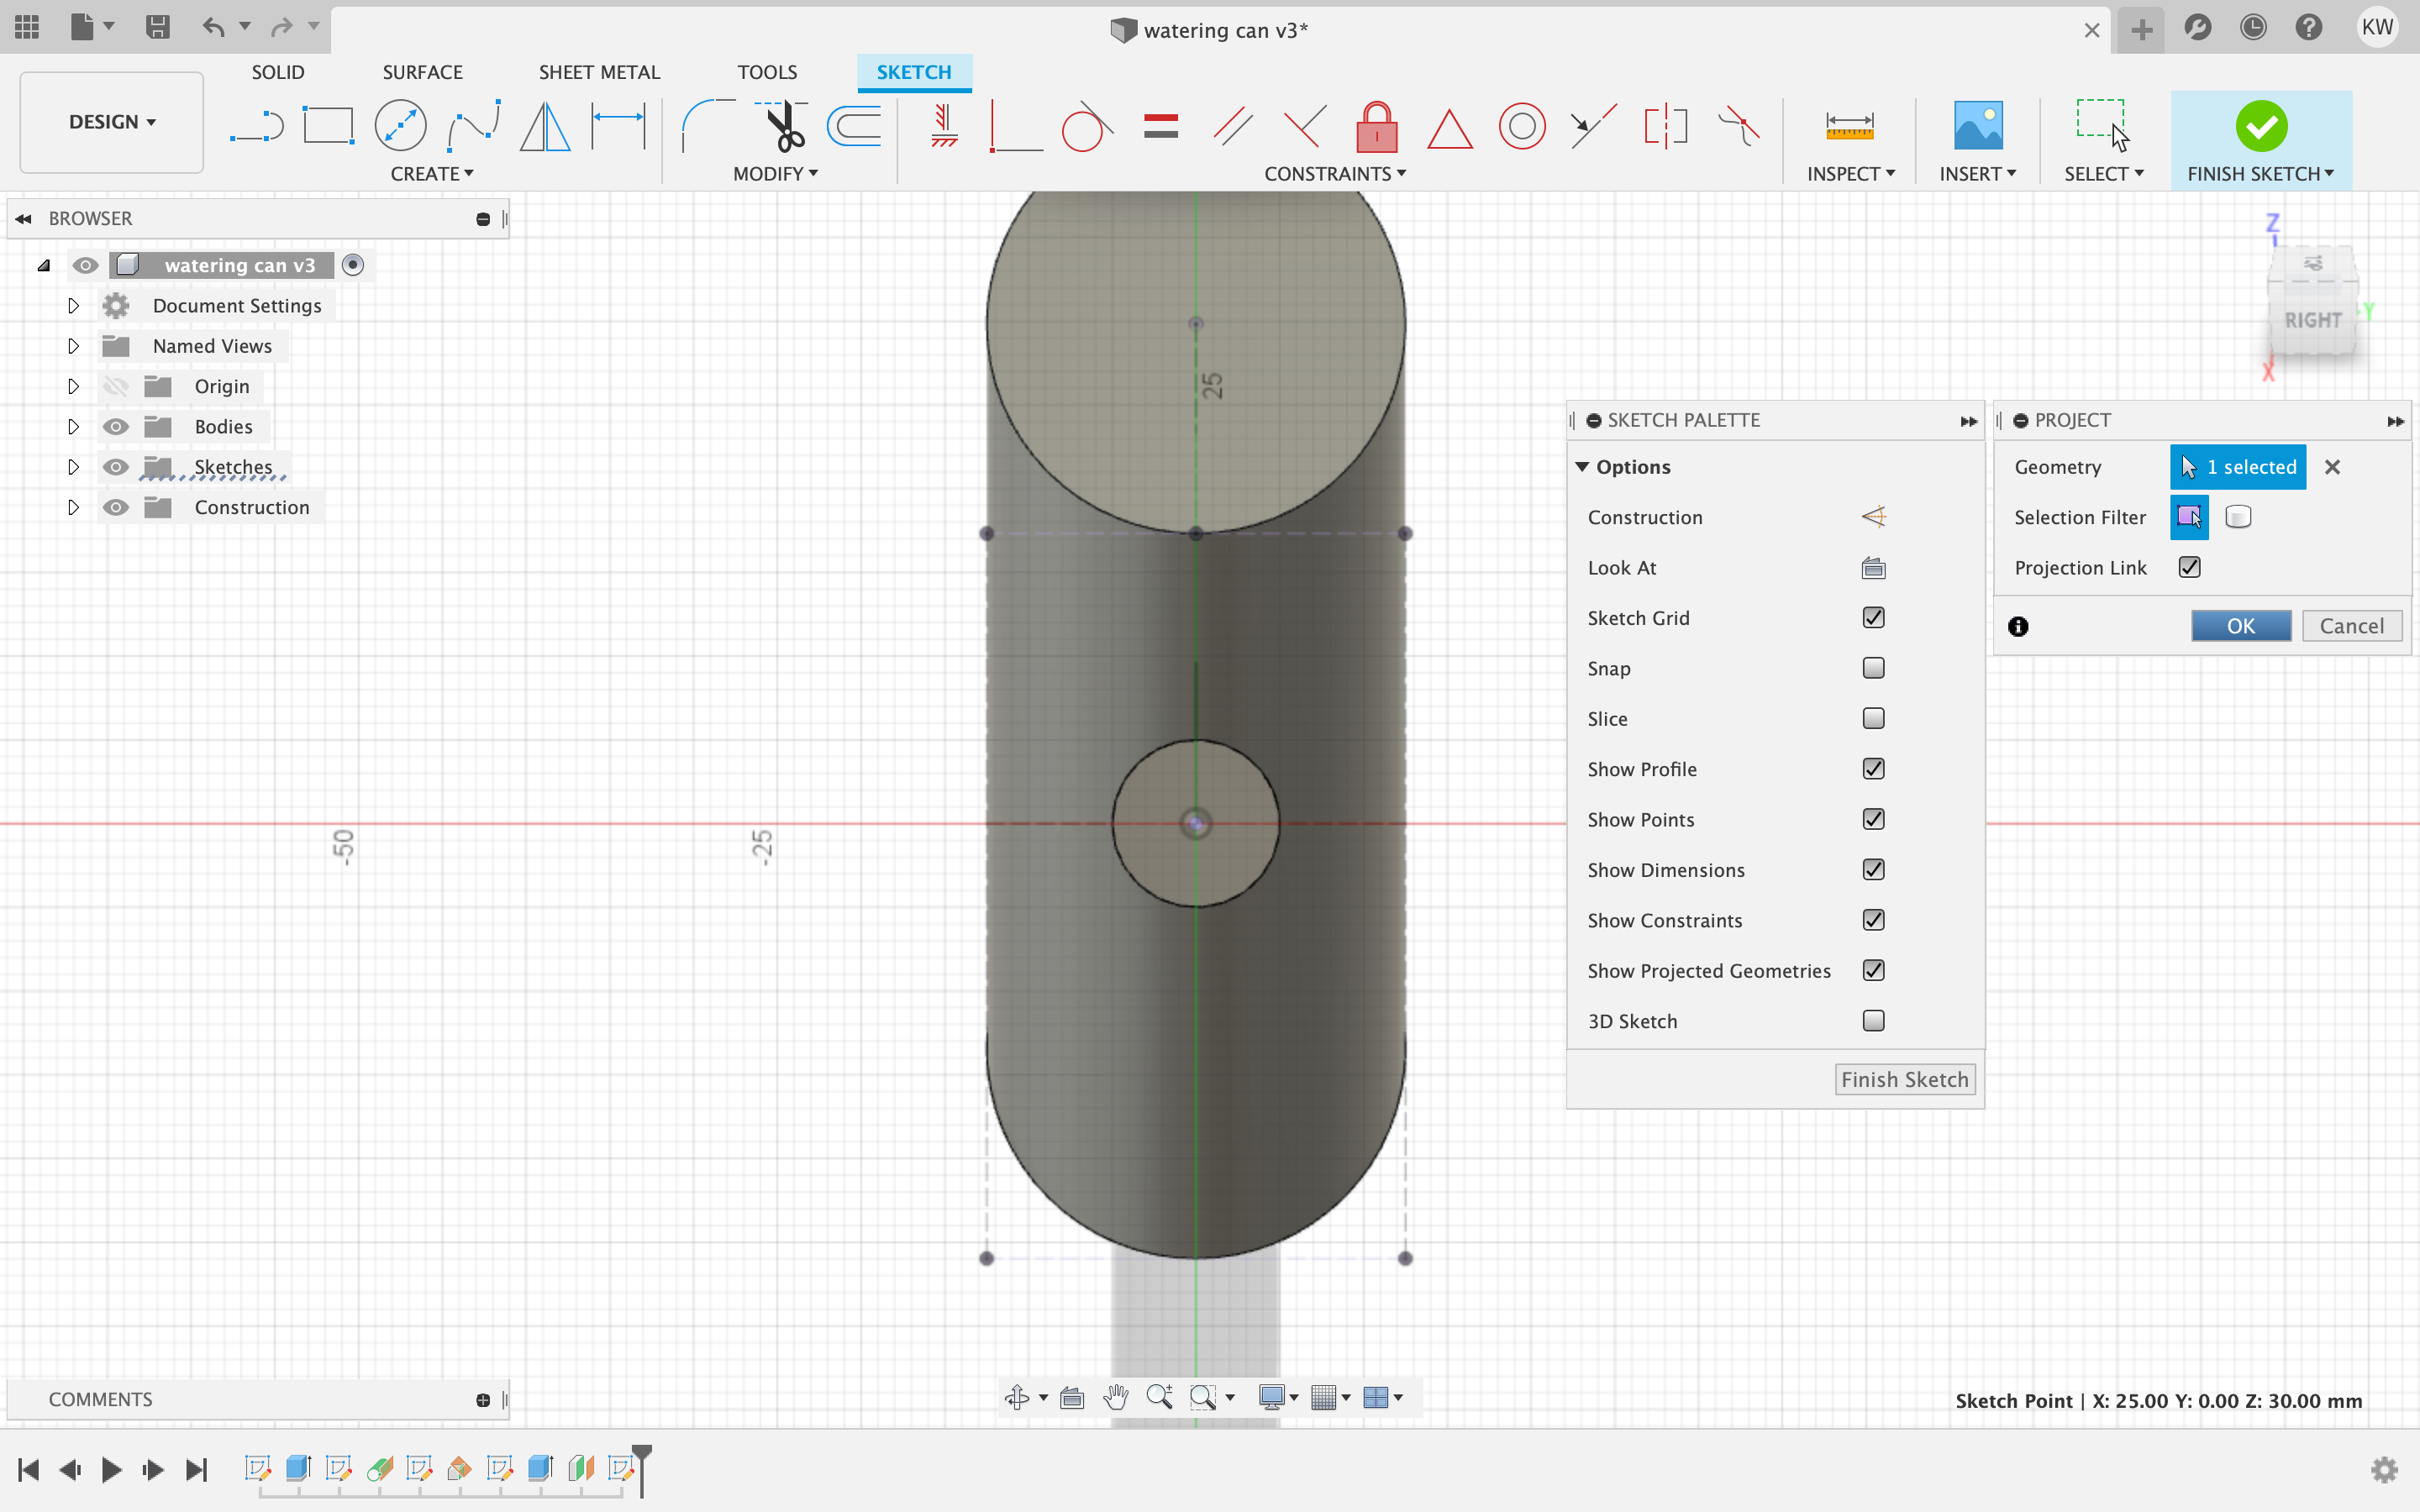
 Then I created a sketch on that plane, I projected the center of the last circle on my new sketch and made a new circle to be 15mm.
 Then I used the loft tool to connect the two cirlces together.

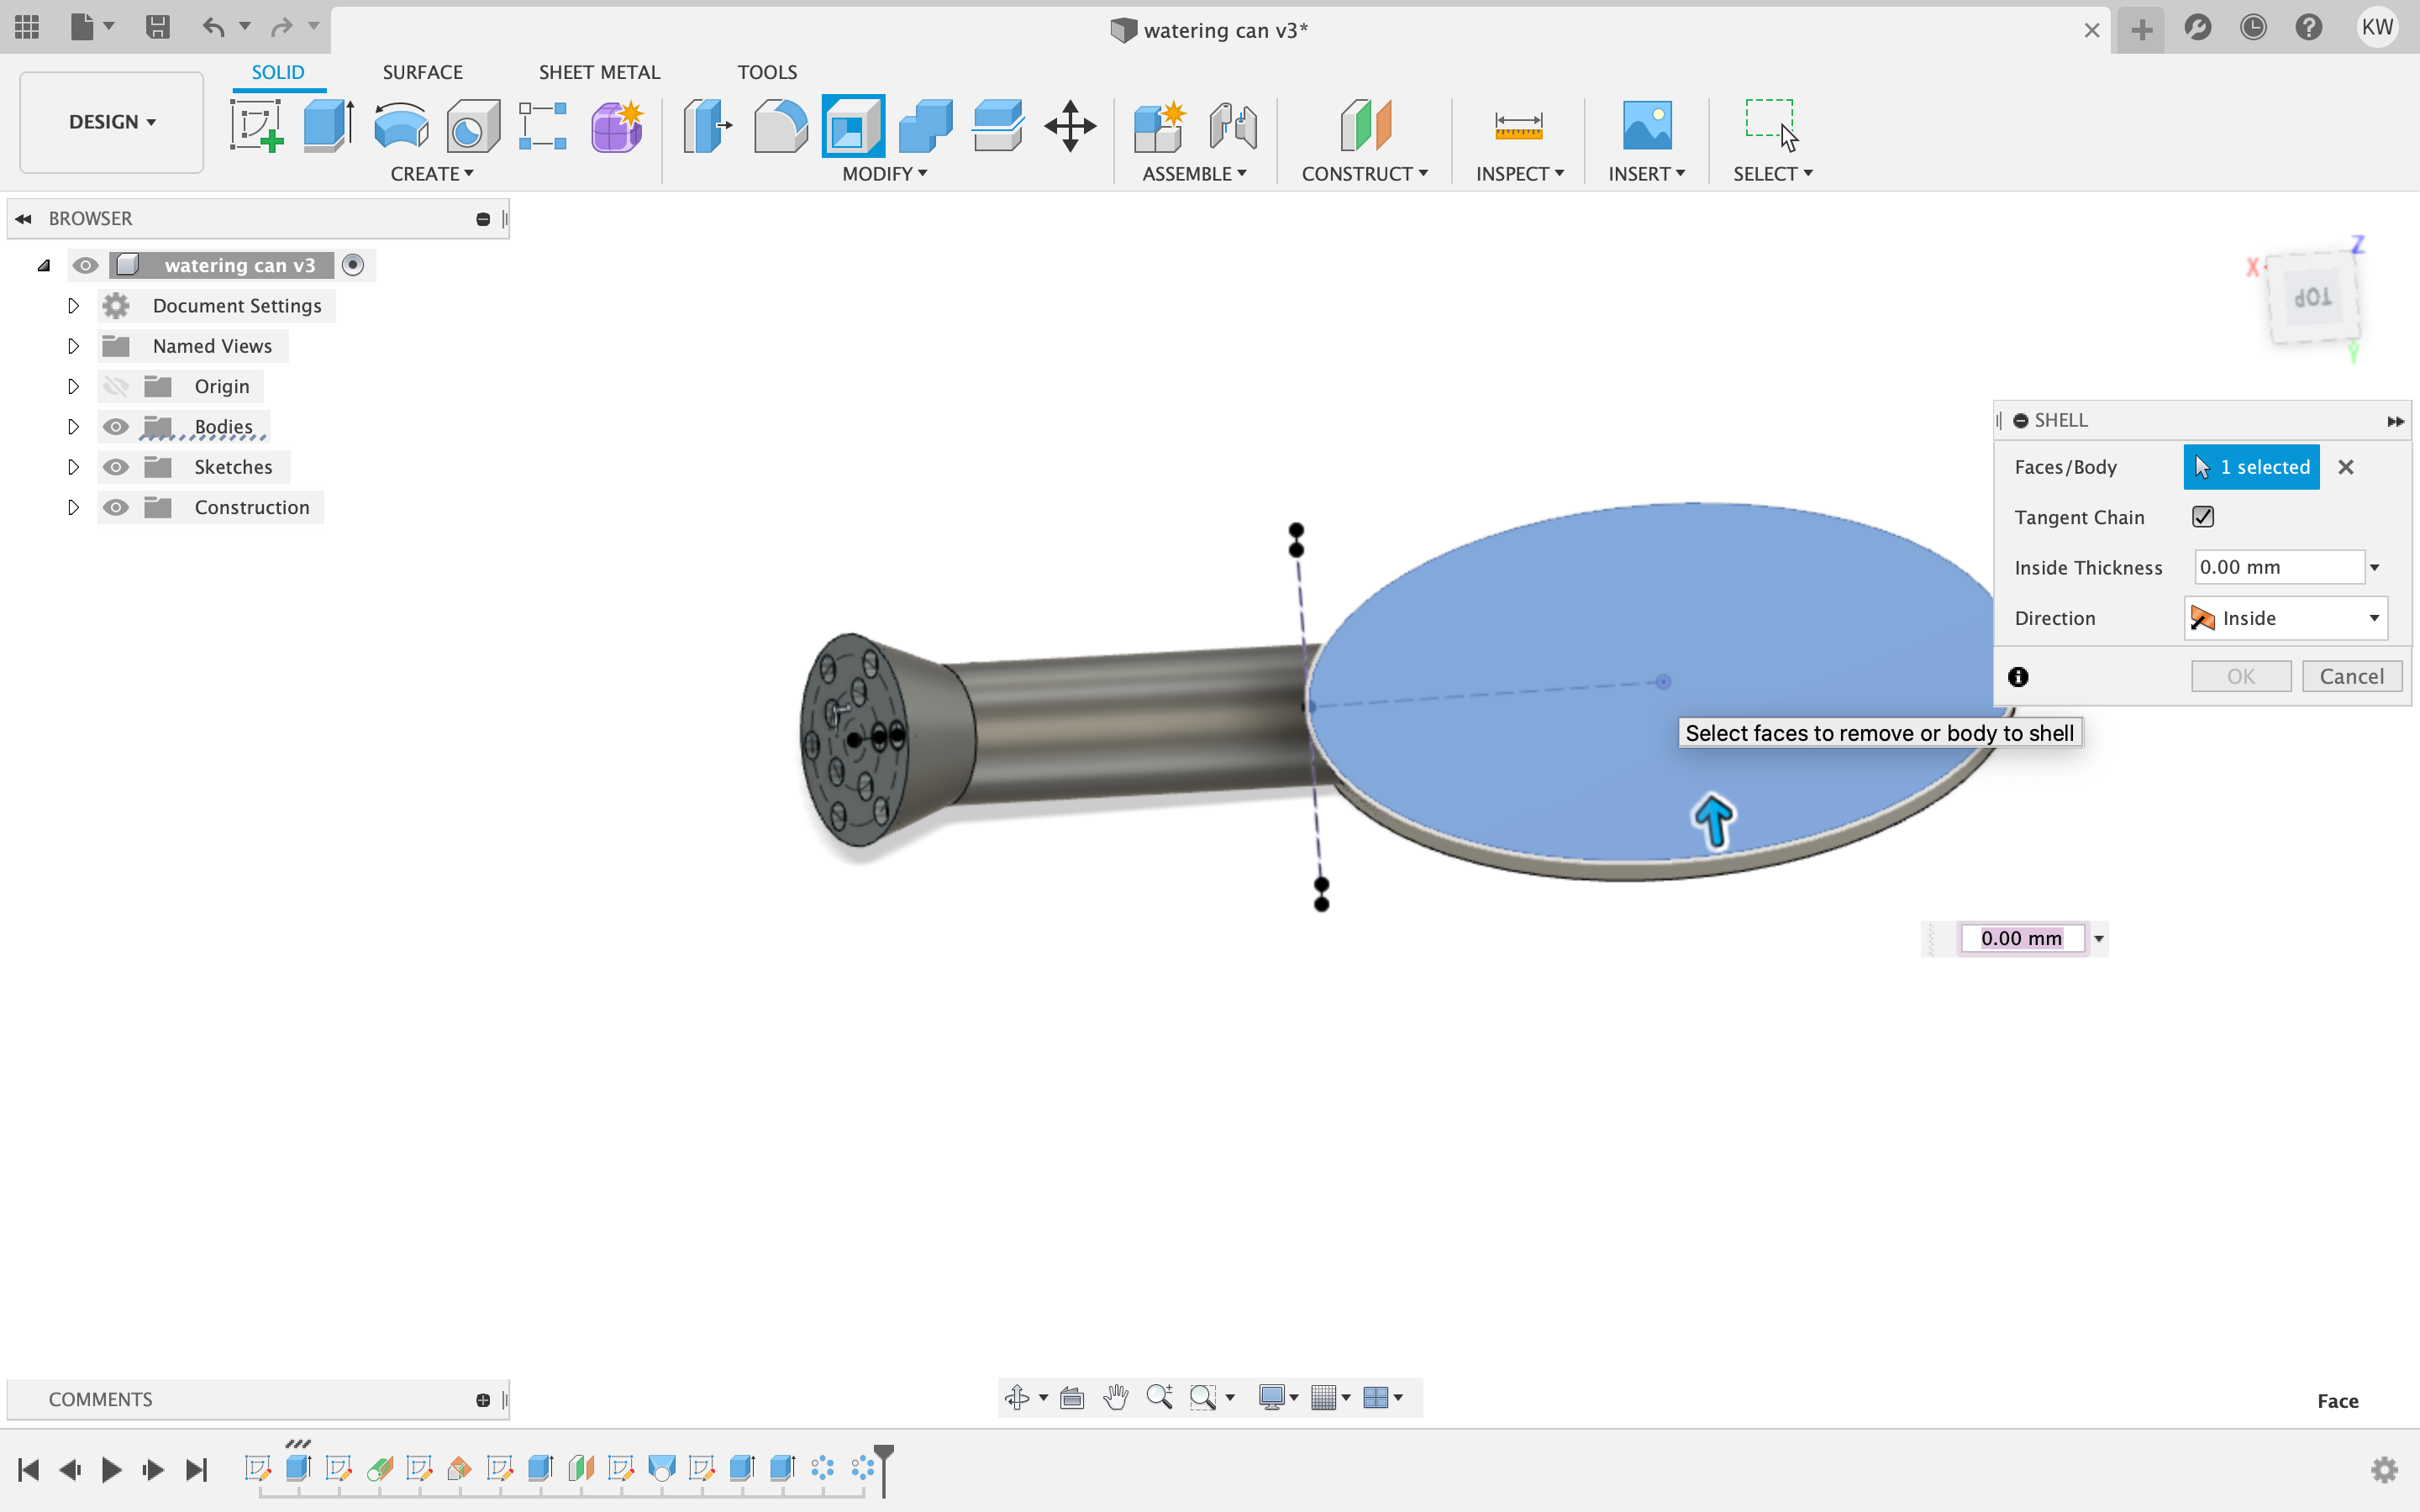
 Then I used the shell tool and made it 1 mm thick and the rest was fully hollow.
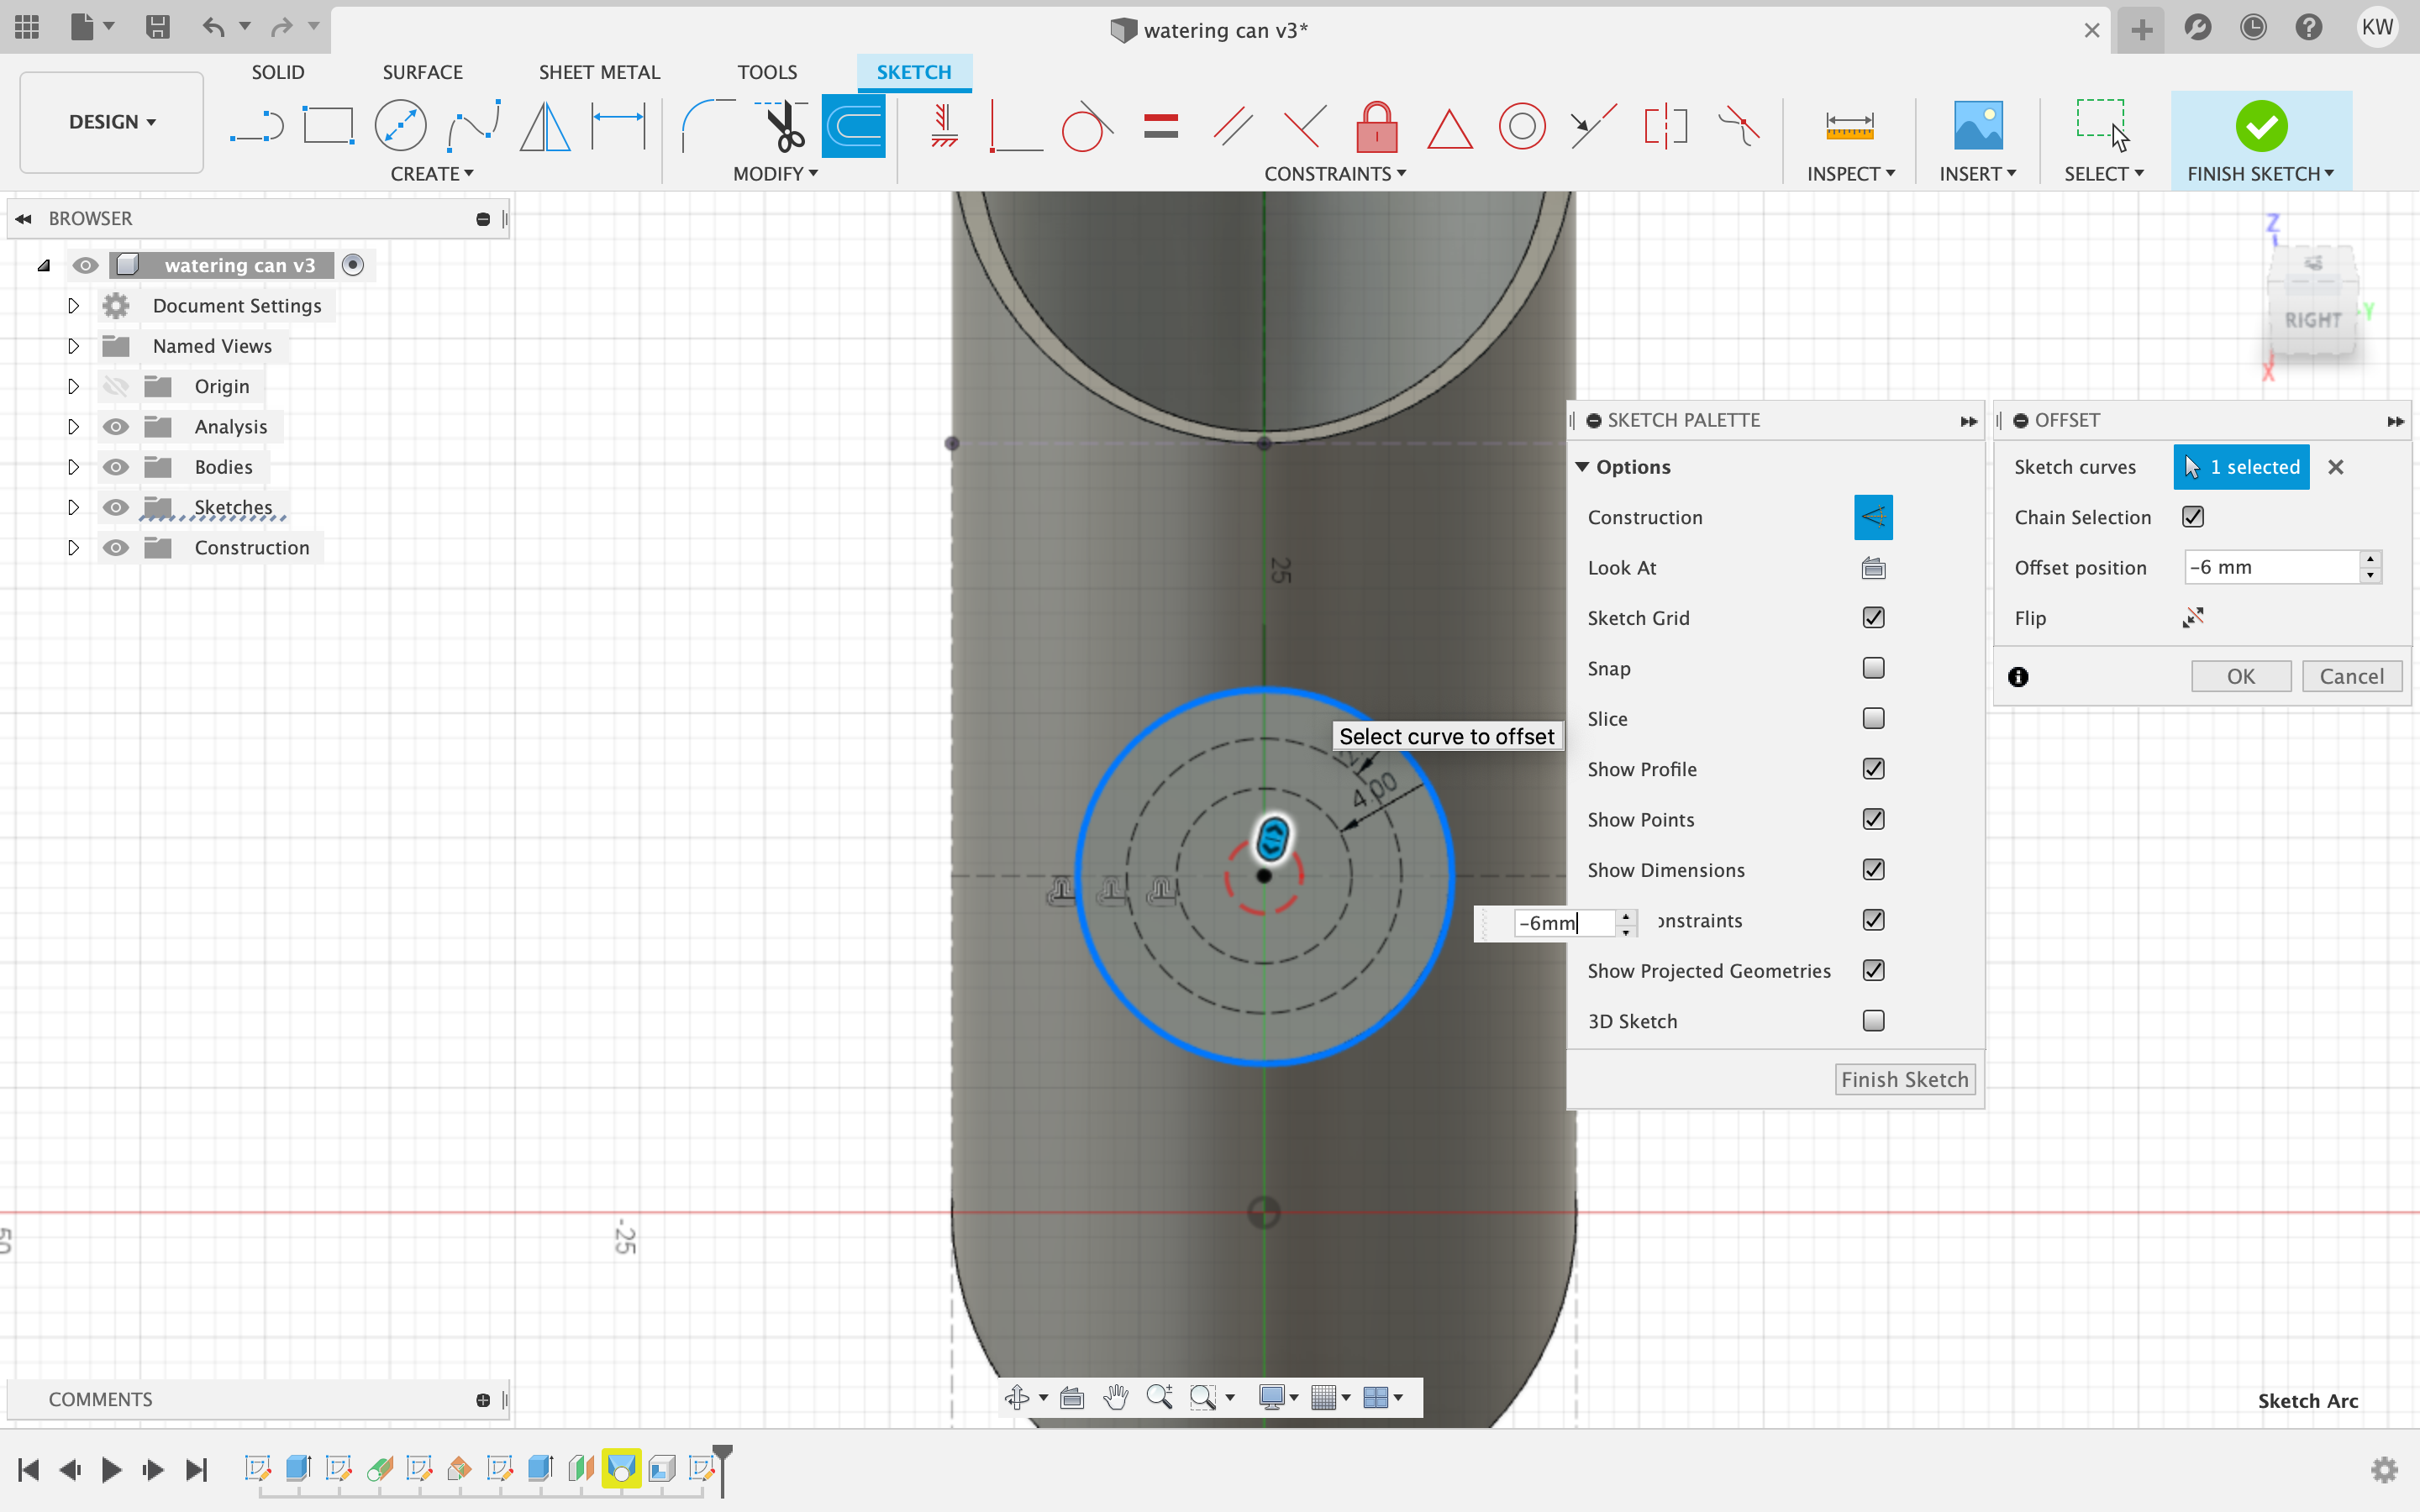
 Next I created the little holes in the cone looking part. I forgot the name of that part of a watering can, as you can see I am fantastic with words. So I offset 3 construction circles to have as a base for the holes.
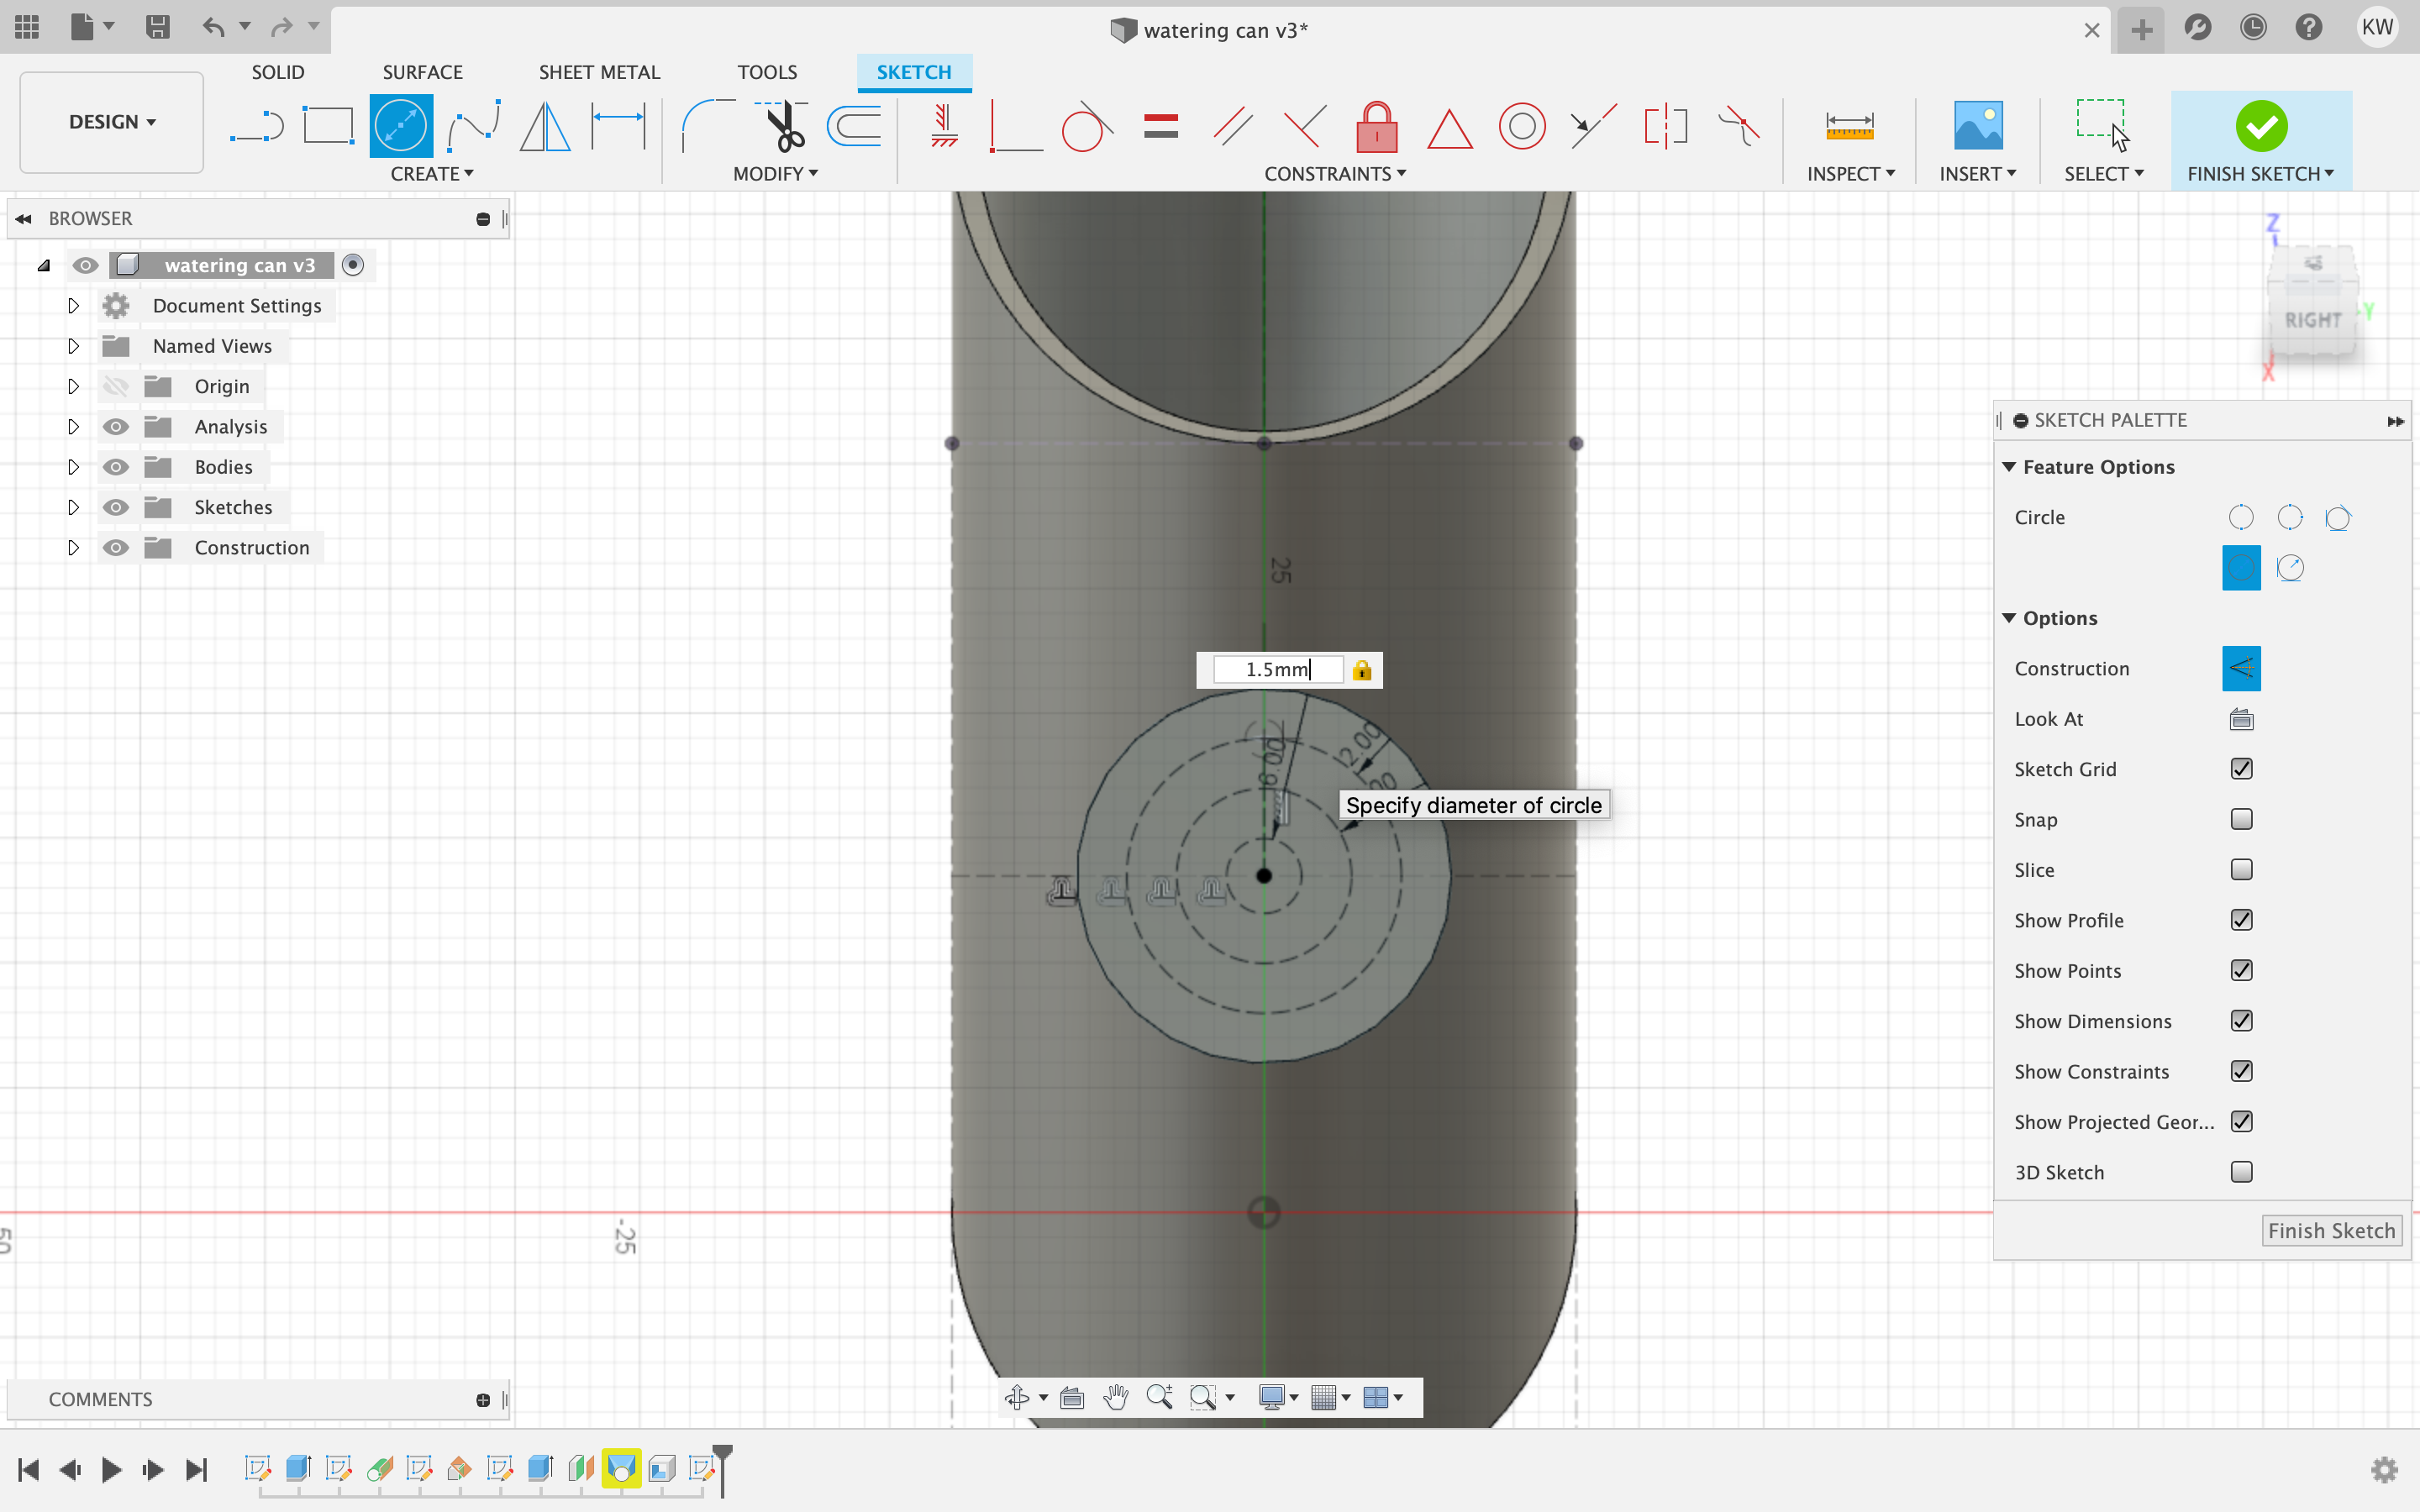
 Then I created a construction line going up to each circle and created a cirlce 1mm on each line.
 Then I did the circle pattern for all 3 circles and repeated it. I did 6 for the first 2 cirlces and then 3 for the inner most circle.


 Then I extruted the circles and changed it to intersect and set it to -1mm
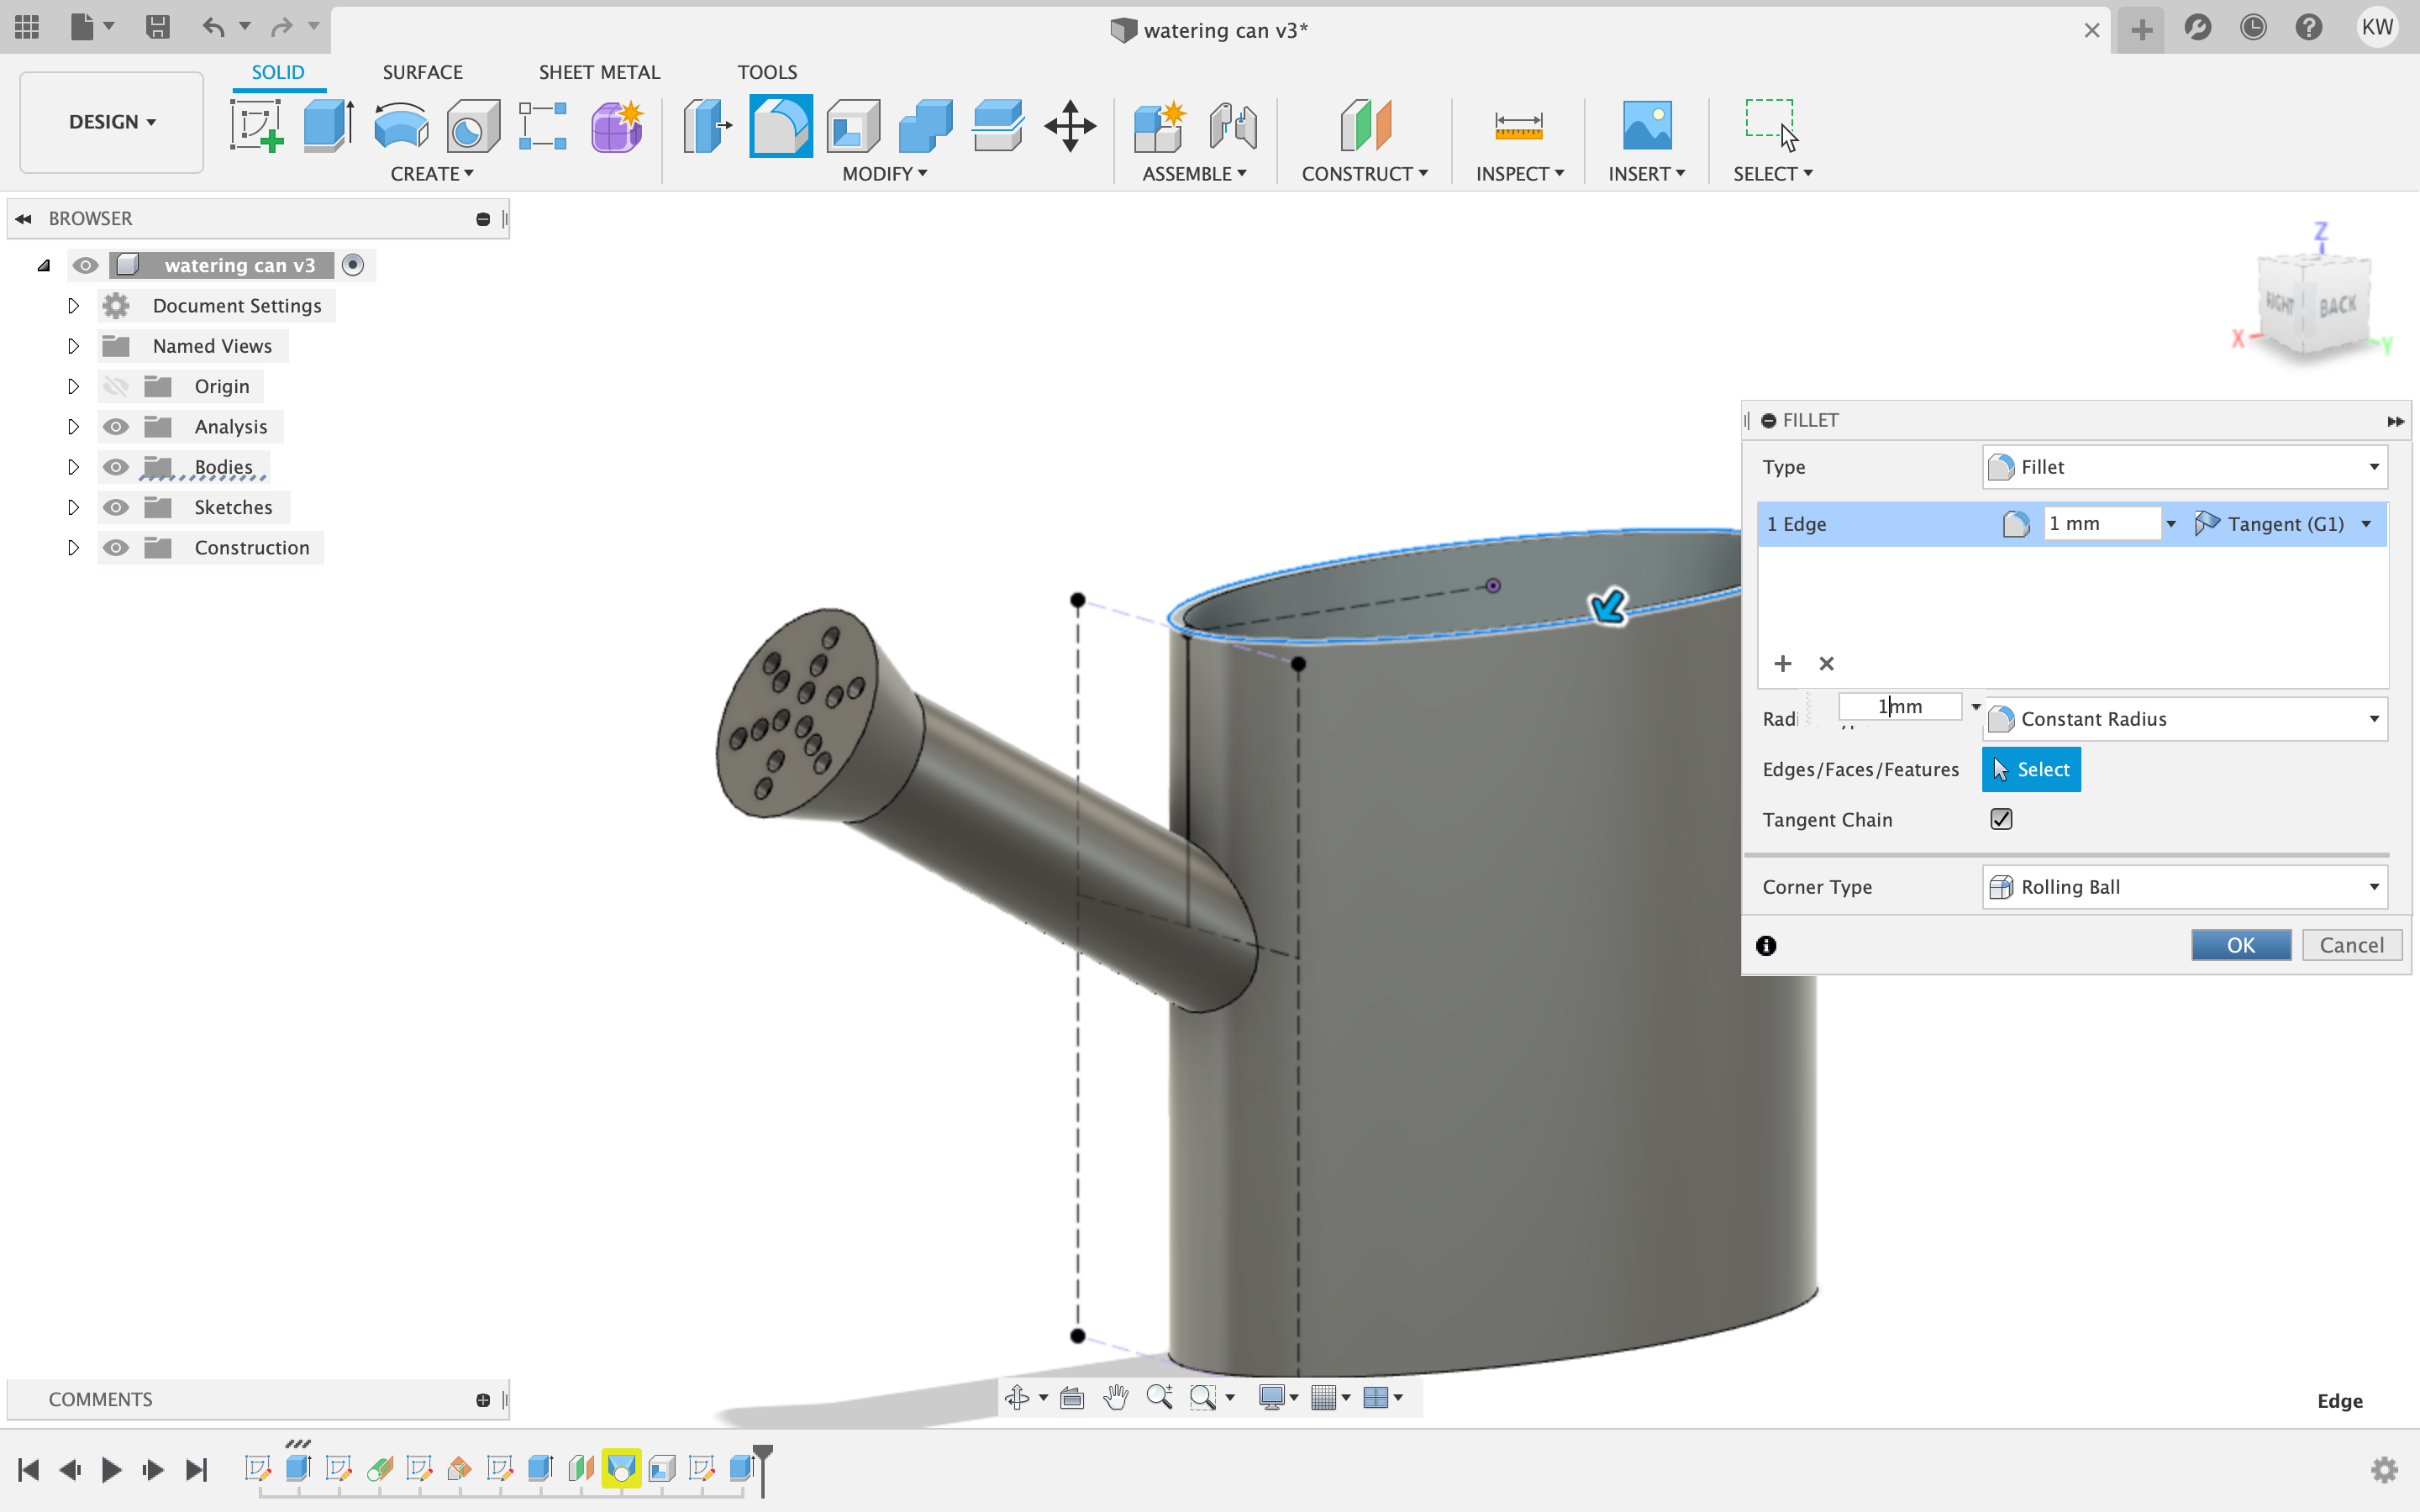
 Then I used the fillet tool and set the edge to 1mm. And that is the final product.
 Files for this week
The task for this week was to 3D print a flower pot and design a watering can. So the frist thing I did was the pot, and the first thing I did was create a sketch and make a circle 50 cm.
Off of that I created a construction line off a little bit to the side and set it verticle so it was constraint
Then I used the dimensions tool to set the hight to be 26mm.
Then I made a circle with the dimensions of 6 mm.
Then I used the trim tool to trim the outside of the new circle I made so I'm left with a half cirlce in the middle of the bigger circle.
Then I used the circle pattern tool to create the pattern all the way around. In the picture it says 27 in the screenshot but I changed it to 28 times around the cirlce.
I then extruted the pot 50mm up.
So that was the one we were supposed to do, but I wanted to make a pumpkin for spooky season. So damnit I'm making a pumking. I did the exact same thing up until the cirlce. I made the circle 16mm long instead of 6mm.
Then I used the cut tool to cut the part of the circle on the inside rather than the outside.
Then I used the cirlce pattern tool one more time and made it go around 10 times.
Then I extruted it 25 mm. The rest of the pictures from the project are not allowing me to post them for some reason so I'll get those up tomorrow. The process was brining it in Prusaslicer, I changed the deminsions a bit to make it wider so it looked more like a pumkin, then I went into print settings -> verticle shells -> spiral base and clicked the box. Then I brought it to the printer and printed it out. It took 2 tries because the orange PLA wasn't working :(
Here is the final product with the plant inside, I named her Perfuma, everyone say hi.
So the next part was to create the watering can. I started out by making an oval, 50 mm long and 25mm high.
Then I extruted it 50 mm.
The next thing I did was creat a sketch on the top of the oval and created a construction line and set it to be horizontal.
Next I created a plane tangent to a face at point to make a plan coming right off of the oval front.
I created a sketch and a construction line box around the plane and a line going down 20mm. Then I made a construction line going across and set that to be 18mm and projected the bottom of my oval so everything was connected.
Then I did create a plane at a angle and set it to 60.
Then I created a cirlce and extruded it 30 up and like 10 in.
Then I created an offset plane and set it 7 mm up.
Then I created a sketch on that plane, I projected the center of the last circle on my new sketch and made a new circle to be 15mm.
Then I used the loft tool to connect the two cirlces together.
Then I used the shell tool and made it 1 mm thick and the rest was fully hollow.
Next I created the little holes in the cone looking part. I forgot the name of that part of a watering can, as you can see I am fantastic with words. So I offset 3 construction circles to have as a base for the holes.
Then I created a construction line going up to each circle and created a cirlce 1mm on each line.
Then I did the circle pattern for all 3 circles and repeated it. I did 6 for the first 2 cirlces and then 3 for the inner most circle.
Then I extruted the circles and changed it to intersect and set it to -1mm
Then I used the fillet tool and set the edge to 1mm. And that is the final product.
Files for this week