WEEK 2
This weeks assigment was to lazer cut samples with the setting you used and to lazer cut out a box. For creating the 5 samples I had a hard time at first with the orientation of my cut. I put in the dementions of my material just fine and created a box and then rounded out the corners. But when I went to send it to the printer I pressed the upper left coroner and it didn't look the way it was supposed to
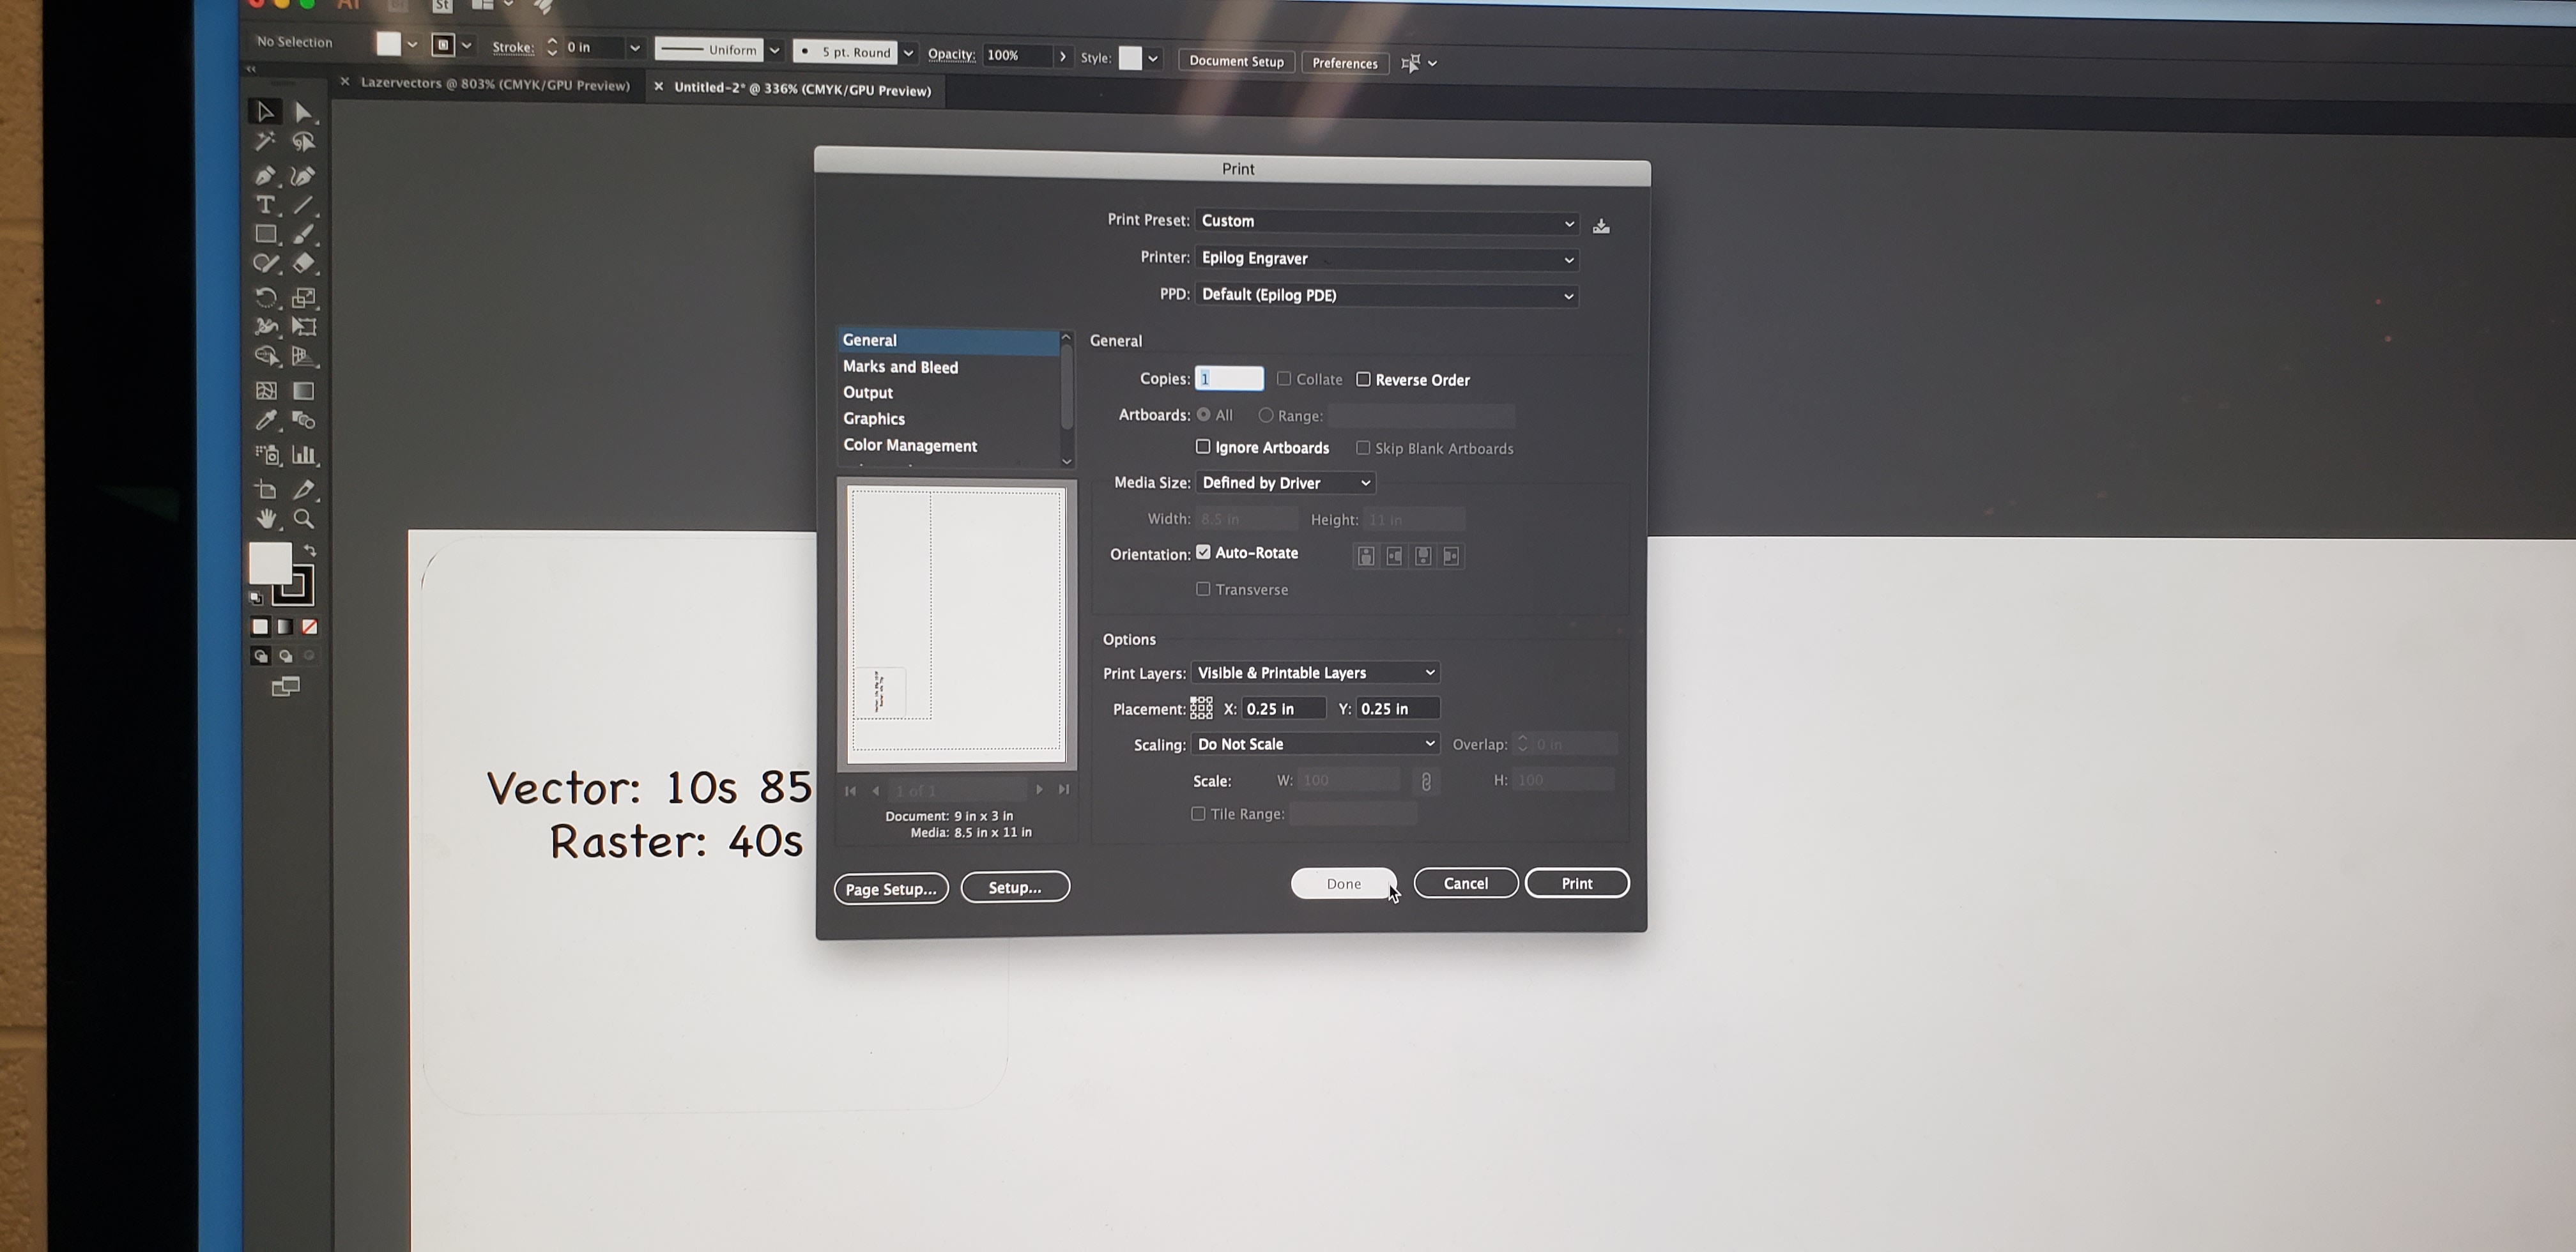
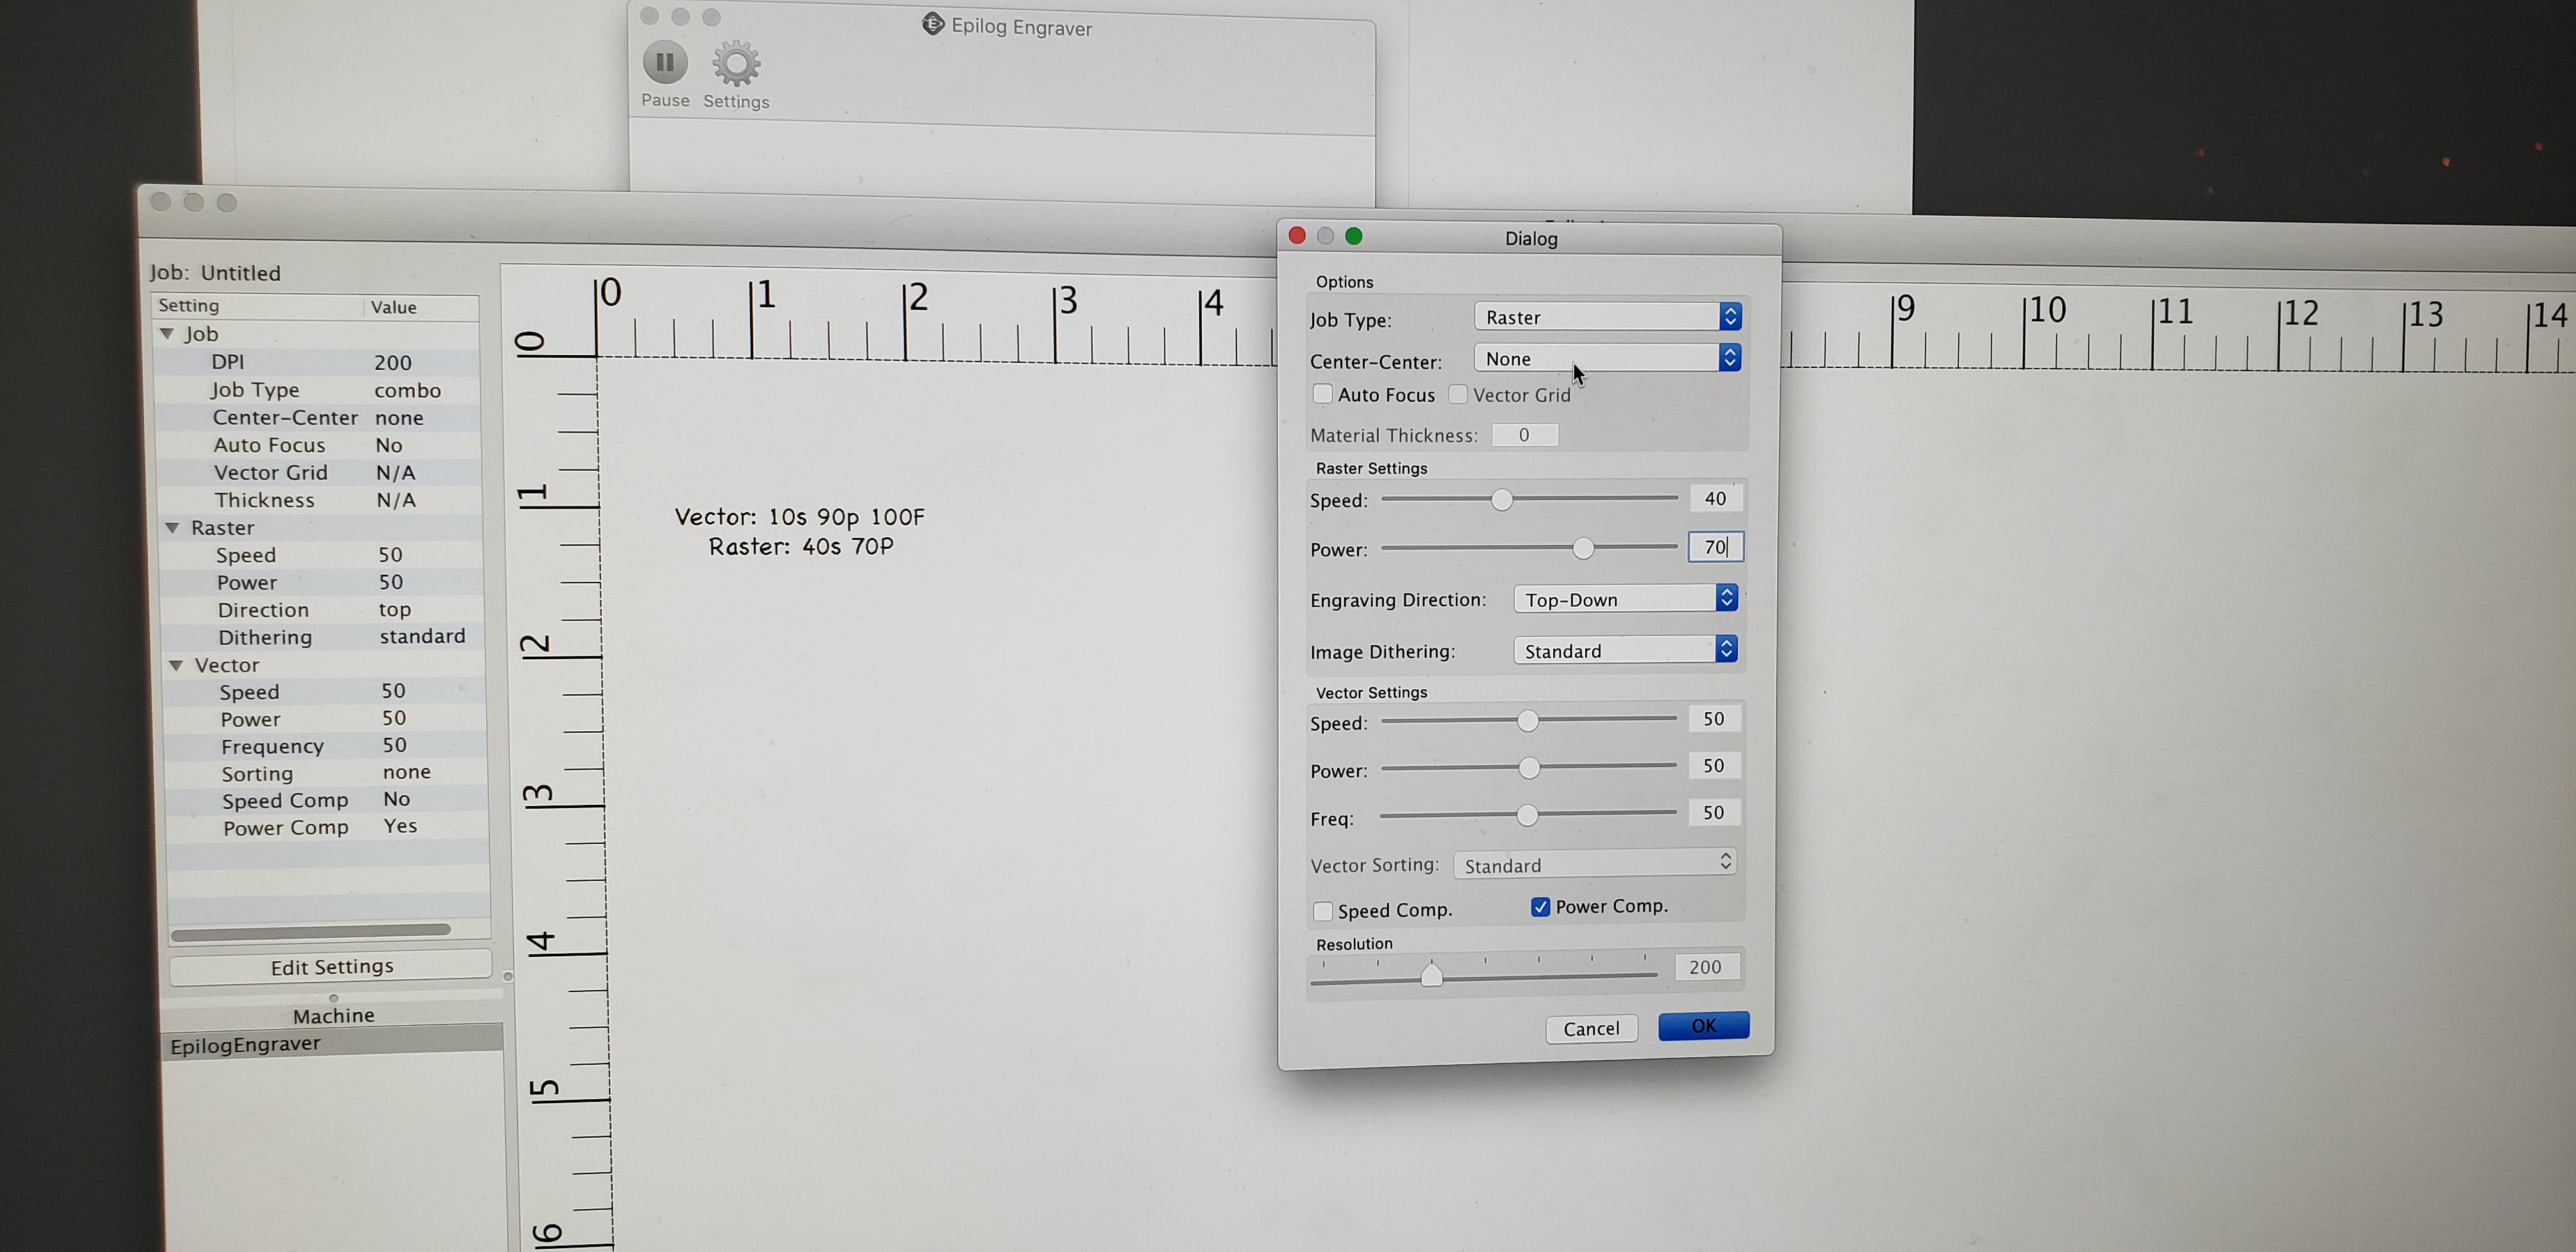
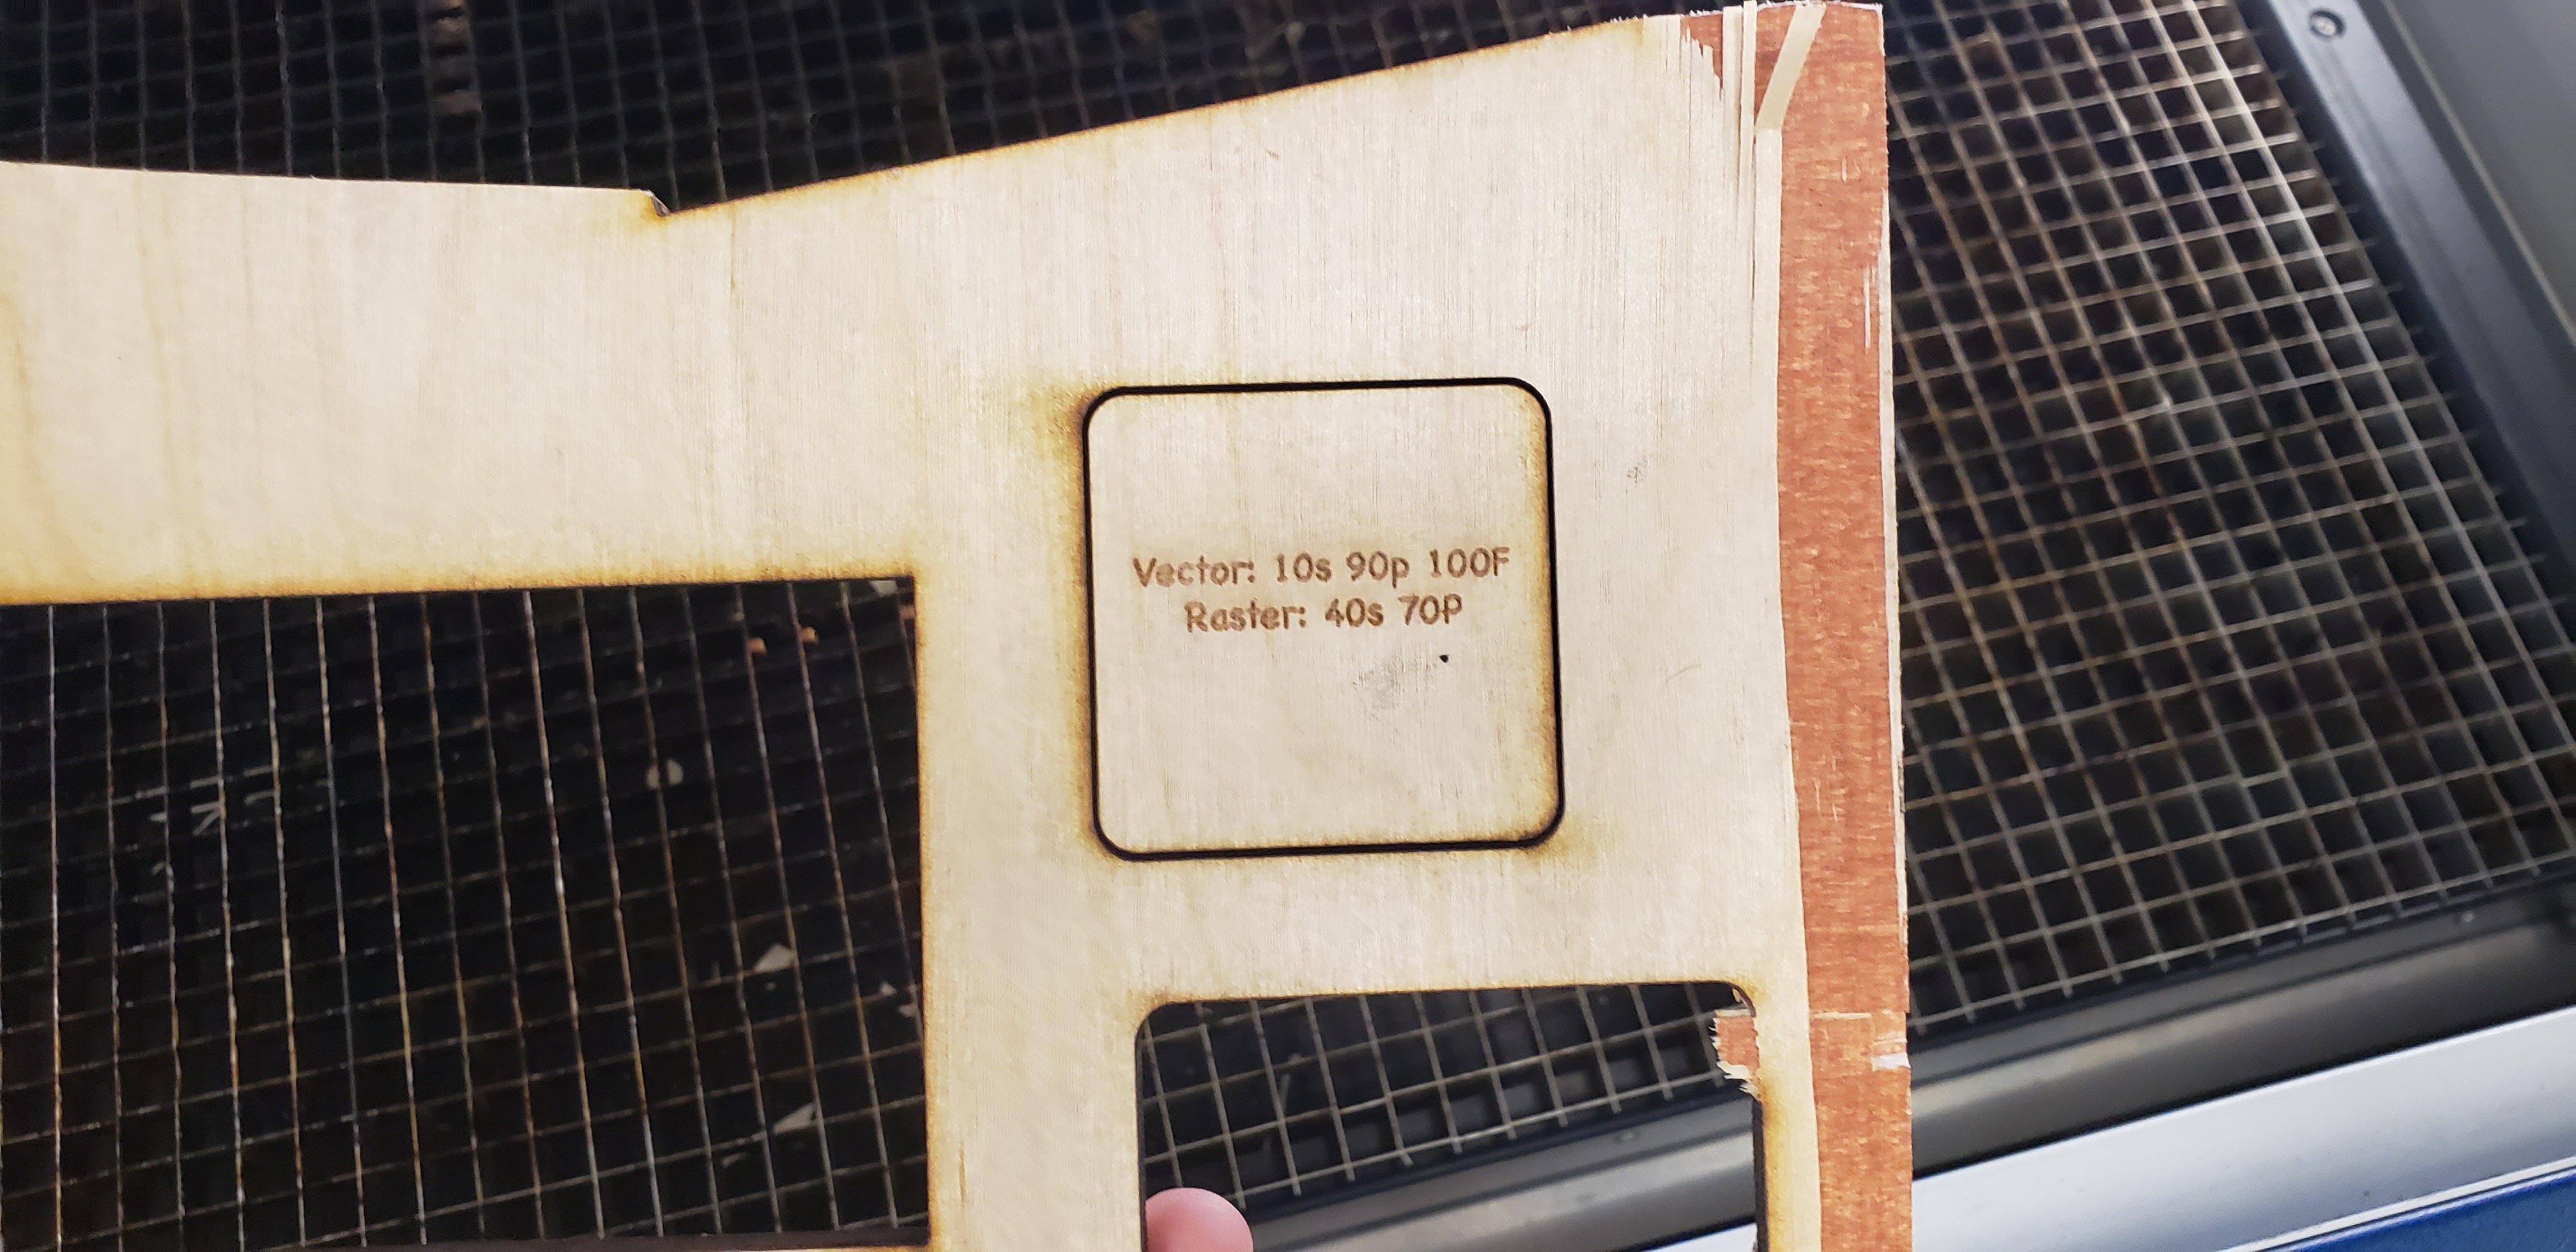
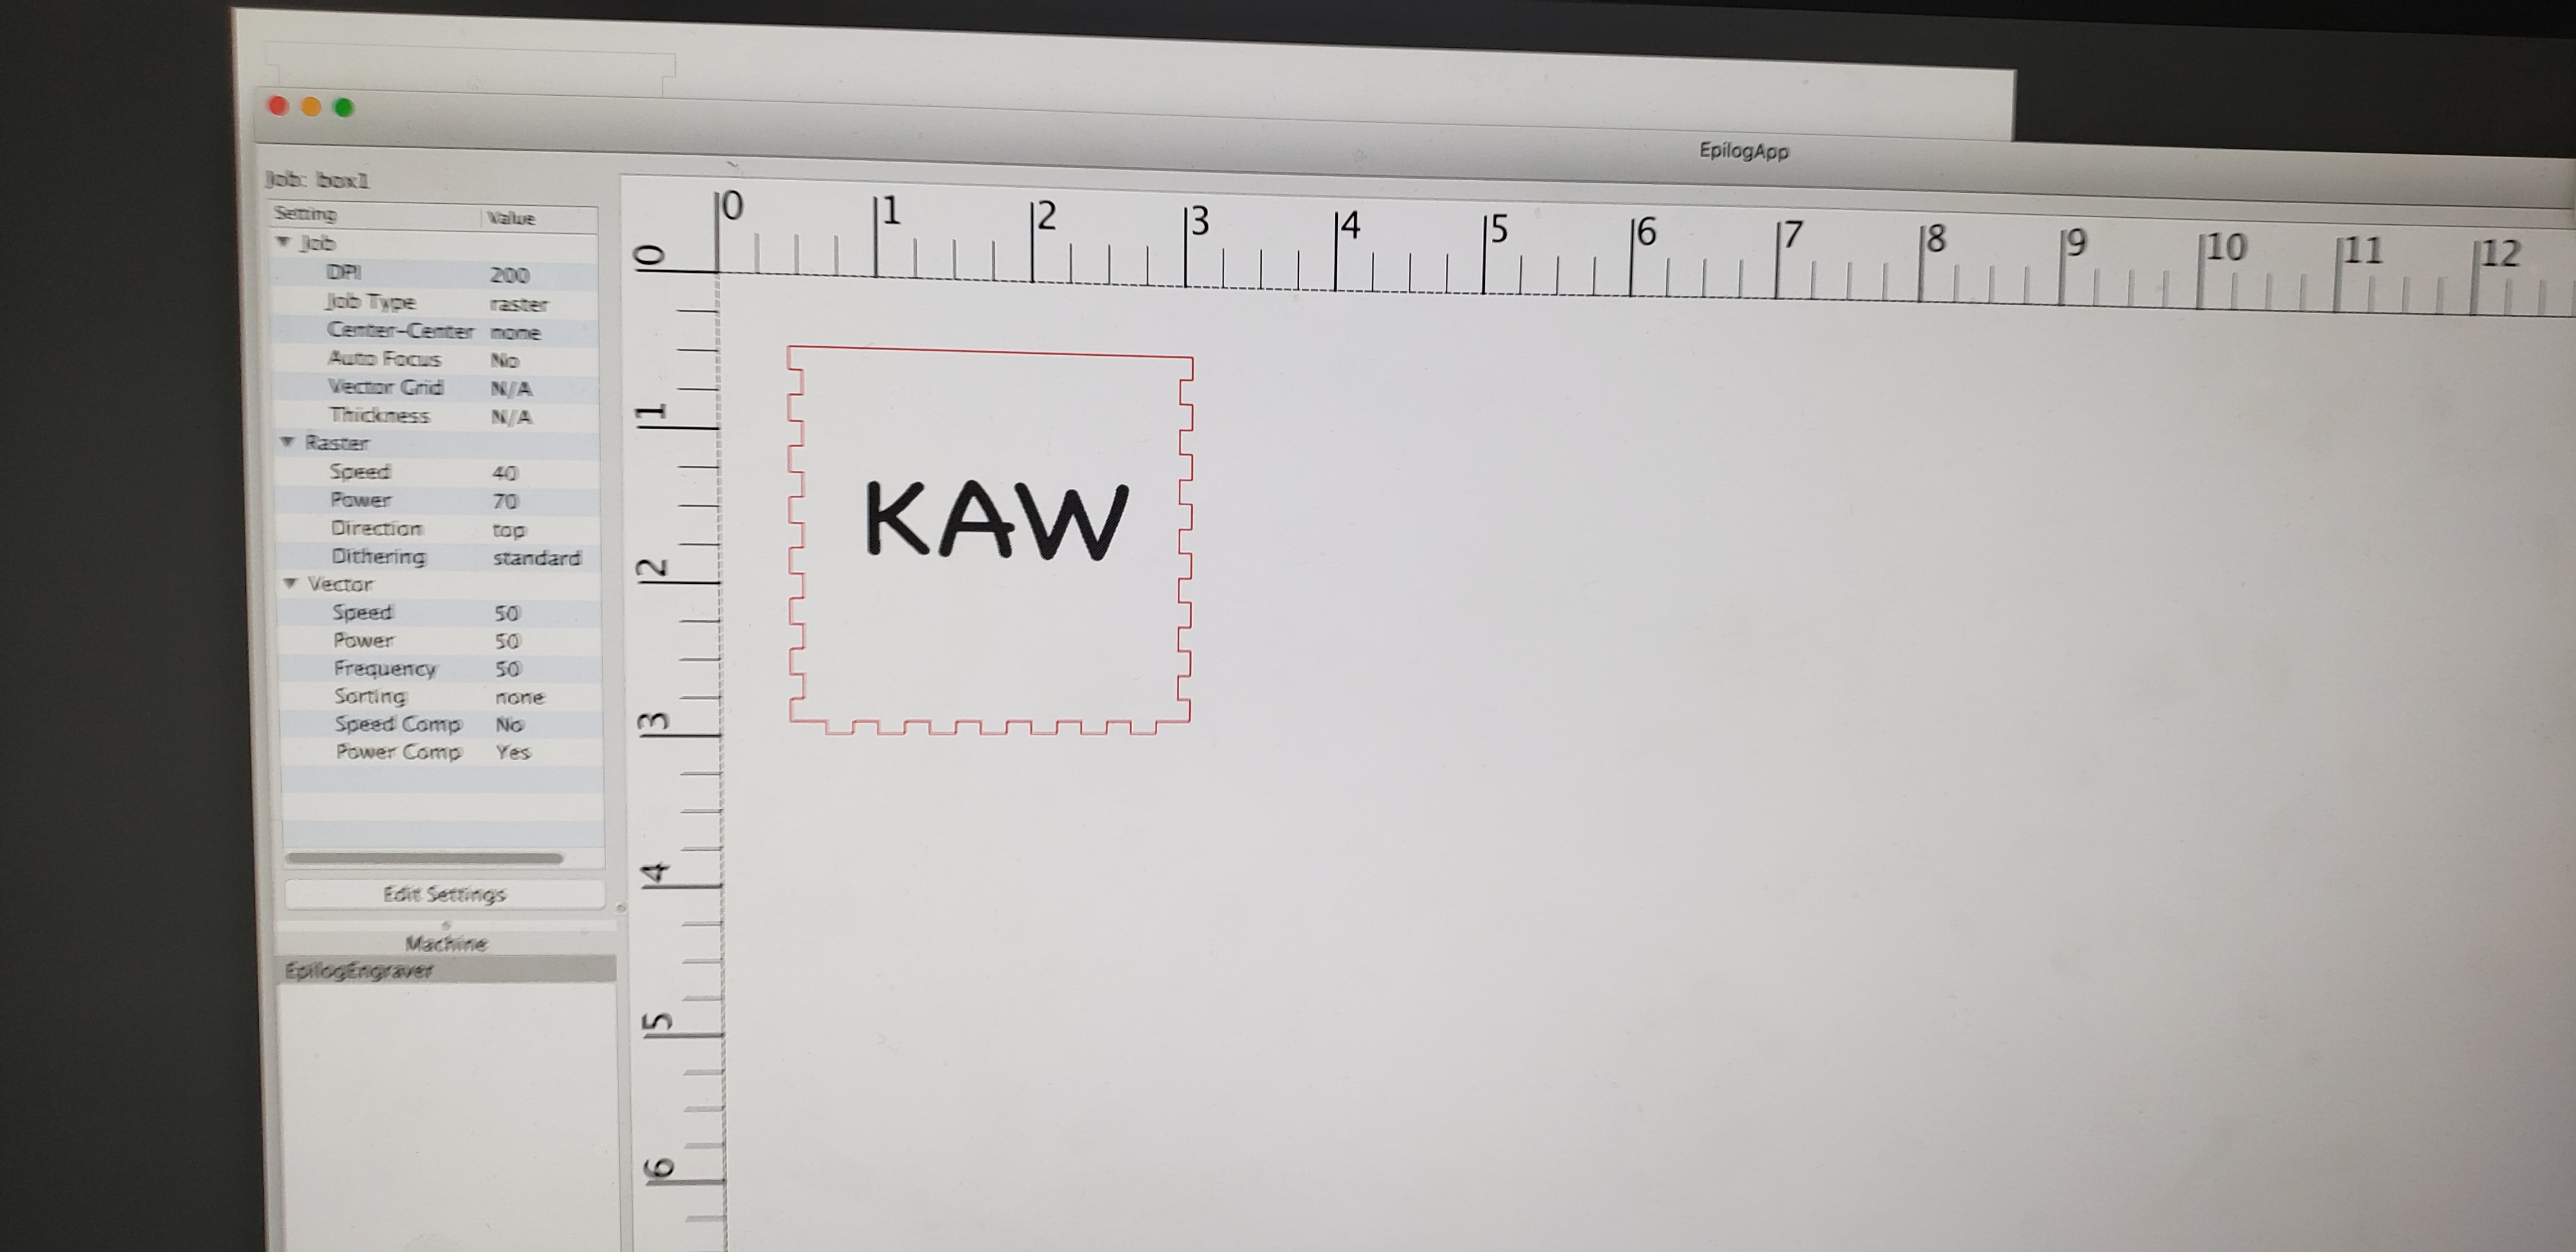
 I needed to ask for help to figure out what I should do. I ended up creating a new file and setting the dimentions to be a square then copying over my already created file. The next step I did was bring it over to print. In this case I was using the 1/8 plywood so I put in the vector and raster settings I put on the wood itself (as shown in the picture below) and printed it out. The person who was working the lab that day told me to do just the raster first and then the vector. According to him it had a higher chance of fully cutting it out and not getting it stuck. So thats what I did, I made the setting raster only then hit print. Then I went to the laser cutter and changed the jog and the focus for my material and hit go. Then I went back into the program, deleted the text I wrote and then sent it back to the printer so I could cut it out.
 Next I did a peice of 1/4 plywood. Using my template I created from the last time I put in the new thing I was going to engrave onto the wood. Making sure that the text was bigger than the outline and that the outline where it is actually going to cut was .01mm.
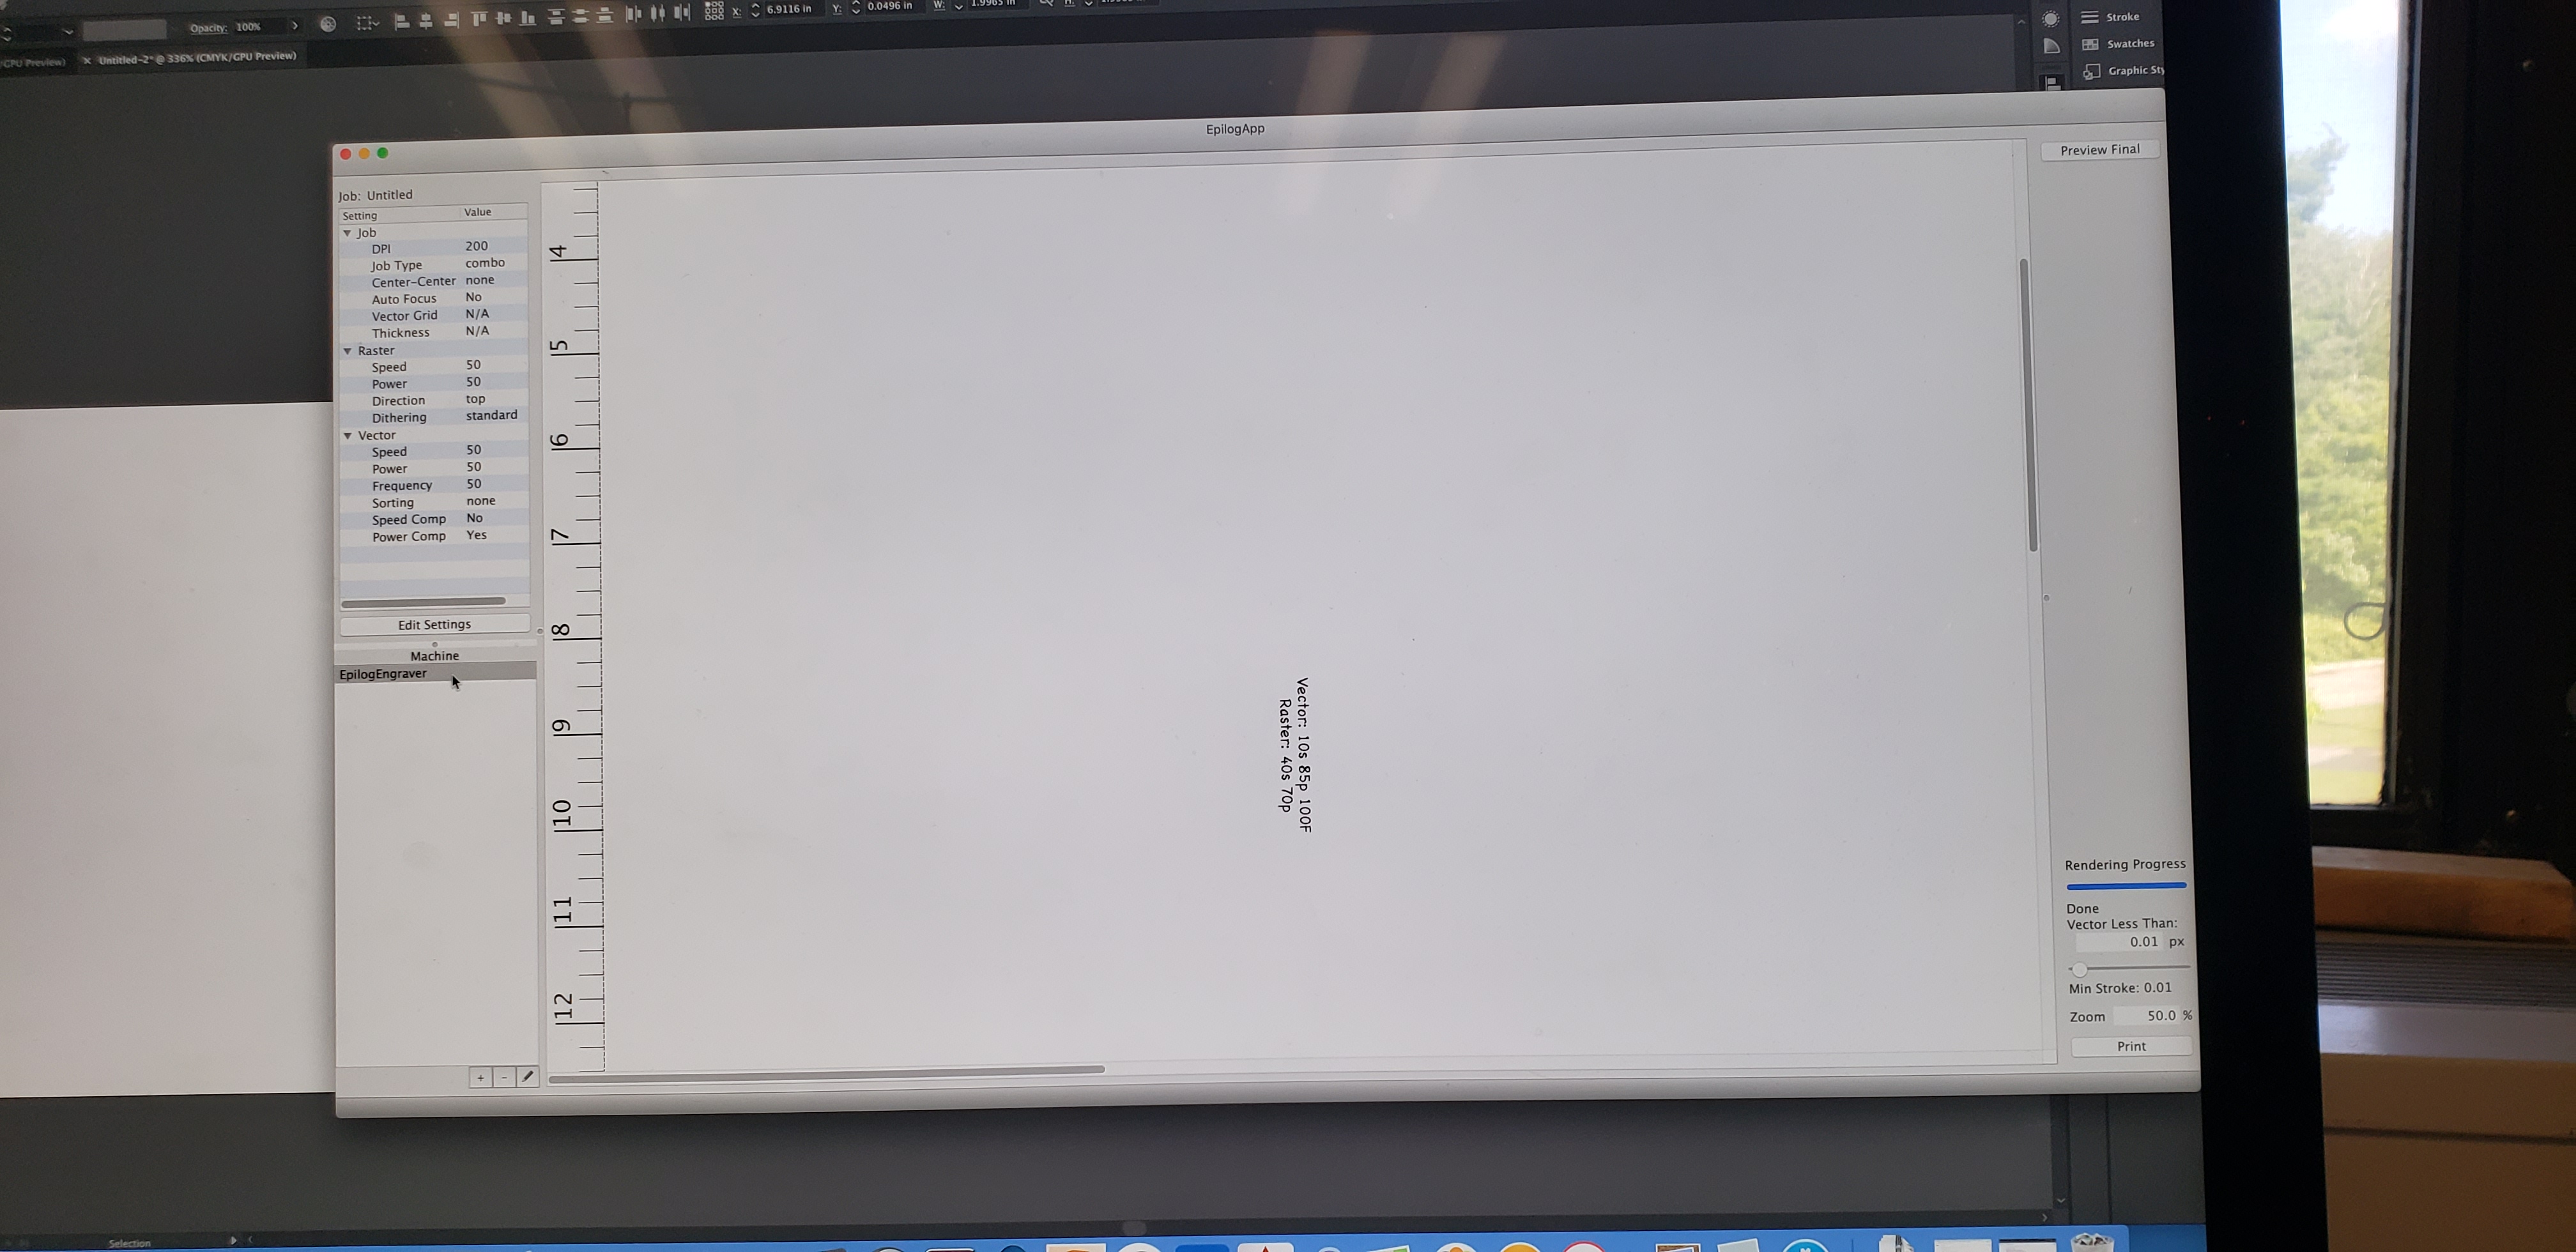
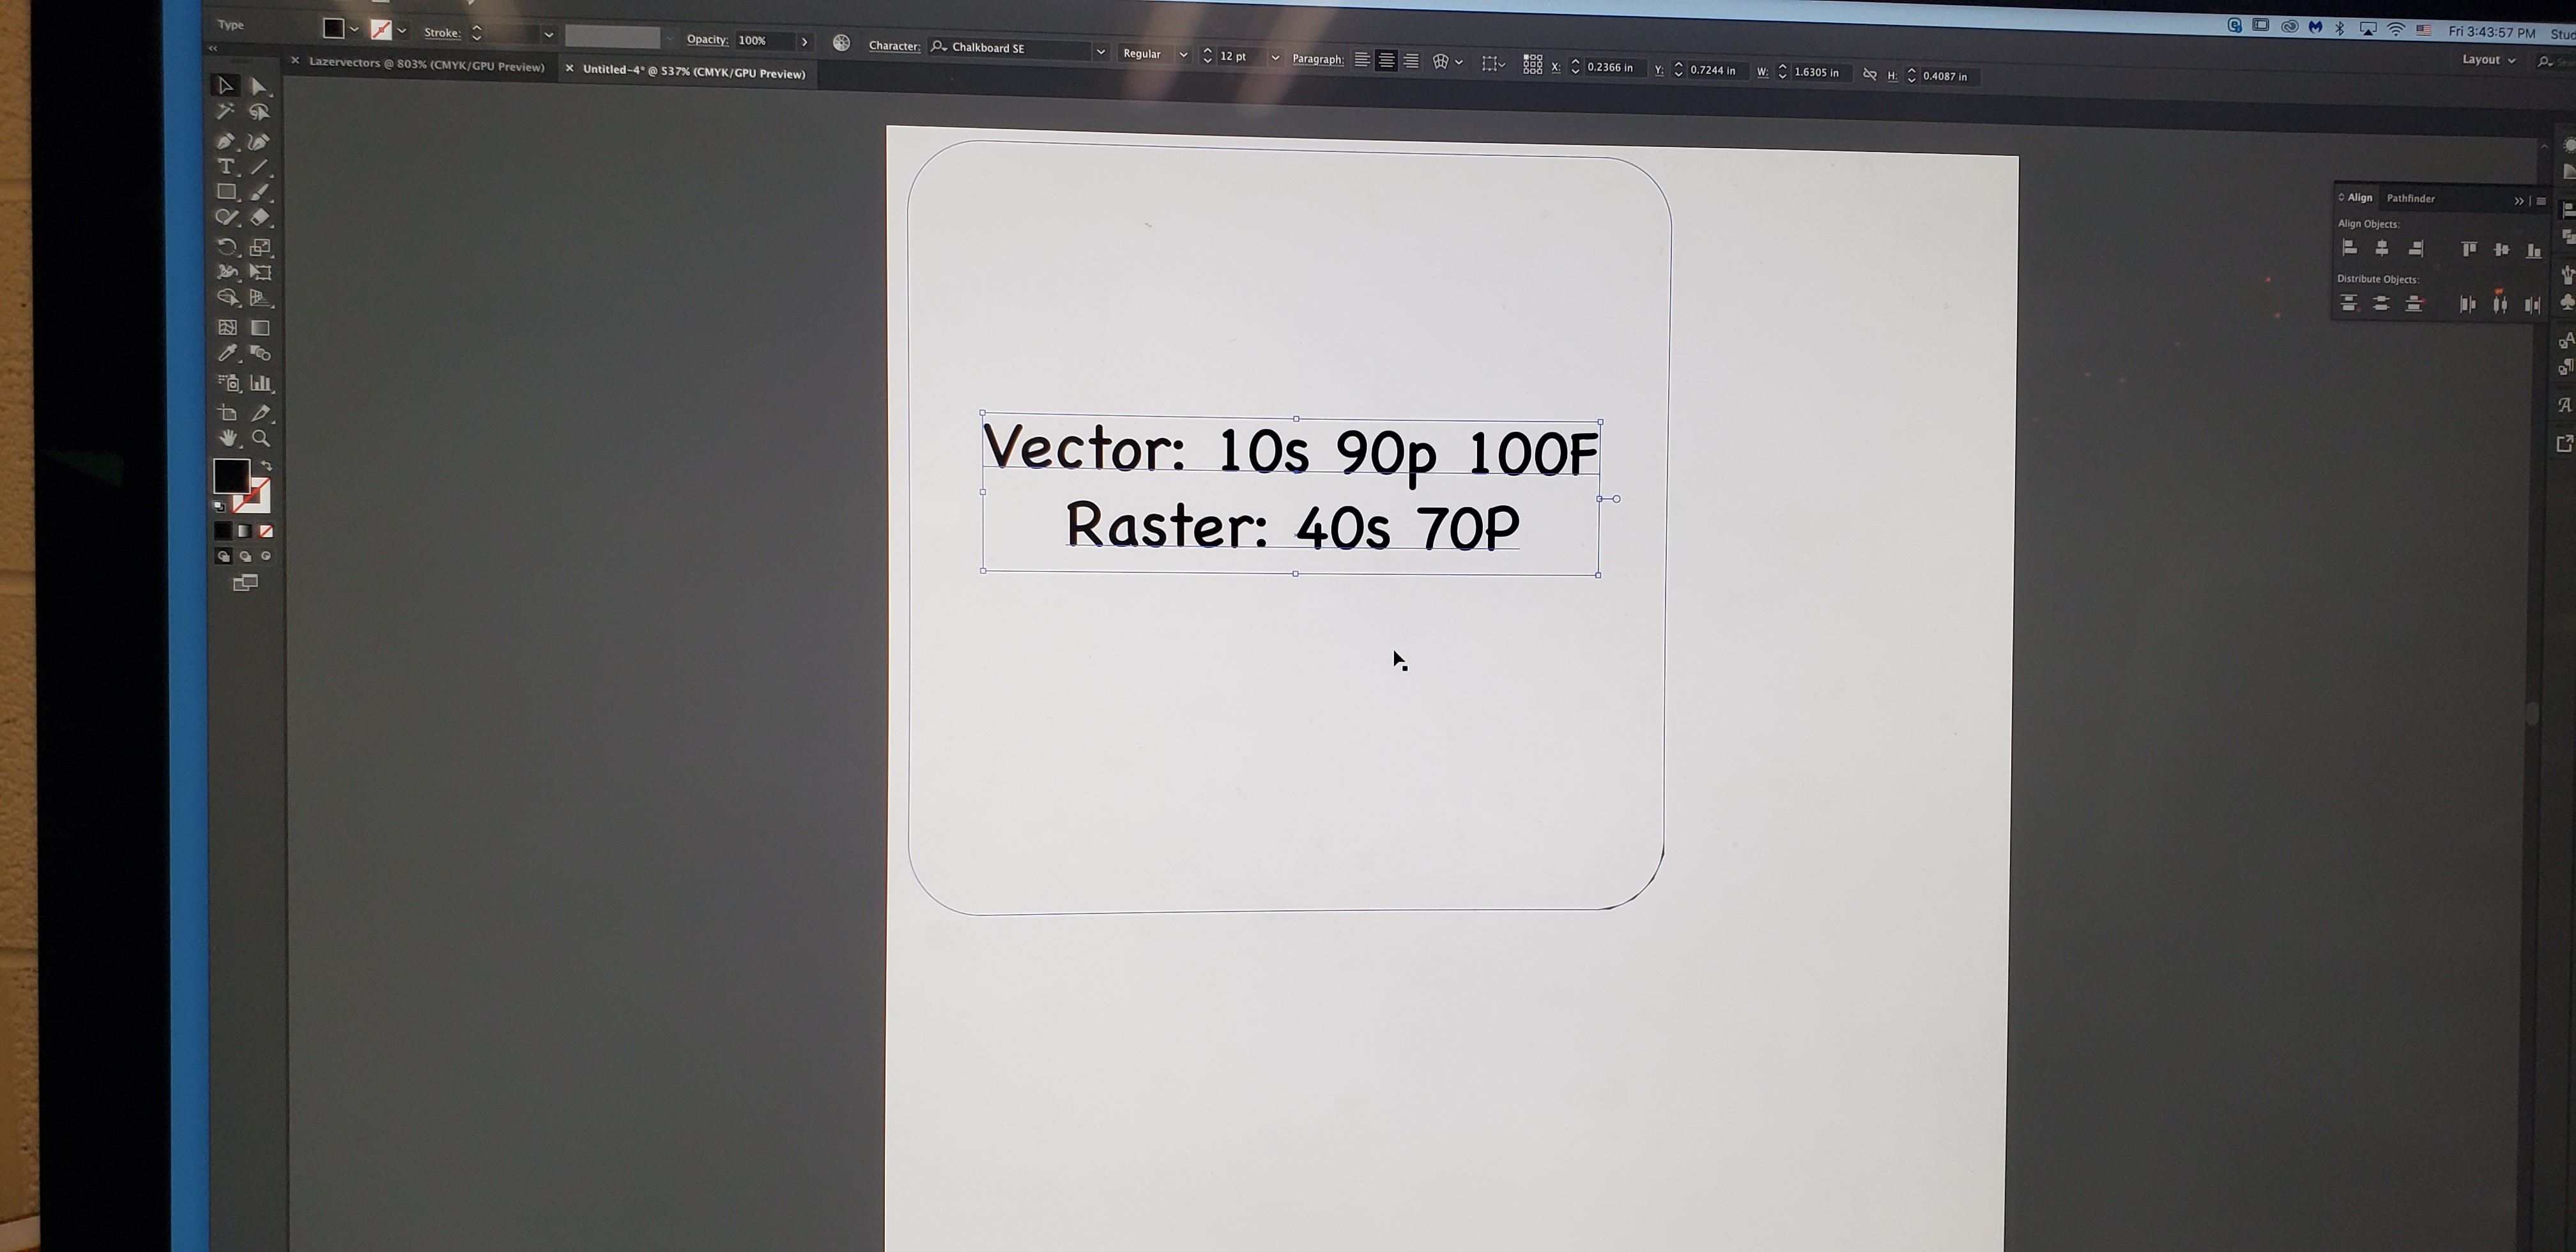 Then I sent it to the printer and put in the vector and raster settings I predicted was going to work.
 Then I once again set the jog and focus for that material and pressed go. But something happened this time that didnt happen the last time. It didnt cut all the way through.
 So, I put the material right back where it was and pressed go again making sure the settings were the same. I had to do it one more time because it moved a little so the final product looked a little wonky but in the end I think it looks good.
 The next material I used was a thing of cardboard. I ended up just using the defult settings when a project is added to the printer. I didnt find that I needed to really change anything. Well, so I thought
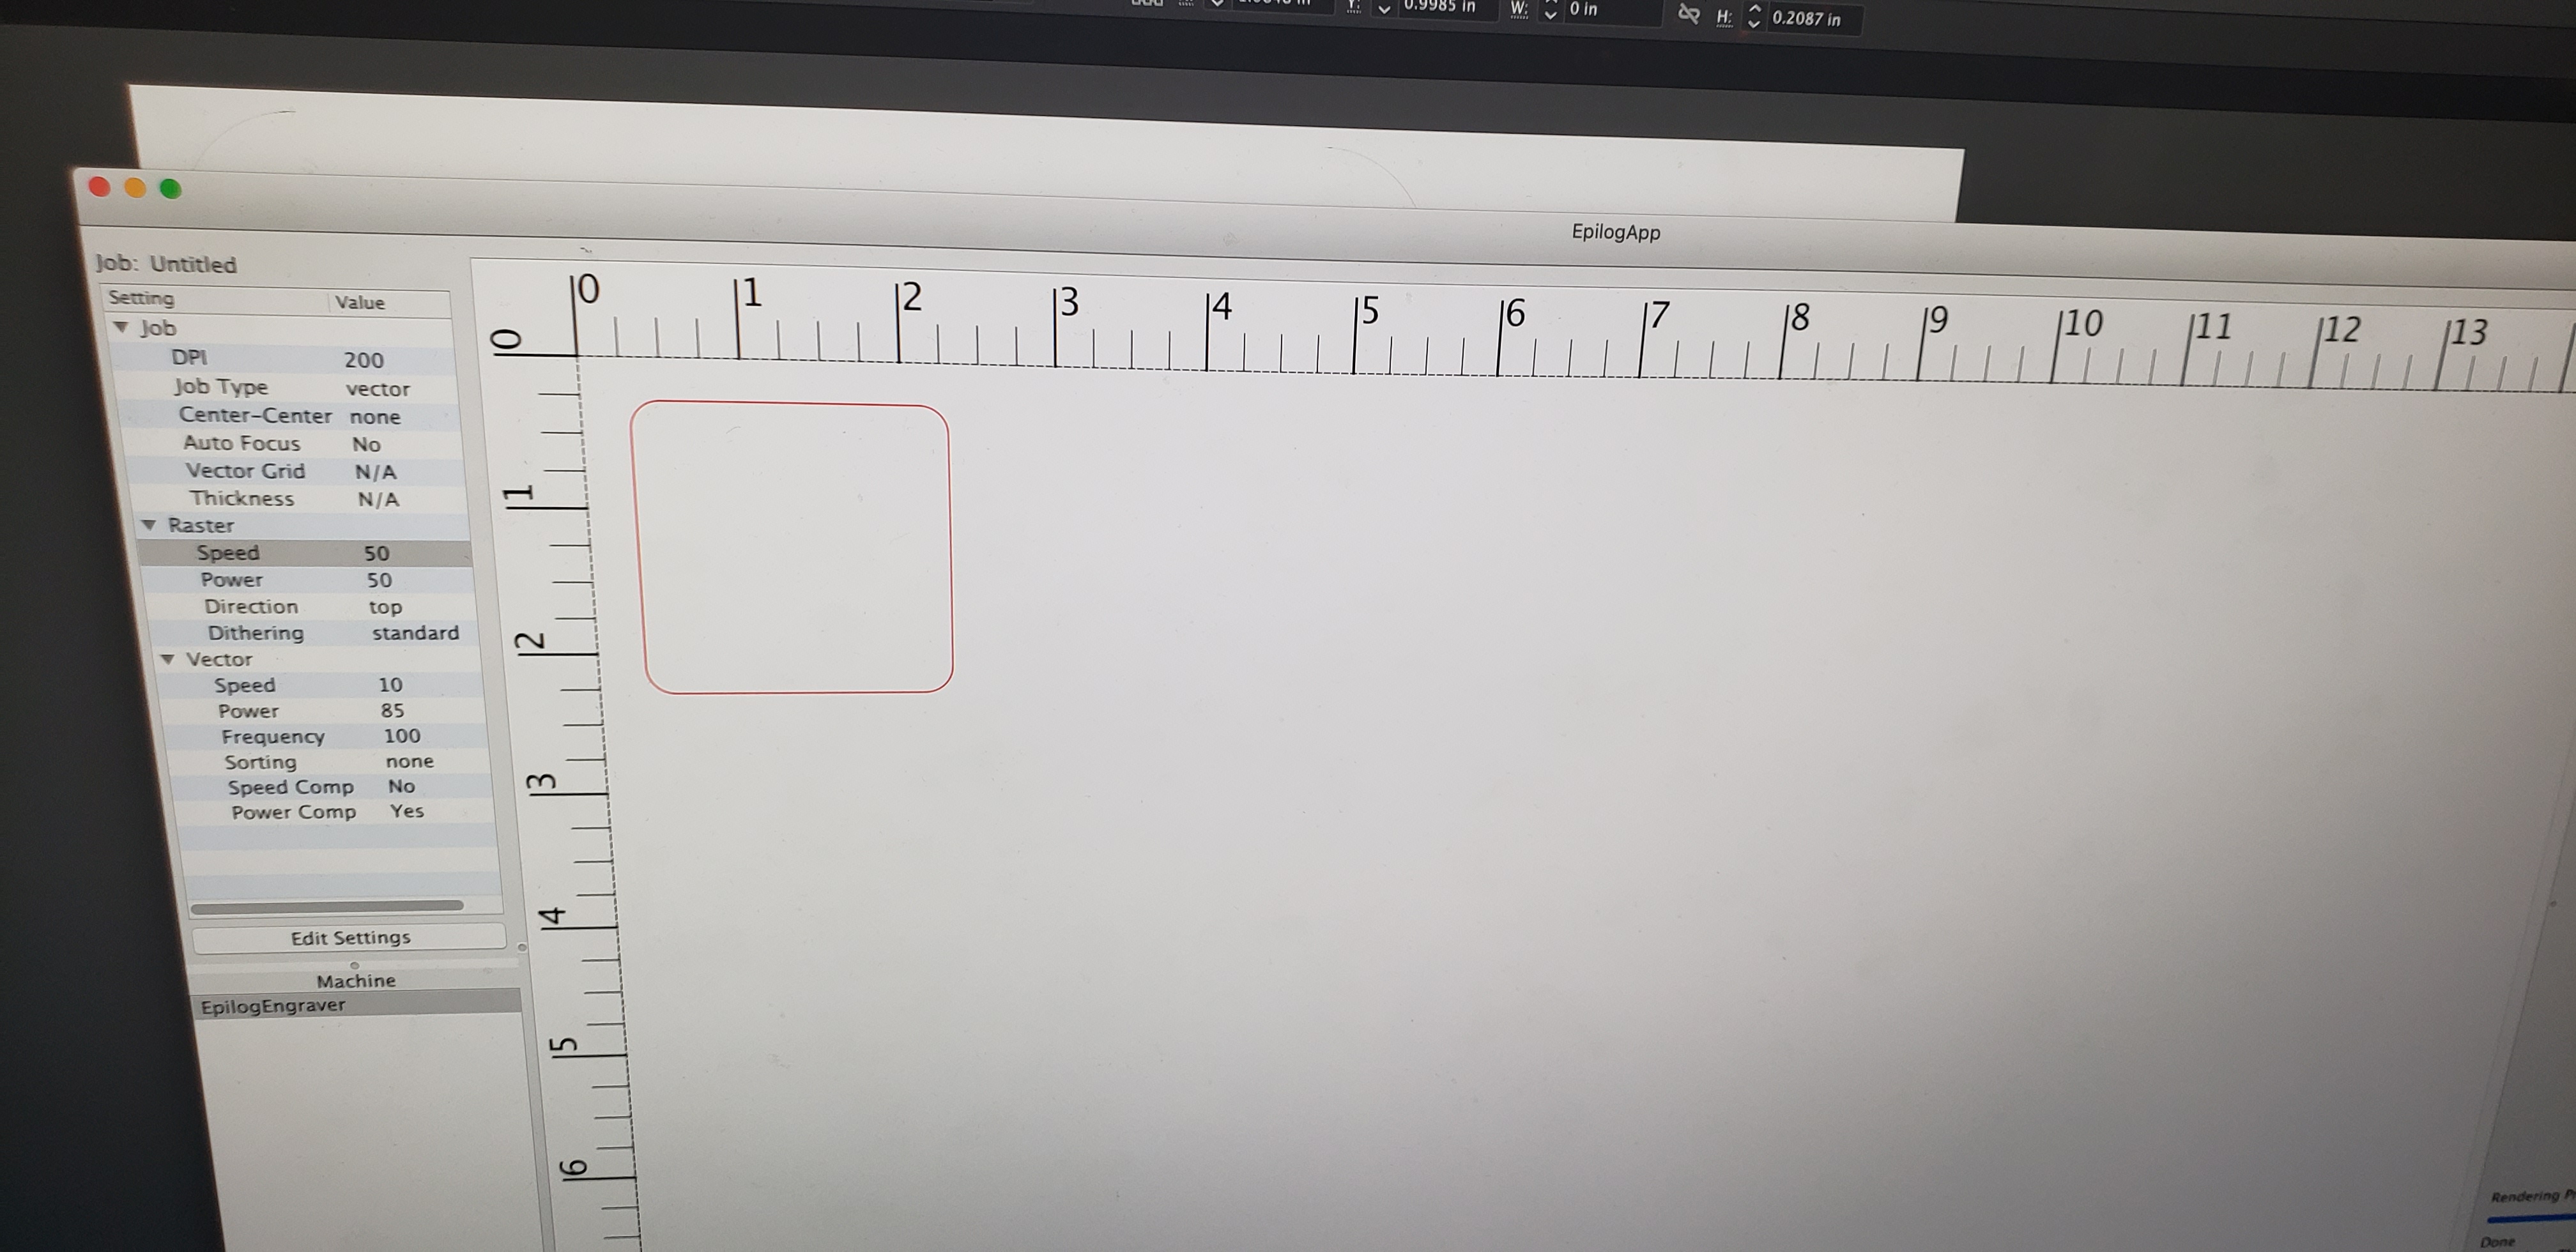
 Then I went to go set up the focus and the jog (as shown below)


 When I hit go and it cut it once again didn't cut all the way through. I new either my vector power wasn't high enough or my speed was too fast. But this time I saw it didnt go all the way through at first so I left the material alone and just hit go again. Once again doing the vector and the raster seperate so the vector only went another time.
 The next material I used was 1/8 acrylic. It ended up being completley clear acrylic but I didn't know that at first. I think the clear acrylic looks really cool so I was happy with the end results. I did everything as before and tired to predict a strong enough power for the vector and the correct speed.
 Then I hit go and it cut out the material. But once again it didn't cut all the way through so I hit go one more time and it went through just fine the second time.

 The last material I used was 1/4 black acrylic. I asked the person working there if I could use it for this project and he said yes. This one gave me the most trouble. I think it had to do with me rushing to finish it so someone else could use the laser cutter but when I put in the values I miss clicked on the speed and did 100 seconds instead of the 10.
 So my solution was to just once again do the vector only setting and cut it out.
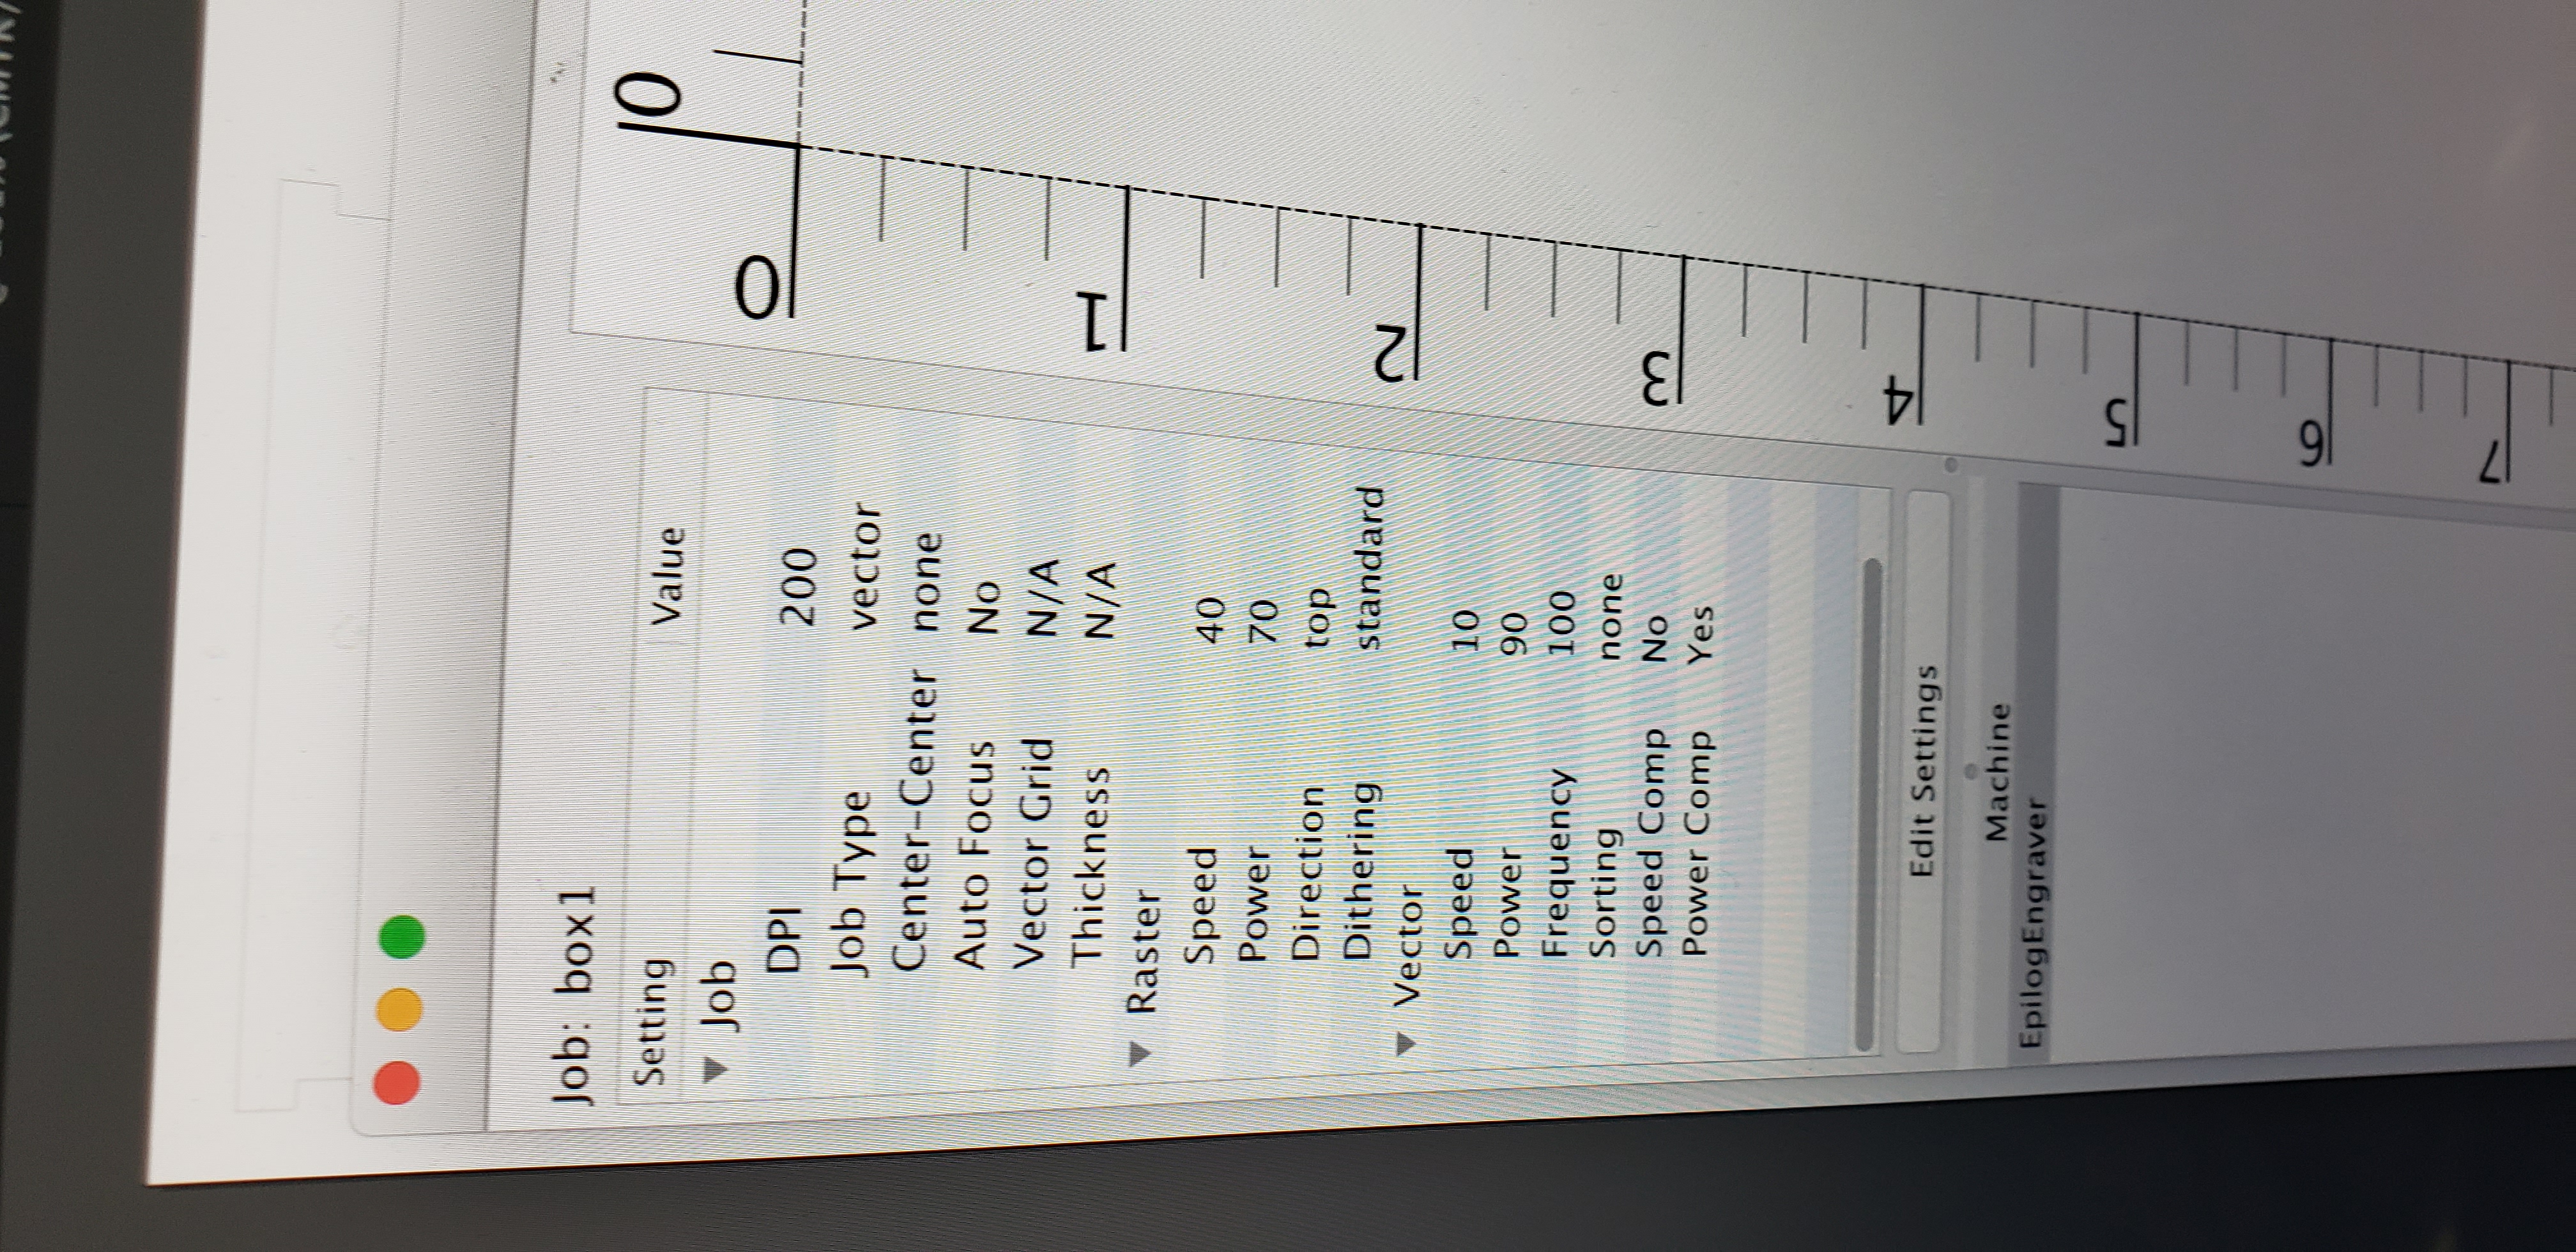
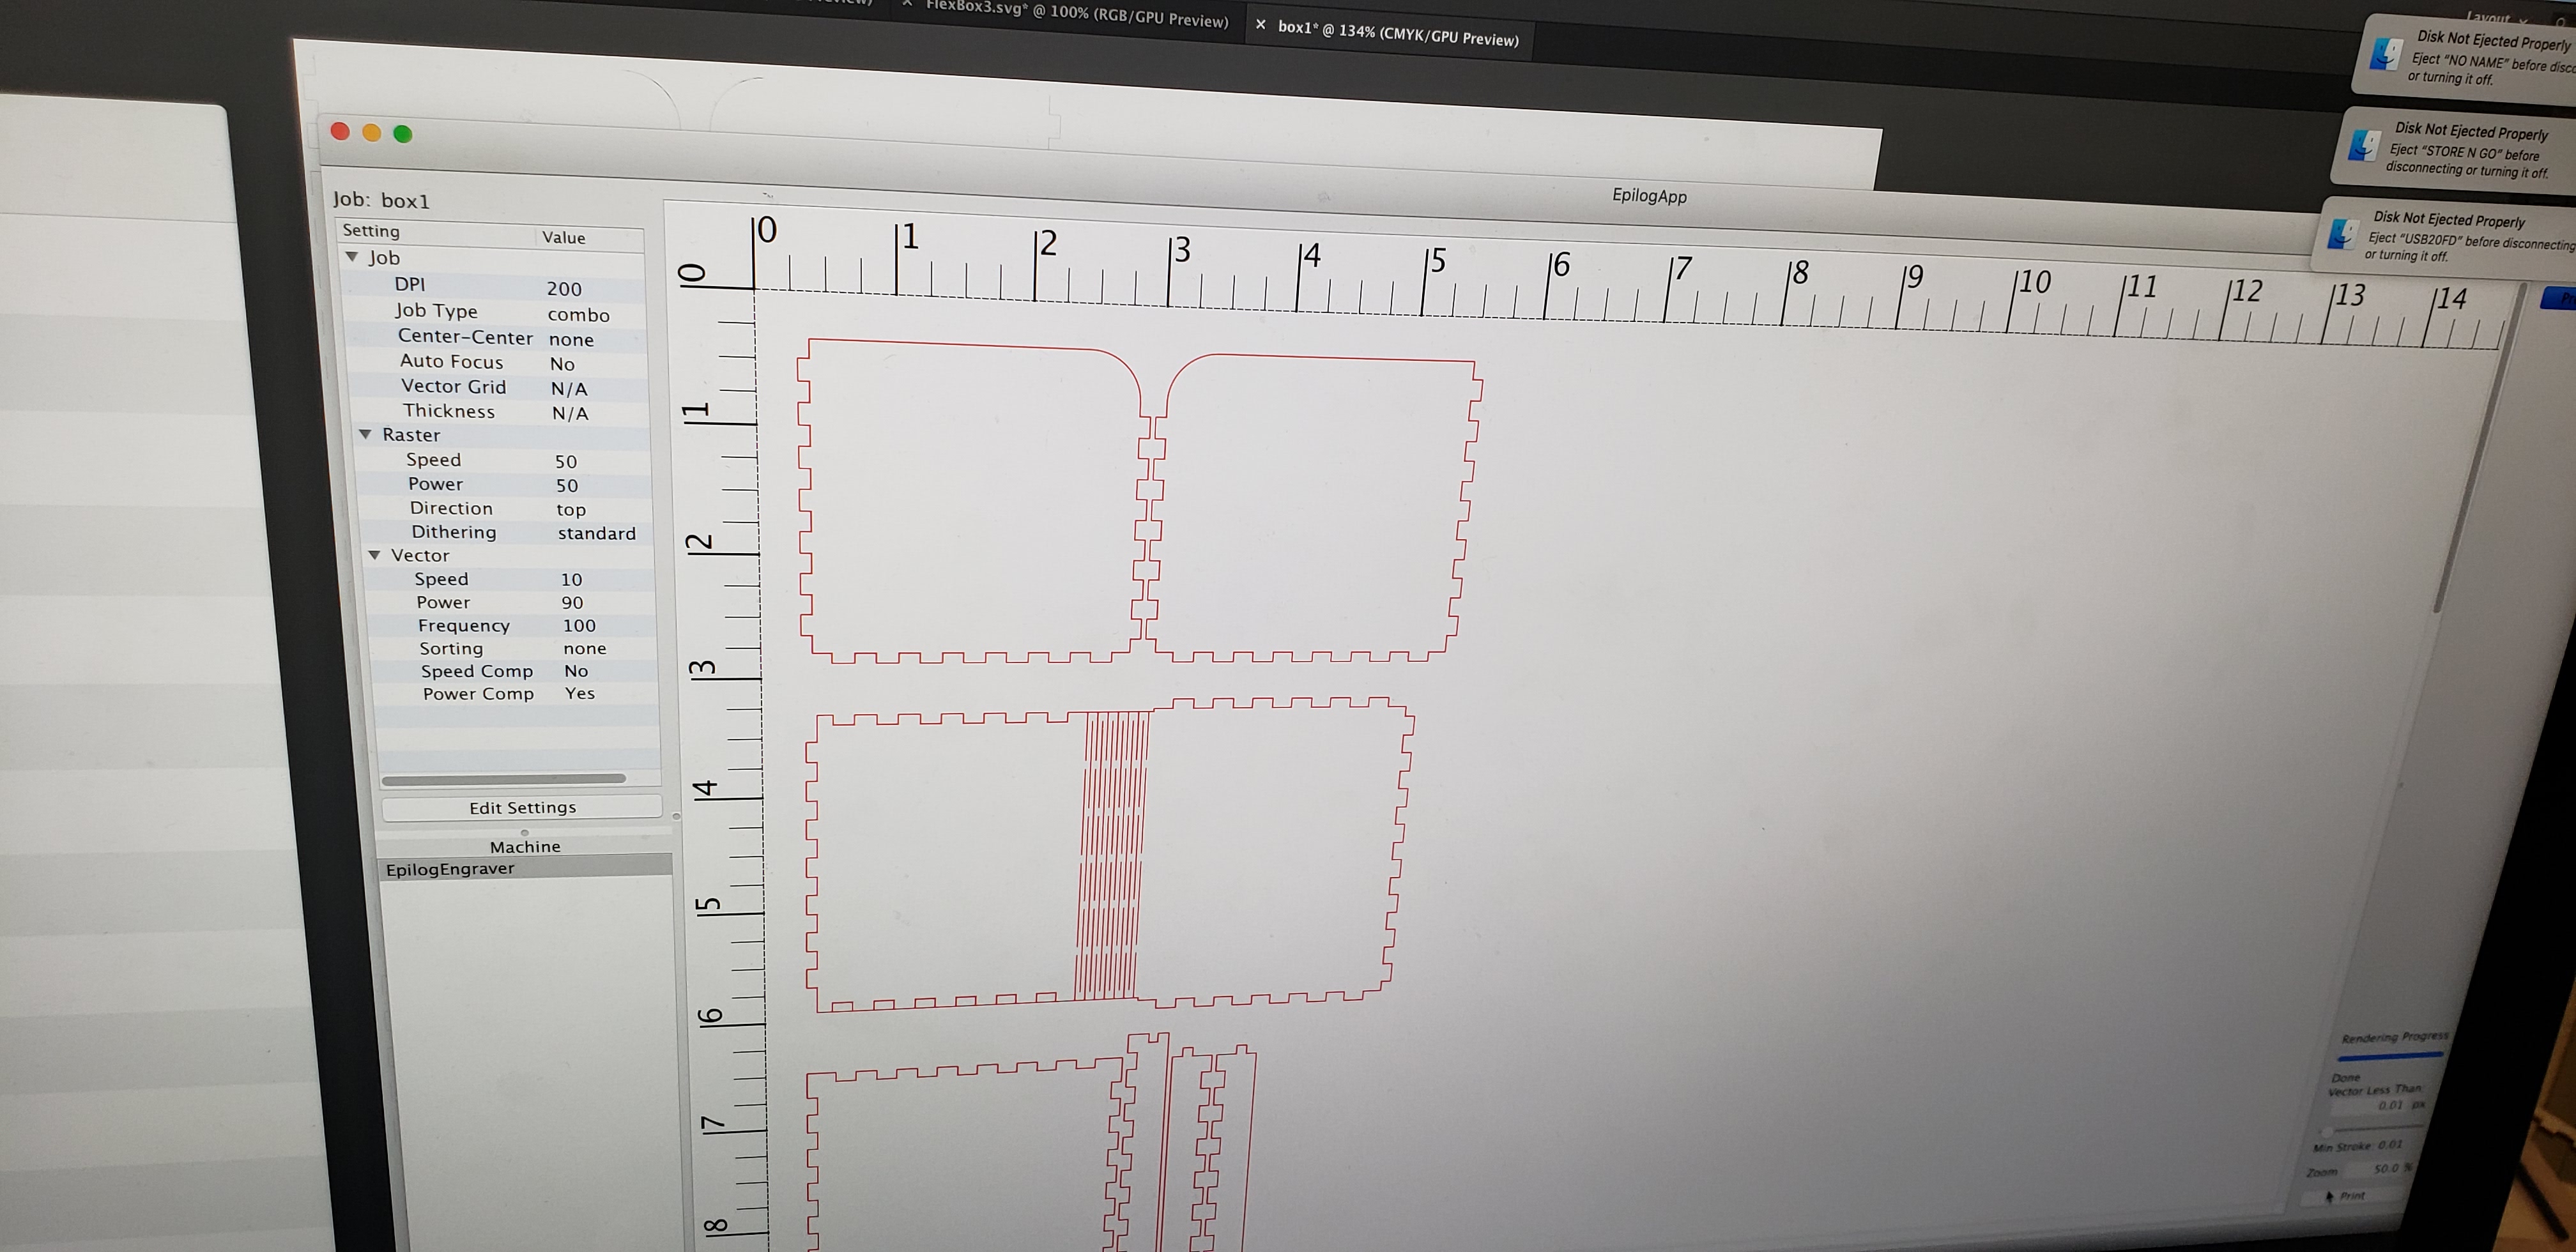
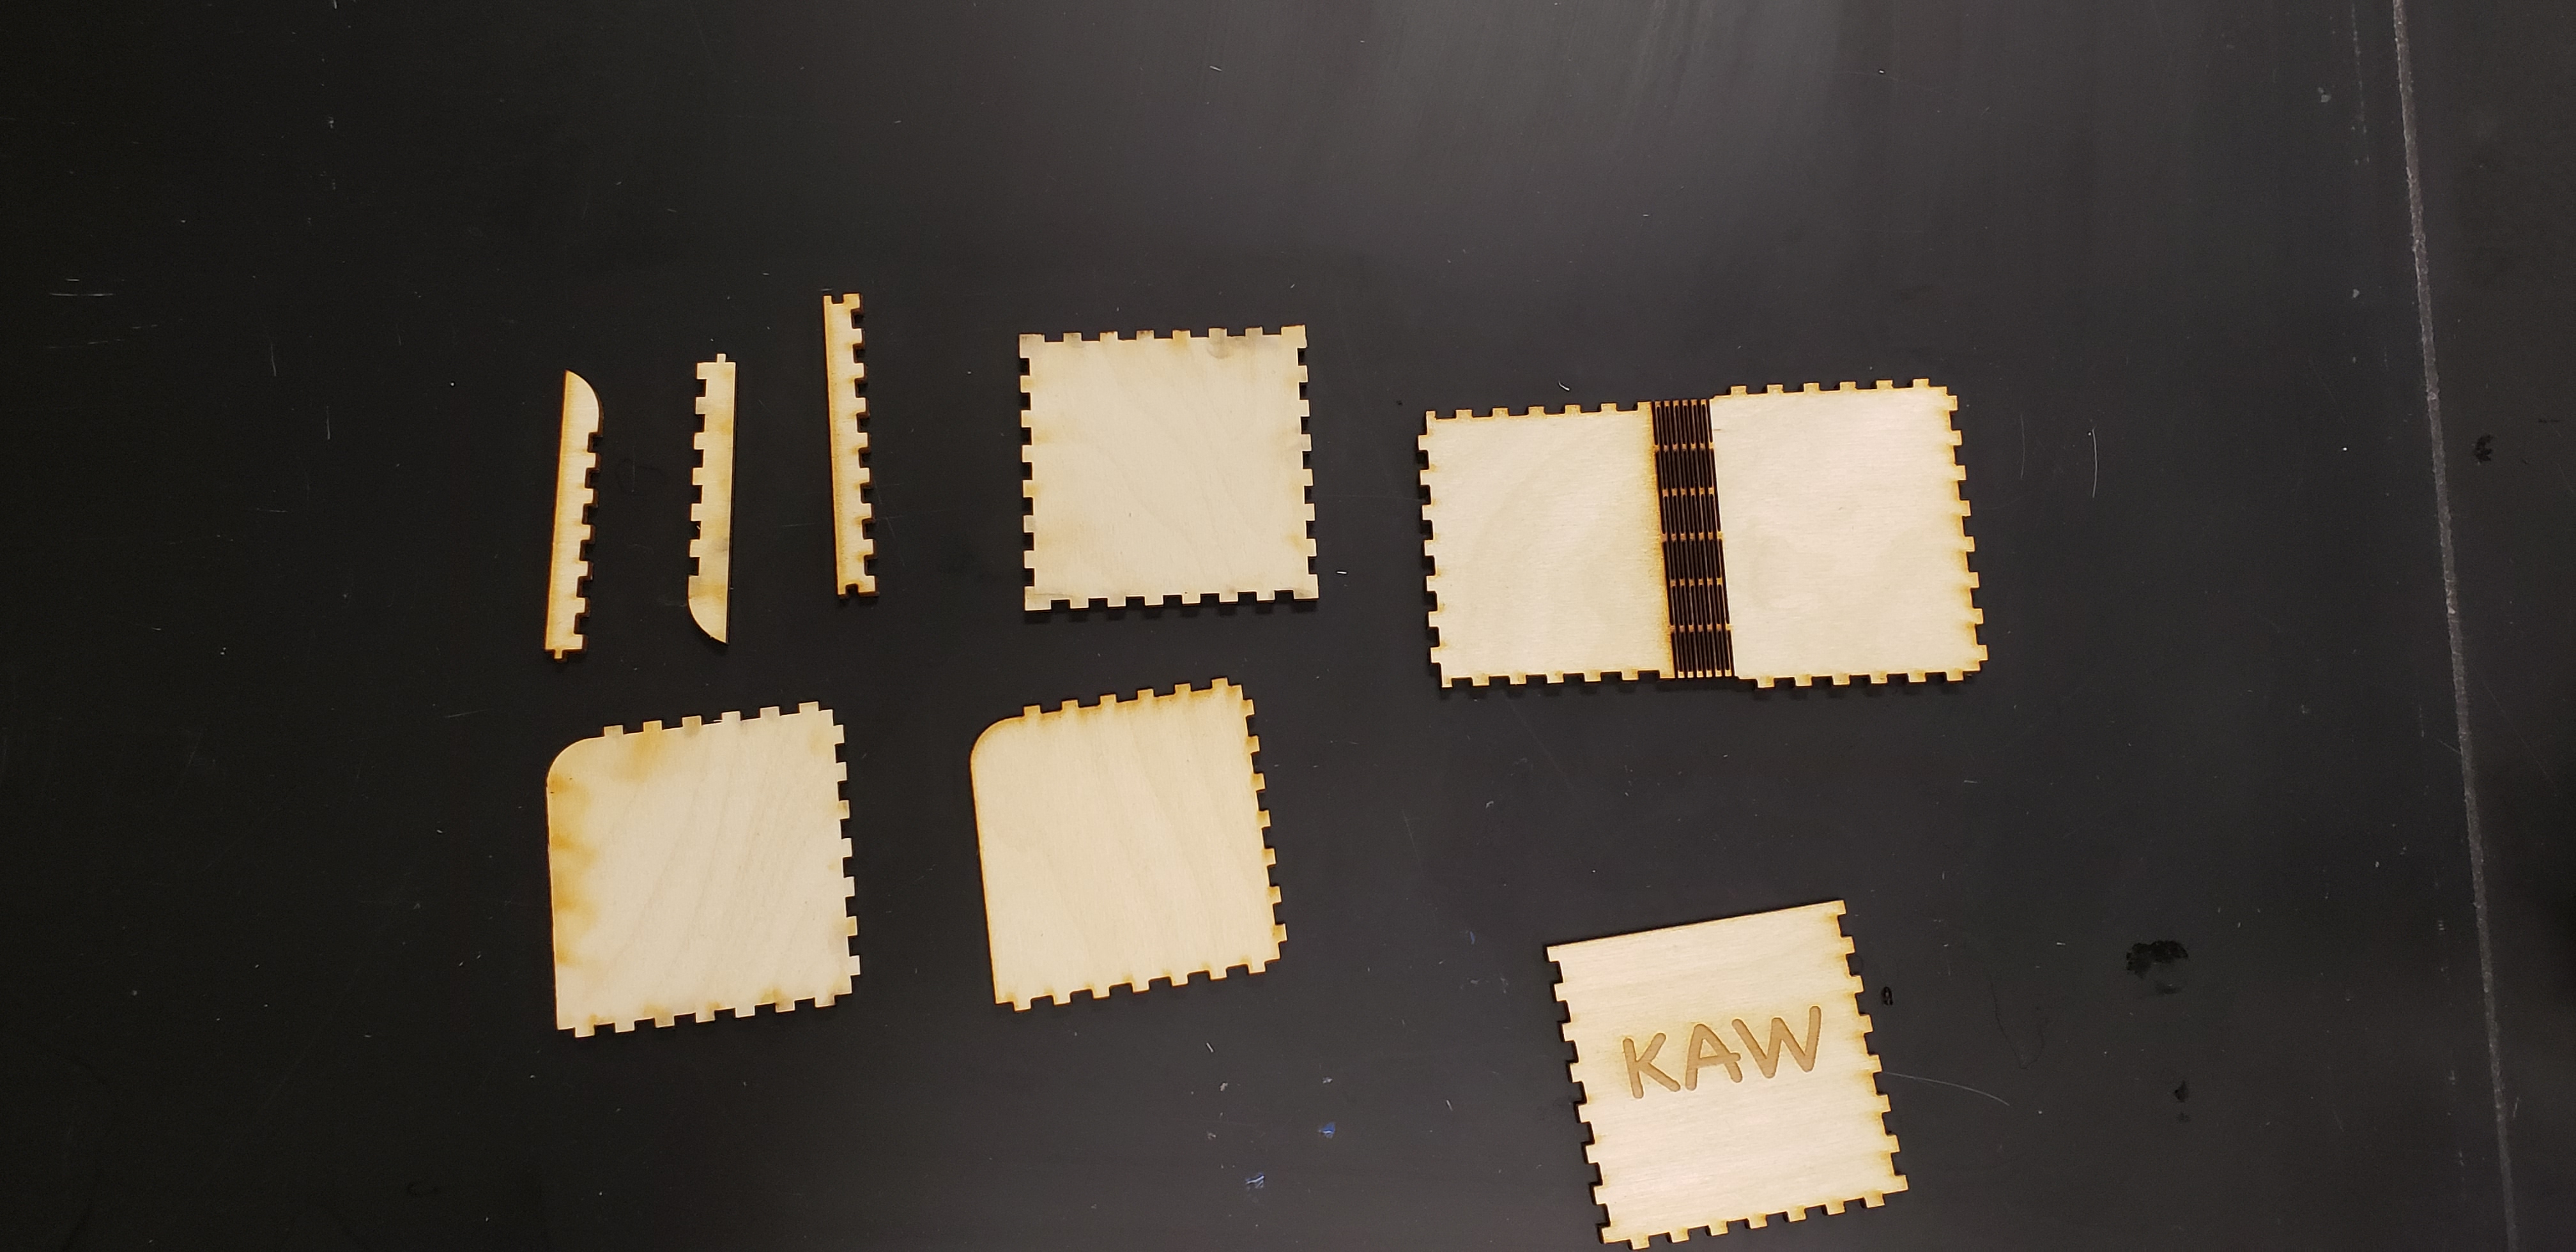
 The next part of the assigment was the box. First I went to the
Website and chose my box. I decided to do box 3 which is one with a living hinge. The first thing I did was make the living hinge a bit bigger because I thought it would be too small. I also was using 1/8 plywood so I changed the thickness to 3.2 is.
The next part of the assigment was the box. First I went to the
Website and chose my box. I decided to do box 3 which is one with a living hinge. The first thing I did was make the living hinge a bit bigger because I thought it would be too small. I also was using 1/8 plywood so I changed the thickness to 3.2 is.
 Next I saved the image and opened it into Illustrator and changed the size of the outline to be 0.01mm so it would know to cut it out and not engrave it. Then I had to do some arranging and I made it smaller so it would fit on the wood space I was using. I ended up having to do 2 cuts because 1 couldn't fit onto the first run.
 Then I cut it out but once again it didn't cut all the way throught, I really need to start putting in the right settings to it cuts all the way through on the first try. So I just hit go again.
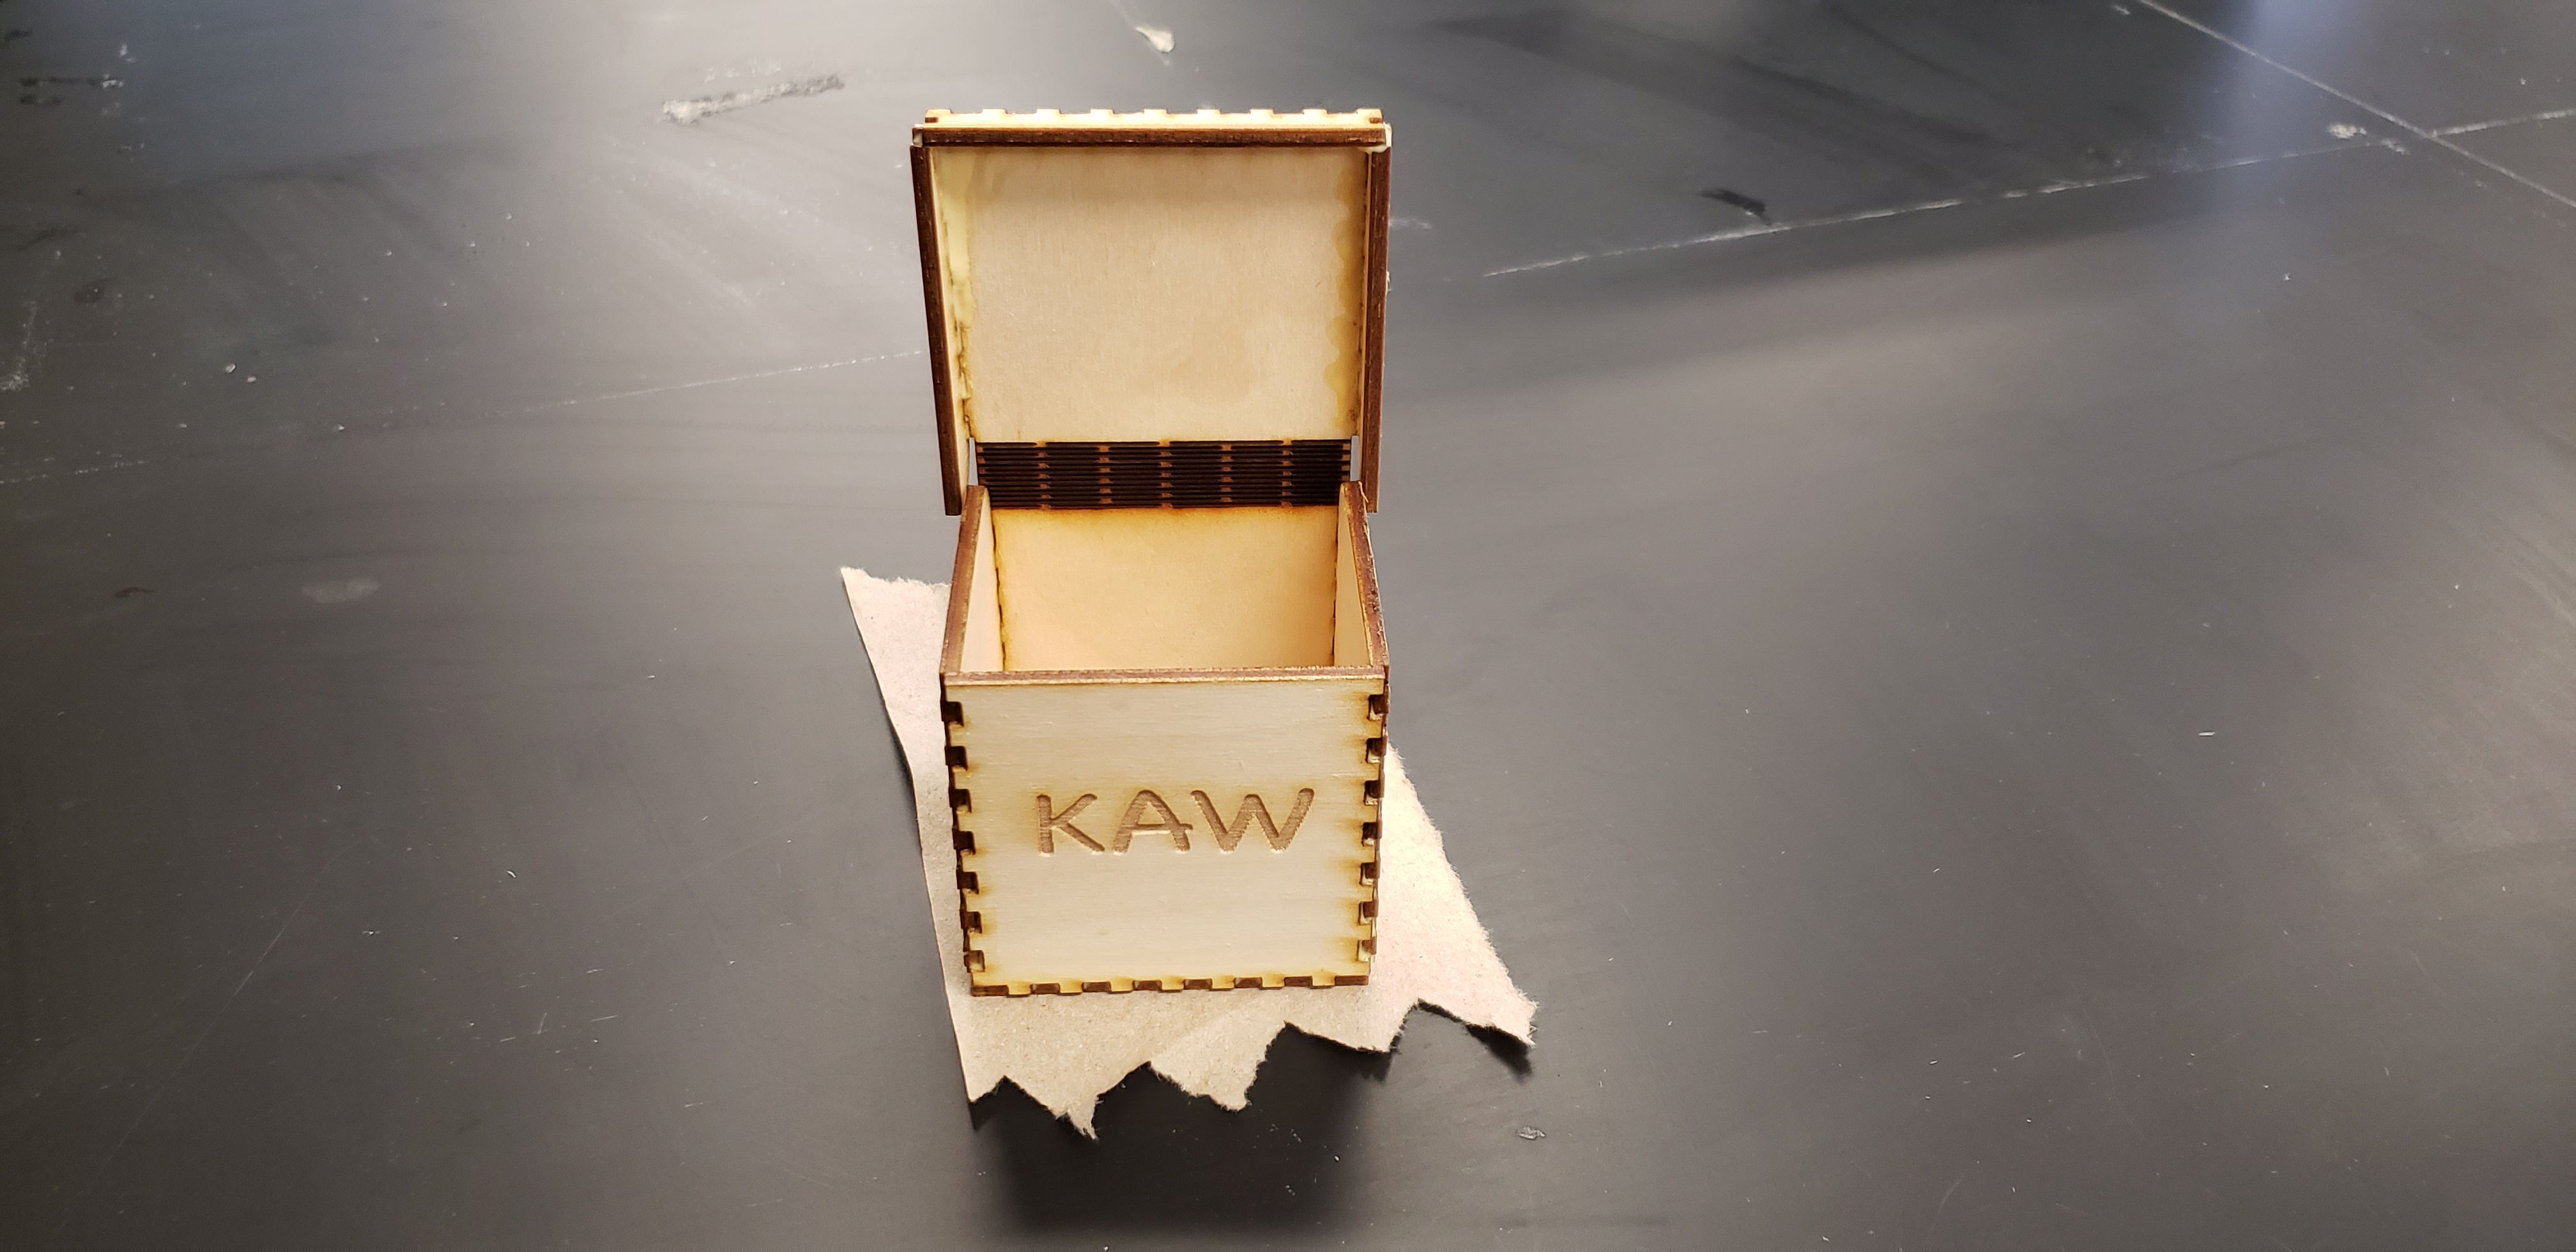
 Then I did the second cut and engraved my initials on it. Thats where the KAW came from and cut that out using the exact same settings.
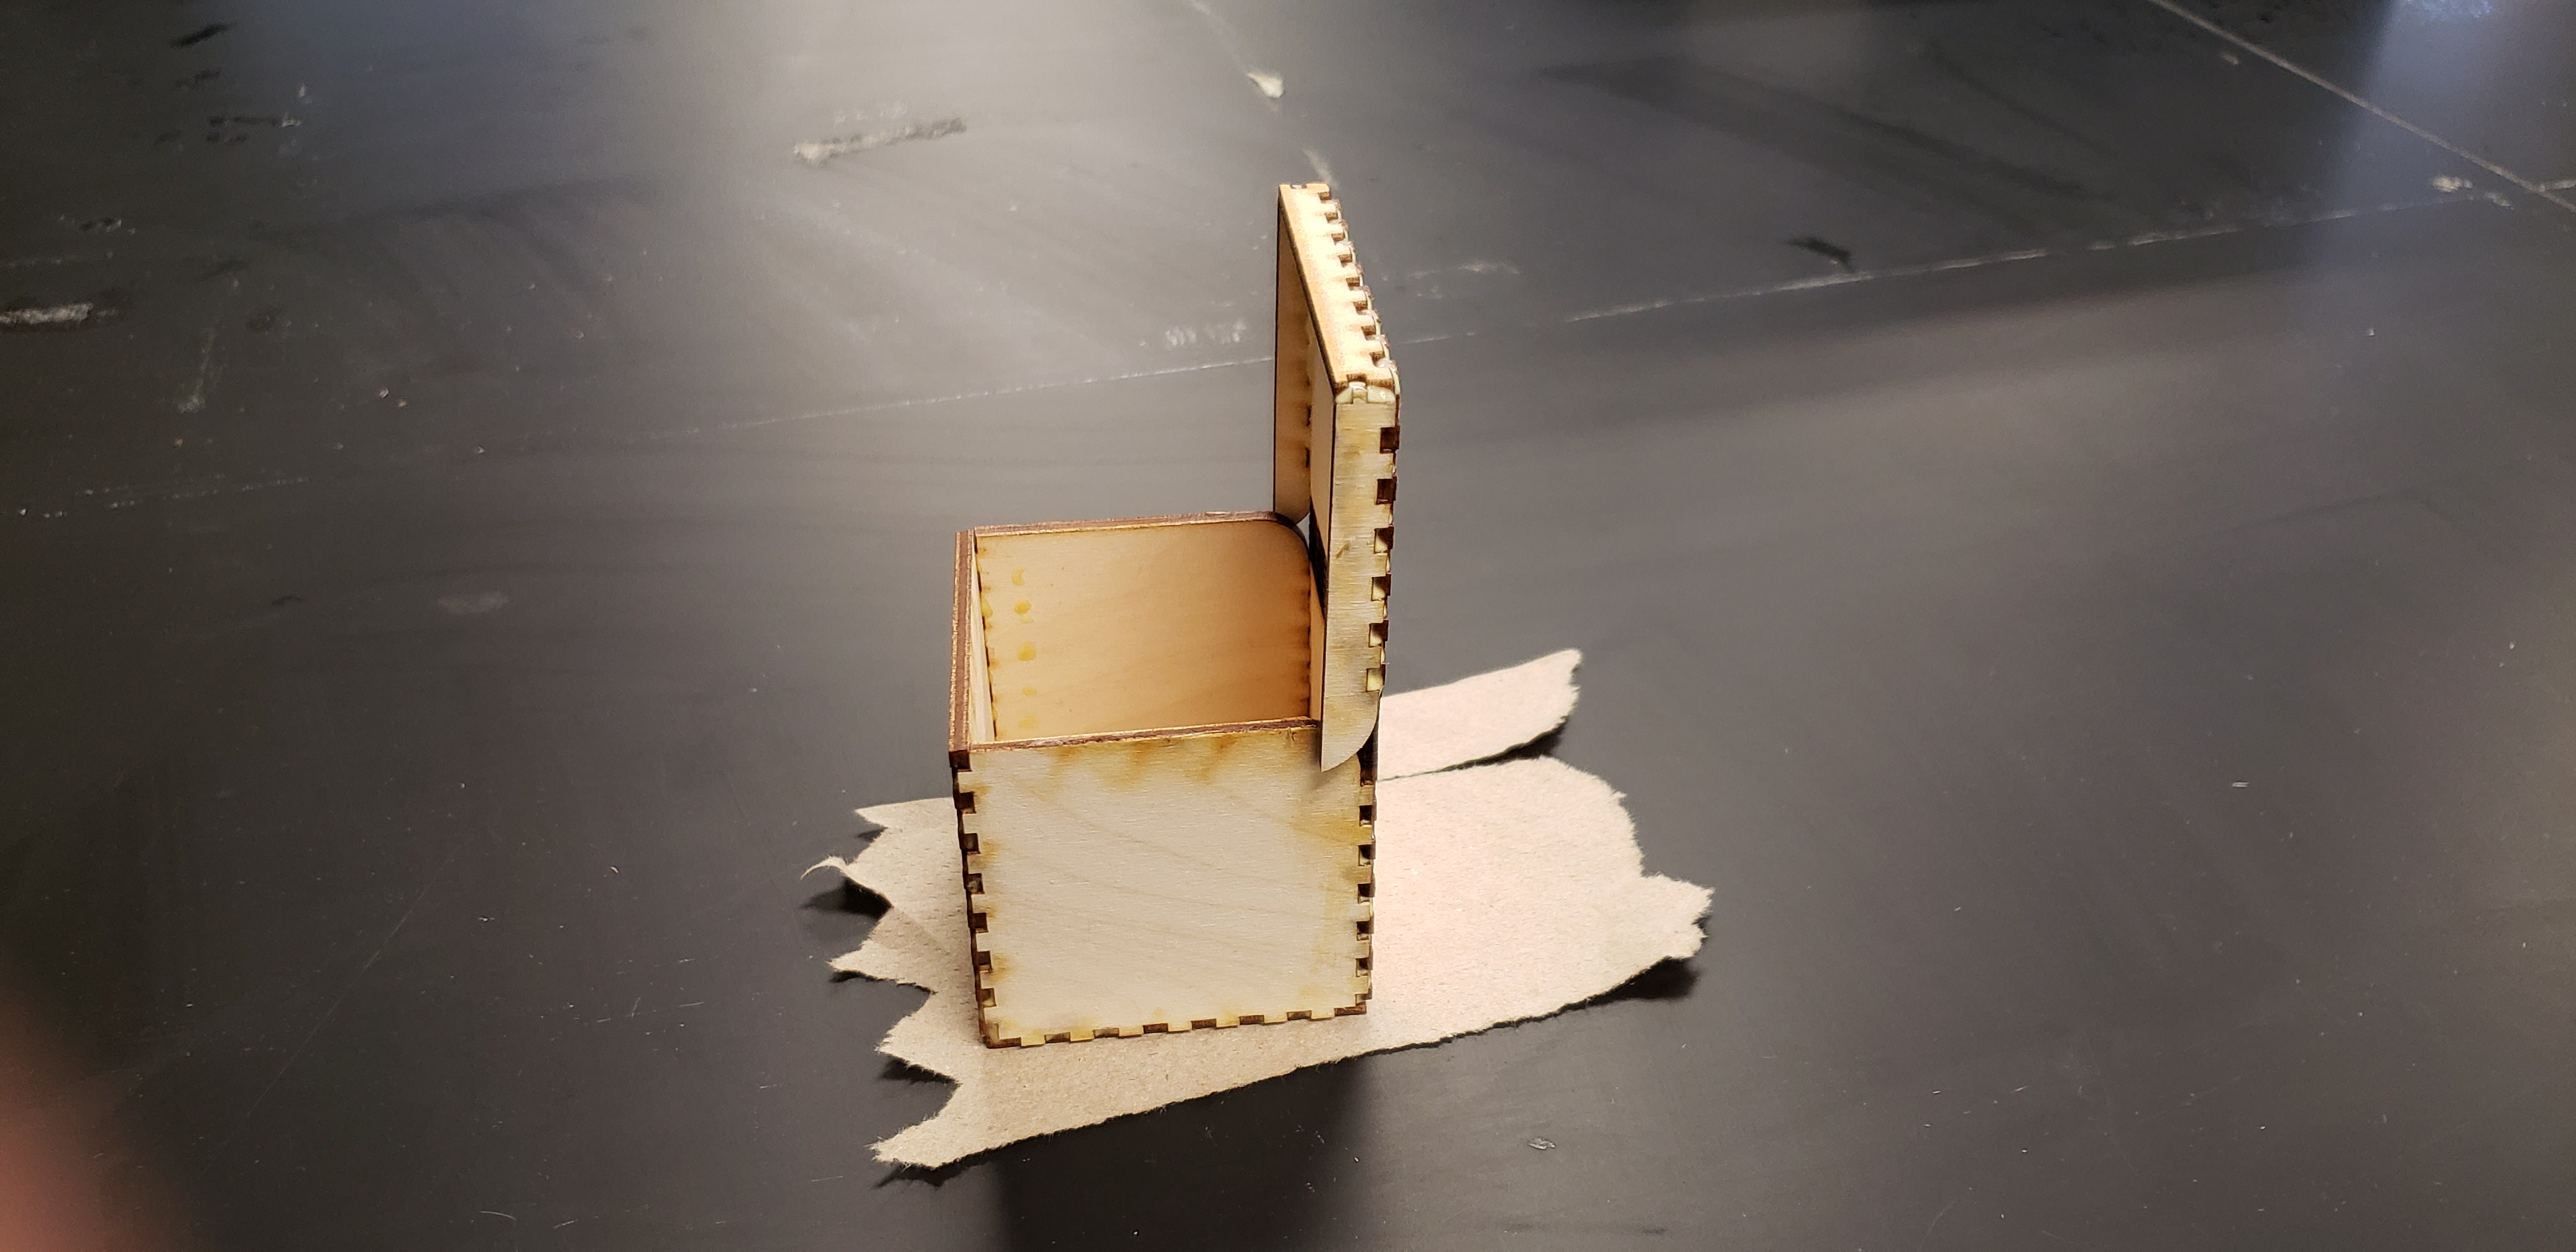
 Then after I had all the parts I put it together
 File for this week
I needed to ask for help to figure out what I should do. I ended up creating a new file and setting the dimentions to be a square then copying over my already created file. The next step I did was bring it over to print. In this case I was using the 1/8 plywood so I put in the vector and raster settings I put on the wood itself (as shown in the picture below) and printed it out. The person who was working the lab that day told me to do just the raster first and then the vector. According to him it had a higher chance of fully cutting it out and not getting it stuck. So thats what I did, I made the setting raster only then hit print. Then I went to the laser cutter and changed the jog and the focus for my material and hit go. Then I went back into the program, deleted the text I wrote and then sent it back to the printer so I could cut it out.
Next I did a peice of 1/4 plywood. Using my template I created from the last time I put in the new thing I was going to engrave onto the wood. Making sure that the text was bigger than the outline and that the outline where it is actually going to cut was .01mm.
Then I sent it to the printer and put in the vector and raster settings I predicted was going to work.
Then I once again set the jog and focus for that material and pressed go. But something happened this time that didnt happen the last time. It didnt cut all the way through.
So, I put the material right back where it was and pressed go again making sure the settings were the same. I had to do it one more time because it moved a little so the final product looked a little wonky but in the end I think it looks good.
The next material I used was a thing of cardboard. I ended up just using the defult settings when a project is added to the printer. I didnt find that I needed to really change anything. Well, so I thought
Then I went to go set up the focus and the jog (as shown below)
When I hit go and it cut it once again didn't cut all the way through. I new either my vector power wasn't high enough or my speed was too fast. But this time I saw it didnt go all the way through at first so I left the material alone and just hit go again. Once again doing the vector and the raster seperate so the vector only went another time.
The next material I used was 1/8 acrylic. It ended up being completley clear acrylic but I didn't know that at first. I think the clear acrylic looks really cool so I was happy with the end results. I did everything as before and tired to predict a strong enough power for the vector and the correct speed.
Then I hit go and it cut out the material. But once again it didn't cut all the way through so I hit go one more time and it went through just fine the second time.
The last material I used was 1/4 black acrylic. I asked the person working there if I could use it for this project and he said yes. This one gave me the most trouble. I think it had to do with me rushing to finish it so someone else could use the laser cutter but when I put in the values I miss clicked on the speed and did 100 seconds instead of the 10.
So my solution was to just once again do the vector only setting and cut it out.
The next part of the assigment was the box. First I went to the
Website and chose my box. I decided to do box 3 which is one with a living hinge. The first thing I did was make the living hinge a bit bigger because I thought it would be too small. I also was using 1/8 plywood so I changed the thickness to 3.2 is.
Next I saved the image and opened it into Illustrator and changed the size of the outline to be 0.01mm so it would know to cut it out and not engrave it. Then I had to do some arranging and I made it smaller so it would fit on the wood space I was using. I ended up having to do 2 cuts because 1 couldn't fit onto the first run.
Then I cut it out but once again it didn't cut all the way throught, I really need to start putting in the right settings to it cuts all the way through on the first try. So I just hit go again.
Then I did the second cut and engraved my initials on it. Thats where the KAW came from and cut that out using the exact same settings.
Then after I had all the parts I put it together
File for this week